Multi Posting Documents

Contents
 »
» 
Overview
The Multi Post program allows you to post in batch, a range of Documents that are due for billing. Documents to post can be selected by specifying criteria. Multi Post is most useful if there are many jobs in the system that may be due for posting. These jobs can be selected and posted through Multi Post in a batch format rather than posting and printing each invoice individually.
Starting the Multi Post Program
Click the Multi Post desktop icon.
The Multi Post window will be displayed.
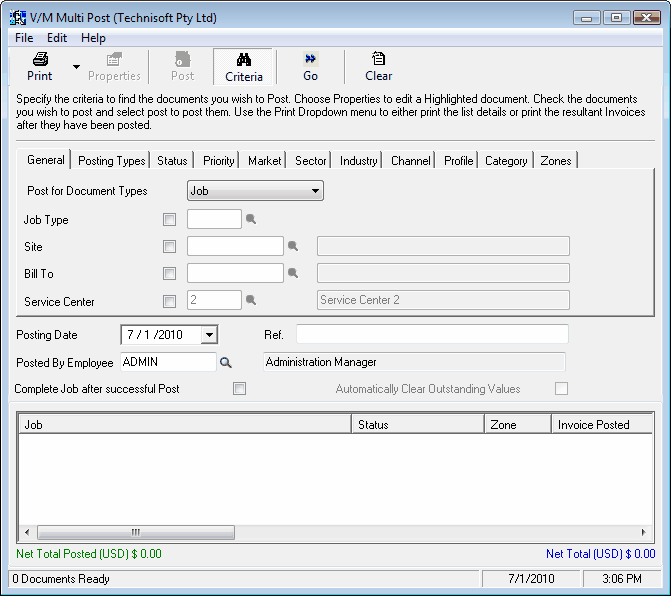
Selecting Documents to Post
Many selection criteria can be set.
General tab
Document Type
In the Post for Document Types drop-down list, select the type of document to Post.
Job Type
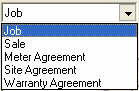
Tick the Job Type check box and use the Finder![]() to select the Job Type to include in the search criteria.
to select the Job Type to include in the search criteria.
Site
Tick the Site check box and use the Finder![]() to select the Site to include in the search criteria. This is very useful if one particular site is very busy, where it is possible to have 10 or 20 invoices for a day or a week.
to select the Site to include in the search criteria. This is very useful if one particular site is very busy, where it is possible to have 10 or 20 invoices for a day or a week.
Bill To
Tick the Bill To check box and use the Finder![]() to select the Bill To Customer to include in the search criteria. (Multiple Sites may be billed to one Customer.)
to select the Bill To Customer to include in the search criteria. (Multiple Sites may be billed to one Customer.)
Service Center
Tick the Service Center check box and use the Finder![]() to select the Service Center to include in the search criteria.
to select the Service Center to include in the search criteria.
Note:
This option is only available if you are using the Service Manager Service Center Add-On.
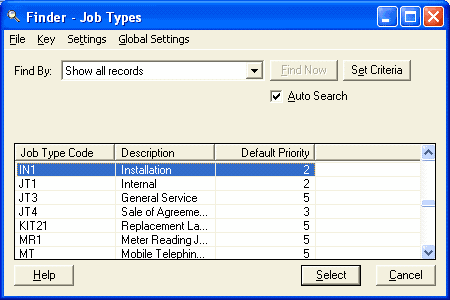
Posting Types tab
In the Posting Types tab, select the types of document to post.
Note the new option If Source Job is Closed, set Posting date to Job Close Date. This feature which was available in Document Entry only, has been extended to Multi Post. It is only applicable to Jobs. The feature is ignored if the Job Status is not set to Closed.
Many other selection criteria can be set in the remaining tabs.
Displaying the Search Results
![]()
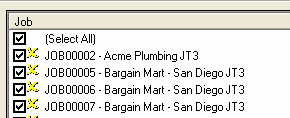
After setting the required criteria, click the Go icon on the toolbar. A list of Jobs that match the specified criteria will be displayed in the lower Results pane.
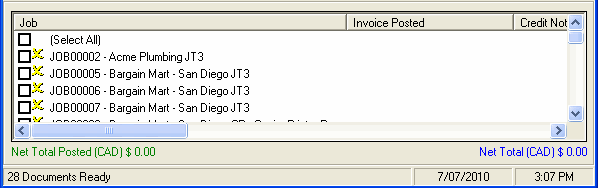
The options in the Results pane are to tick the Select All check box to select all the Jobs in the list or select the Jobs individually.
Batch Totals
As you select Jobs, the Net Total and Net Total Posted figures at the bottom of the screen. These figures represent the batch totals. On the left in green is the Posted total and on the right in blue is the Selected for Posting total.
![]()
![]()
It is possible to select all the items due to be invoiced today as this will display the Net Total of all these invoices.
Posting the Documents
Click the Post icon on the toolbar to Post the selected Documents.
![]()
Printing – Desktop Preferences
Note:
If you are faxing or emailing Multi Post batches, go to the Sage 300 System Manager, and select View » Preferences. Clear the Confirm on Print check box and then click [OK].
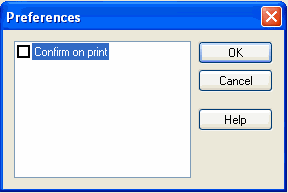
If you don't do this, Service Manager will display a prompt after each Invoice is posted to proceed to the Printing phase.