Posting Schedules

Contents
 »
» 
Overview
The Service Manager Posting Schedules program allows you to modify or review Recurring Billing schedules for Documents in Service Manager. The program allows you to automate the Recurring Billing function and is especially useful when billing Agreements or similar documents.
Starting the Posting Schedules Program
Click the Posting Schedules desktop icon.
You can also run the Posting Schedules program from Document Entry by double-clicking the Schedule Transactions node in the Document tree.
The Posting Schedules window will be displayed.

Selecting Documents due for Billing
Criteria can be specified to select a range of Documents due for billing. The same criteria can be used to view existing schedules.
Show Single Document
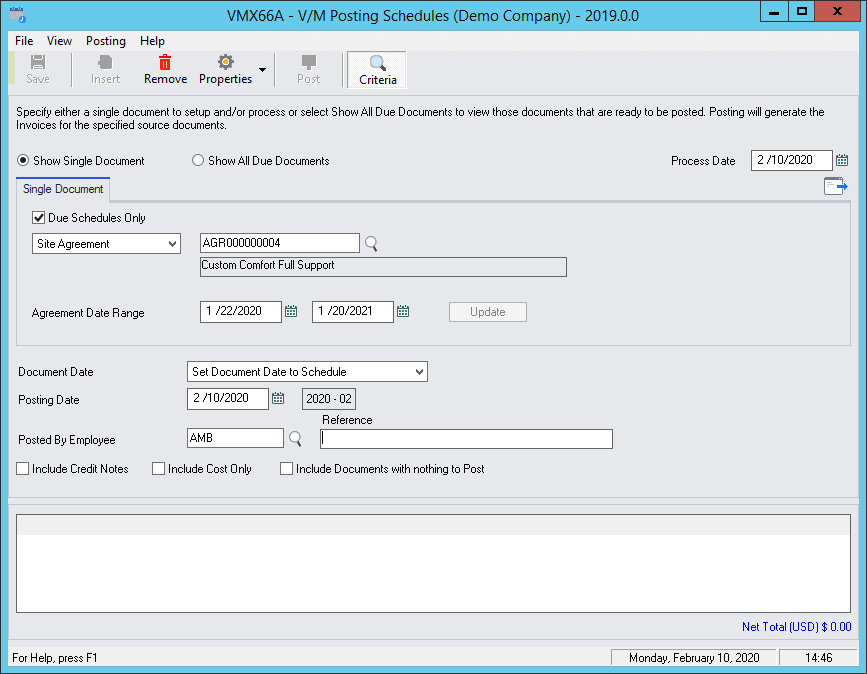
Tick the Due Schedules Only check box to select only schedules due for billing. Posted schedules will not be selected.
Select the required Document by Type and Number.
Select an Agreement Date Range.
If an Agreement is not Active, it will be ignored during processing.
It is possible to set the Process Date forward to look at items in advance or process billing in advance.
You can specify a Posting Date or Set the Posting Date to Schedule. The Posted by Employee is used to track items for audit purposes. The Reference field could be used for authority purposes.
Click Go ![]() to list the Schedule entries due for billing. These Documents will list in the lower Results pane.
to list the Schedule entries due for billing. These Documents will list in the lower Results pane.
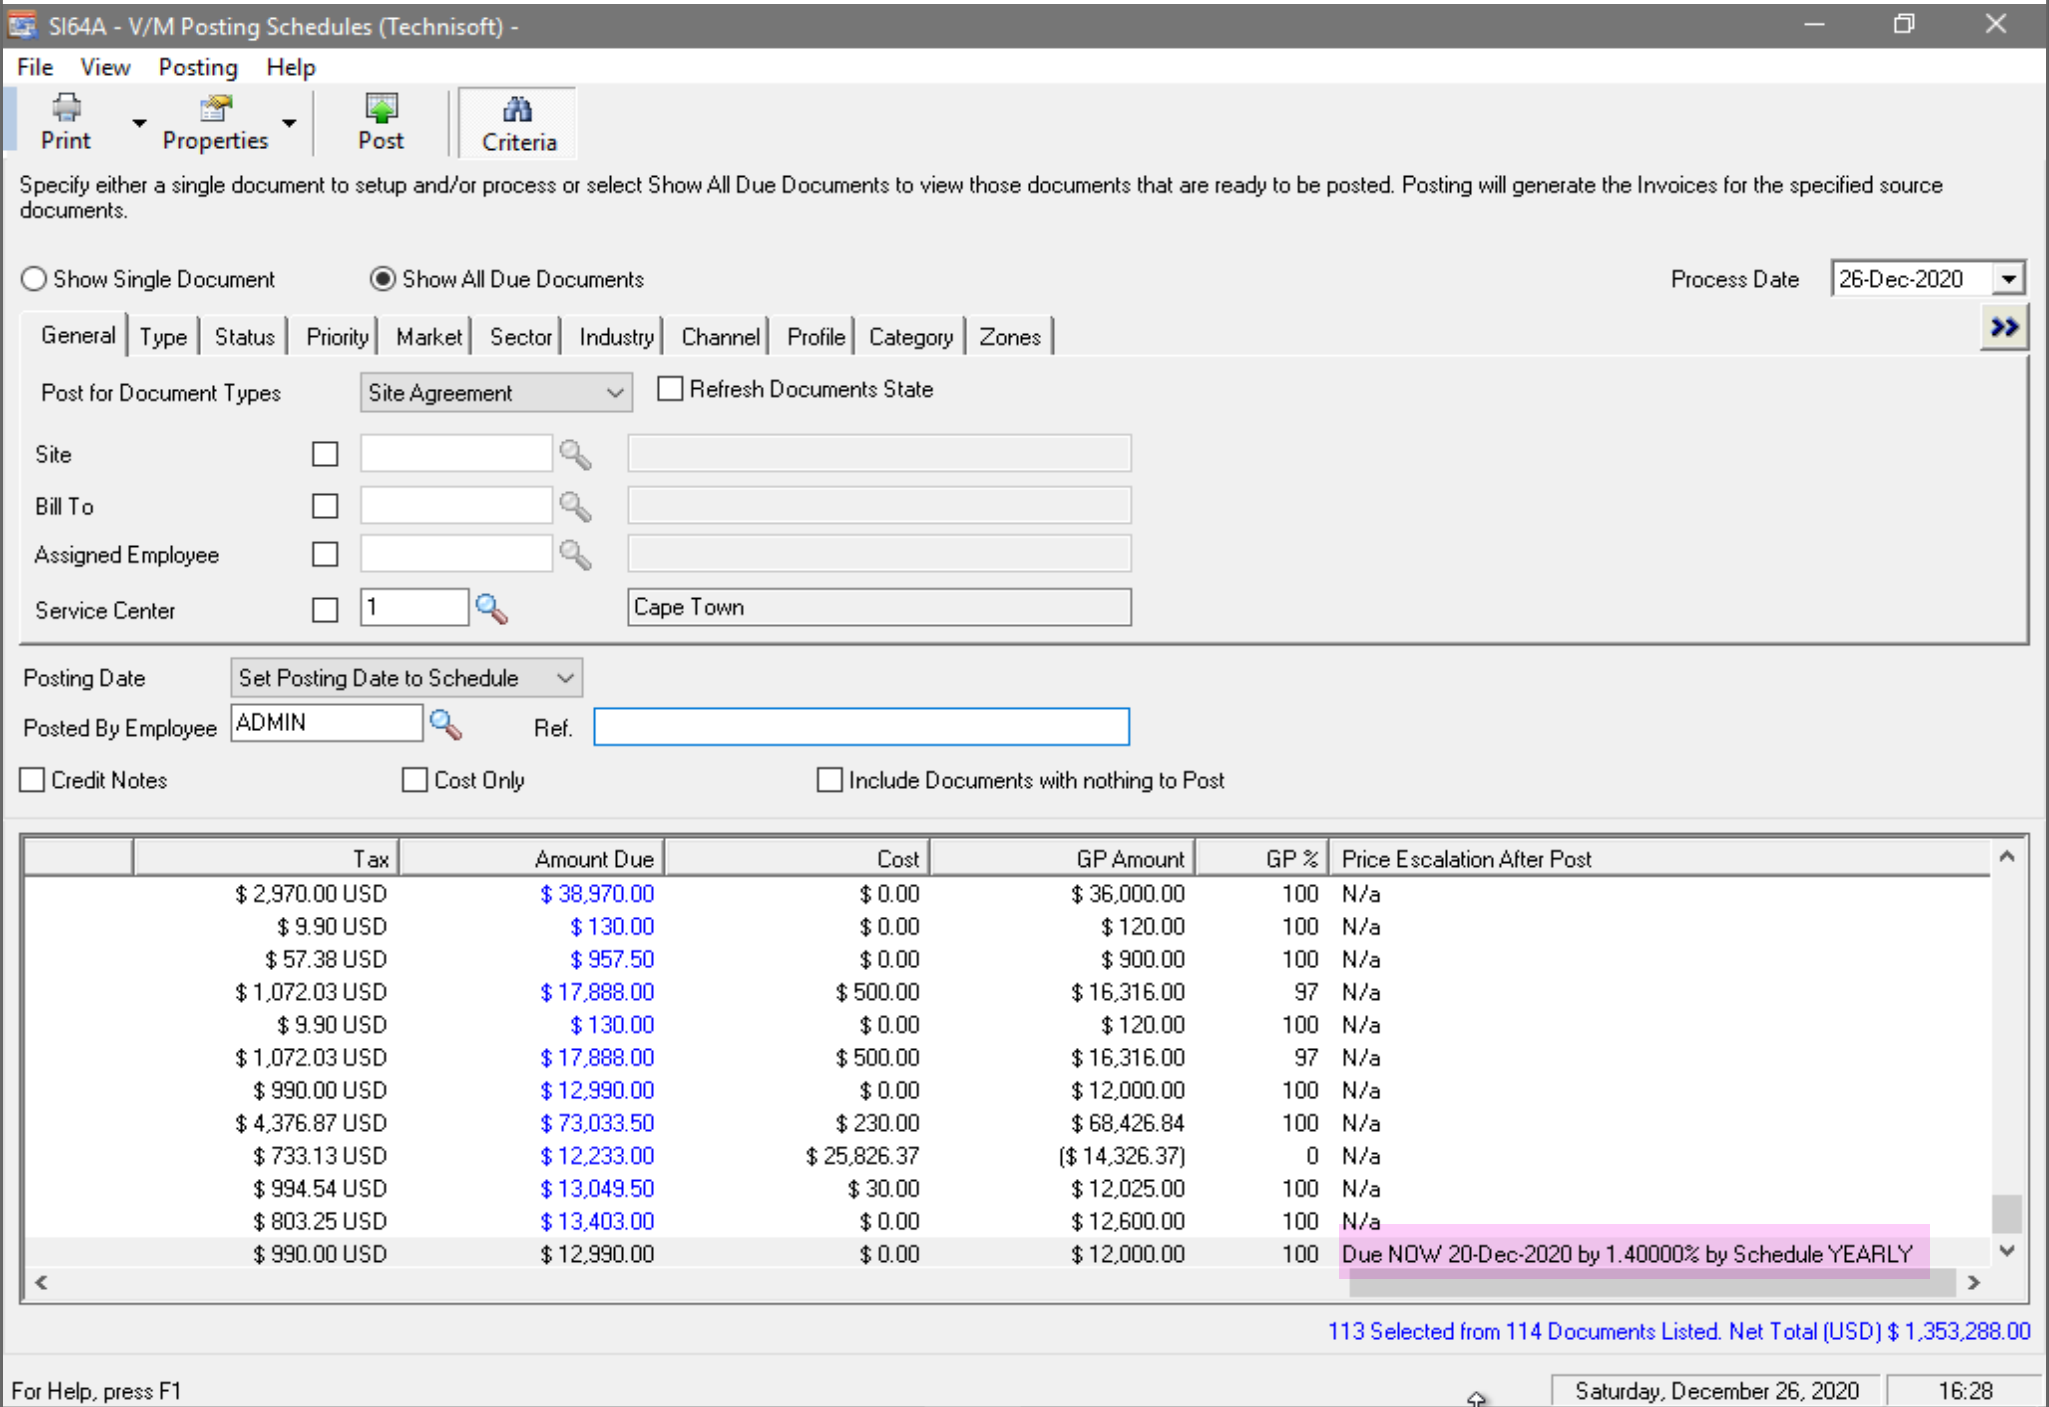
Show All Due Documents
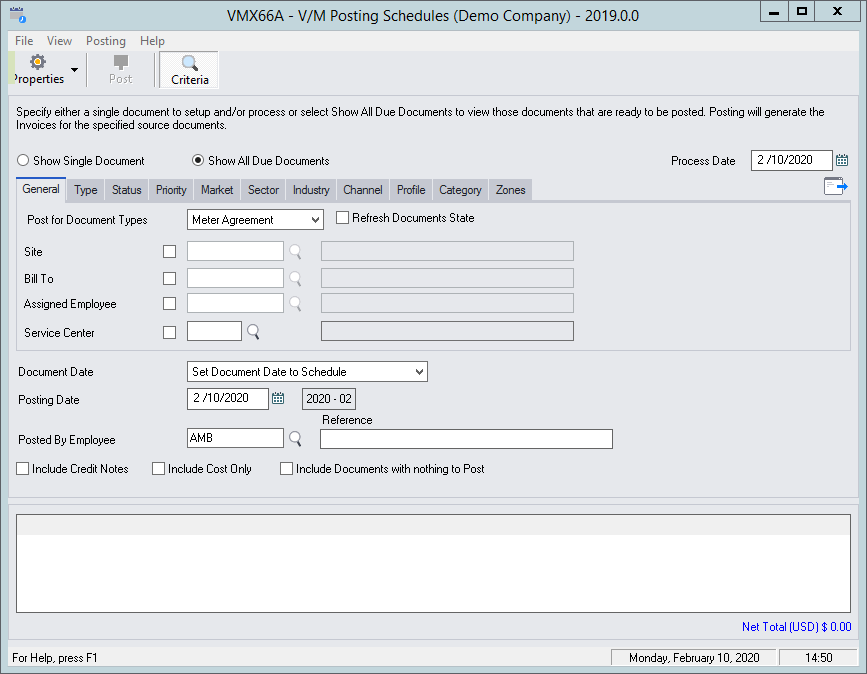
It is possible to set the Process Date forward to look at items in advance or process billing in advance.
You can specify a Posting Date or Set the Posting Date to Schedule. The Posted by Employee is used to track items for audit purposes. The Reference field could be used for authority purposes.
You can set criteria for Job Type, Site, Bill To Customer, Assigned Employee and Service Center - if you are using the Service Manager Service Center Add-On.
You can also set criteria for Status, Priority, Market, Sector, Industry, Channel, Profile, Category and Zone using the relevant tabs.
Options to include Credit Notes, Cost Only and Documents with nothing to Post are available to provide the ability to post recurring costs or credit notes as well as invoices. These options will only post those documents that include Recurring Schedules not standard documents with Cost Only or Credit Notes that have no schedule attached.
Note this feature can be useful where regular charge backs are involved or where internal work needs to be taken up on a regular basis (Cost Only).
Click Go ![]() to list the Document(s) due for billing. These Documents will list in the lower Results pane.
to list the Document(s) due for billing. These Documents will list in the lower Results pane.
Displaying the Document(s) in the Results pane

Tip: Maximize the screen. Toggle the Criteria icon on the toolbar as required.
![]()
If there are multiple entries to be posted, Select All or select the individual entries to be posted.
Double-click a schedule item or Select Properties to open the Document to view or modify.
Posting the Documents
![]()
Click the Post icon on the toolbar to Post the selected entries.
If an Agreement is not Active, it will be ignored during processing.
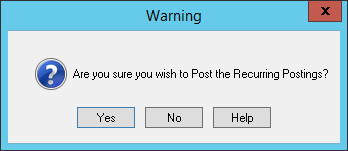
Click [Yes] to continue.
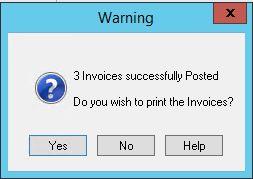
Click [OK].
Price Escalations Due
The V/M Posting Schedules program has a column called “Price Escalation After Post”.
This column displays the status of any escalations that might be due prior to posting.
The line will be greyed and the user is prevented from posting the invoice until the escalation has been processed.
That is to prevent an invoice being processed before a due escalation has been processed.
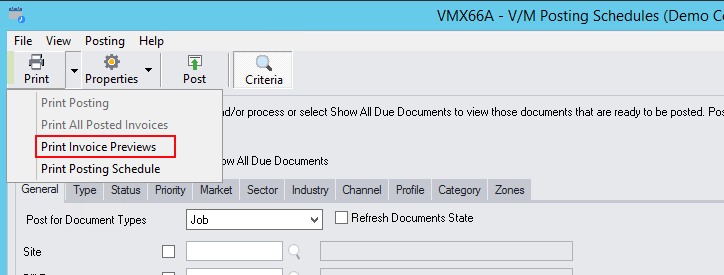
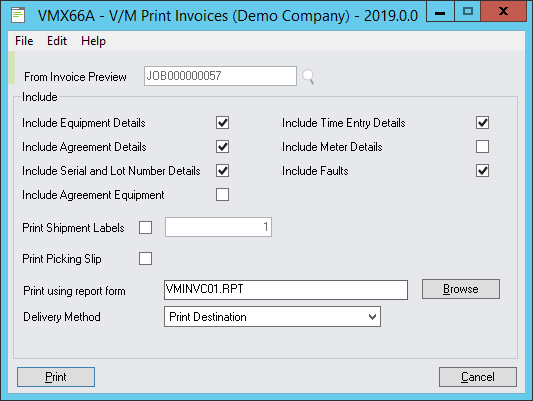
Print Invoice Preview
Invoice print preview is available when posting multiple documents in the Posting Schedules program.
Select a Document Type, set the Process Date and select Go >> to populate documents due to post.
Select document to be previewed.
Select the drop down on the Print menu and select Print Invoice Preview.
Because the documents have not yet been posted and are only being previewed at this time, there is no invoice number generated and the Job Number is used instead.
Note that a document is printed to screen. Close the document and cycle to the next document and so forth until all documents have been completed or canceled out of the process.
Check the documents for errors and formatting as required.
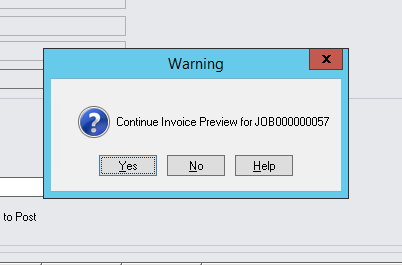
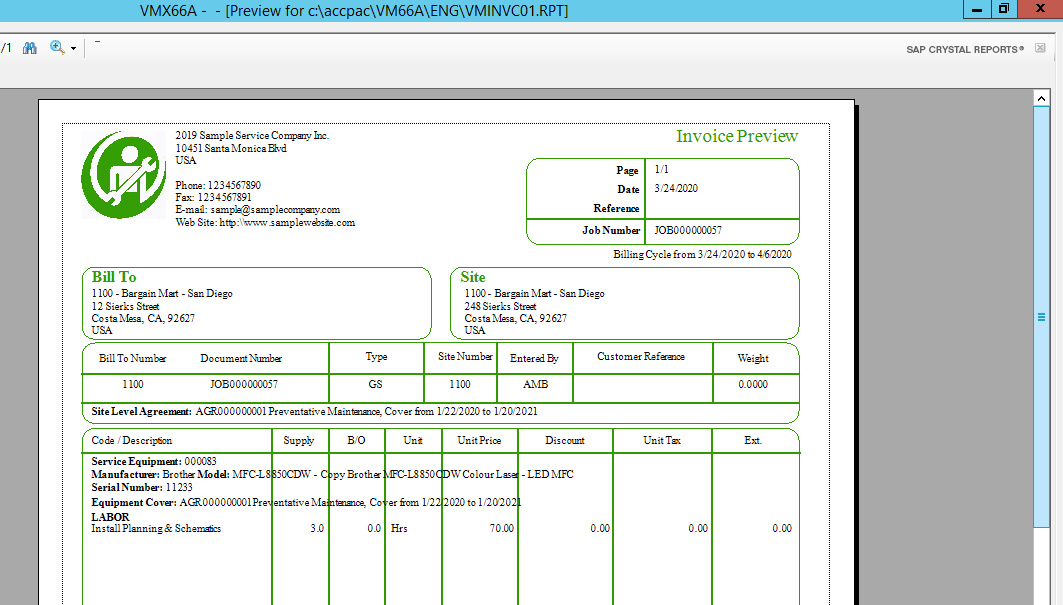
Continue the preview for each job selected.