Document Entry screen

Contents
The Document Entry screen will be displayed when you select a Document or create a new Document. The Document will be displayed in an easy to follow tree structure.
The Document Entry screen provides Employees with functionality similar to that of the Document Entry screen in the Service Manager Desktop product. Employees can View, Edit and Delete Documents, Insert, Edit, Delete and Hold Document Lines (Job Phases, Equipment, Billing, Items, Services and Notations), Create Assignments, Maintain Custom Fields, Post Invoices, Credit Notes, Cost Only Entries and Receipts, and print related reports/forms such as a Work Order - Job Card (from a Job), an Invoice or Credit Note (from Postings) or a Quotation.
Refer to the Document Entry section in the Service Manager User Guide for additional information about Service Manager Document Entry and associated functions.
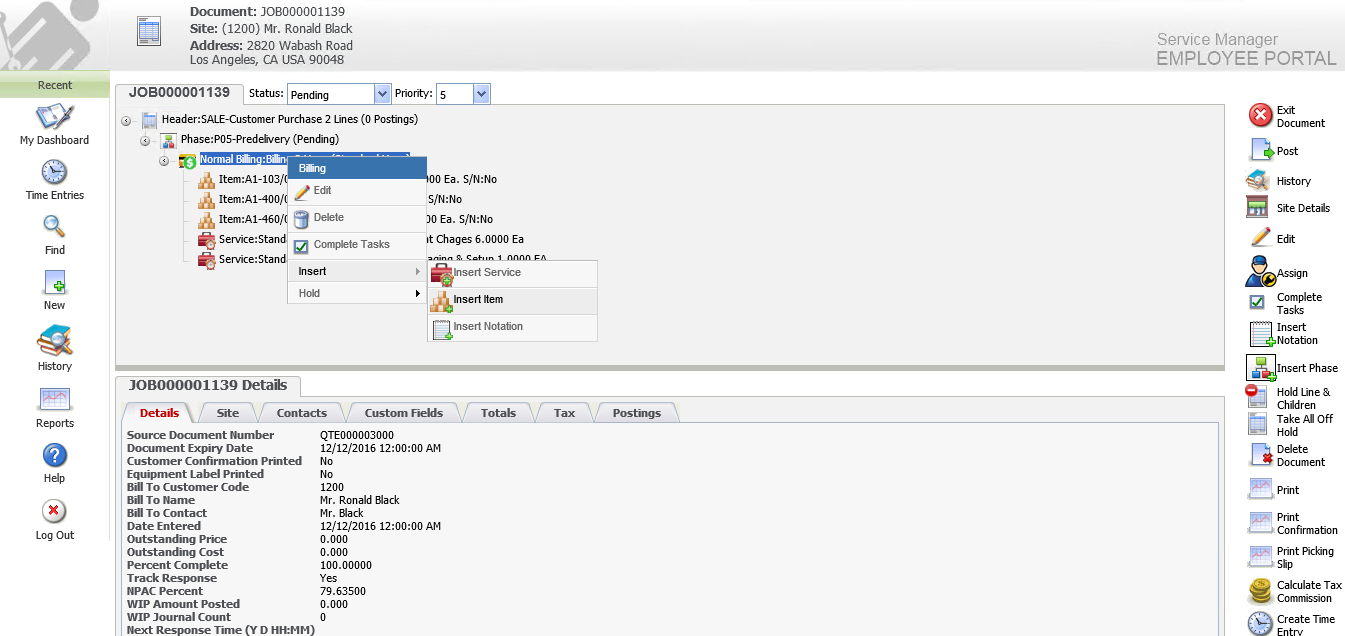
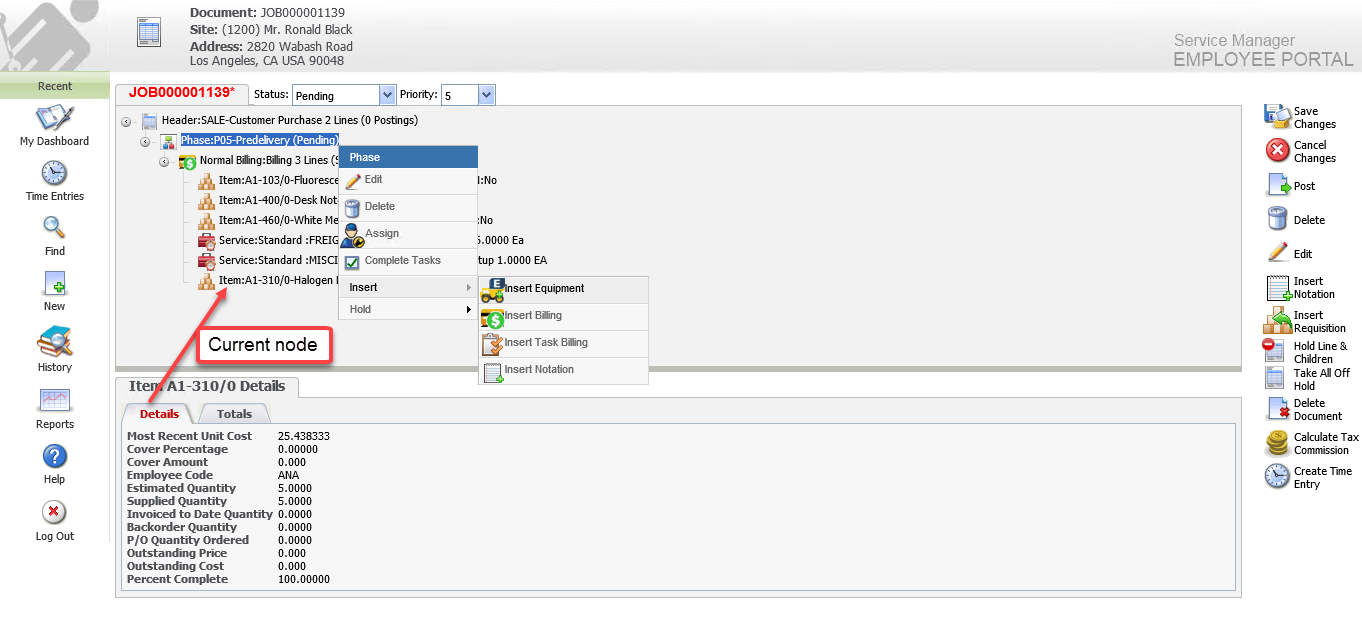
Editing a Document and navigating the Document tree is very intuitive. Functionality is context sensitive. For example, if you right-click on a Billing node, you will only be able to insert a Service, Item or Notation; if you right-click on a Phase, you will only be able to insert Equipment, a Billing Group or Notation.
The lower portion of the screen shows data relating to the currently selected node.
Important information:
Each time you click on a node, the Employee Web Portal will access the Service Manager database and the screen will be refreshed. To avoid this, use the right-click functions.
For example, you want to add Equipment to a Phase, but an Item node is currently displayed showing the Item details. DO NOT click on the Phase node!! Instead, right-click on the Phase node and select Insert / Insert Equipment as shown below. There is no need to click on the Phase first. Doing so will cause unnecessary data retrieval and delay.