History

Contents
 »
» 
Overview
The general History program uses a customizable HTML file to present you with an Audit History in chronological order.
This file can be modified, or substituted with other HTML files, however we recommend that only advanced HTML programmers edit or become involved with this process.
Because History uses an HTML file it can be printed directly to a printer, saved and published to a website, or embedded in email.
There are many different record types that History can be viewed for including, Sites, Customers, Models, Equipment, Meters and Documents.
An Audit table is maintained recording information as tasks are performed in Service Manager. These tasks include: Site and Equipment Creation, Record Modifications and Deletions, Equipment Transfers, Document Entry and more.
Audit information can be filtered.
For example, it is possible to display only Items supplied to an Equipment record, or Notations relating to a Site record or Site Contact. History can be chained to from many places within Service Manager but particularly from within Document Entry.
Start the History Program
Click the History desktop icon.
The Service Manager History window will be displayed.

Specify Criteria

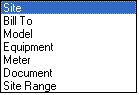
Select the type of History Report required.
Audit Types may be displayed depending on the type of History Report. Tick the appropriate check boxes.
Generate the Report
Click the Proceed icon on the toolbar to generate the report.
![]()
Print the Report
Click the Print icon on the toolbar to print the report.
![]()
The Print dialog will be displayed:
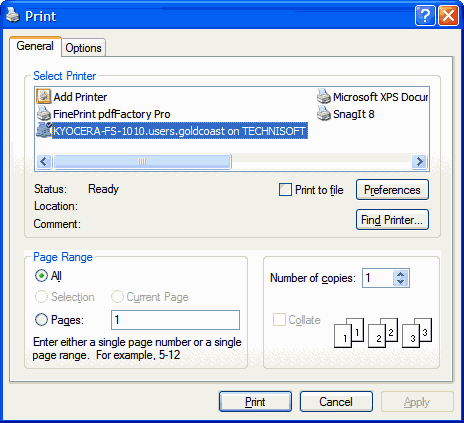
Click [Print] to print the report.
Save and Load Audit Types
Click Save and Load to save and load (re-use) a preferred set of Audit Types.
