Customizing Toolbars

Contents
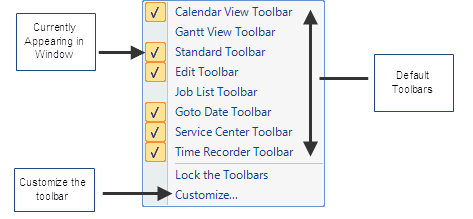
Right mouse clicking within the toolbar region shows which toolbars are currently appearing in Advanced Scheduling as well as an option to customize. The default toolbars are not customizable and the Advanced Scheduling program has ultimate control of which toolbars are displayed in views.
Within the customize option, a new individual toolbar can be created and renamed. Buttons can be added by dragging and dropping from the command tab to the new toolbar location as required. Buttons from an individual toolbar can be removed by right clicking on the button within the toolbar and deleting.
Like most Windows Toolbars to move a Toolbar to a different location, focus the cursor on the Grab Handle (vertical dots) at the start of the toolbar, select it by left clicking the mouse and drag it to the desired position. Toolbars that have been moved, and customized toolbars, will be remembered when closing the Advanced Scheduling Add-On program but will not be remembered when an upgrade is applied.
When installing a new version or upgrade, it is not recommended that settings files from previous versions be used as newly introduced menus and toolbar items may not be displayed.