Document Query

Contents
 »
» 
Overview
Document Query is a very powerful tool that enables you to locate Documents based on simple or complex criteria. Documents may be loaded into Document Entry, Jobs may be loaded into Job Manager, Resources may be assigned to a Document/Phase, Query results can be emailed to employees or customers, or printed.
Topics covered in this section
This section covers how to:
•Create and run a Query
•Load a Document from the Result list into Document Entry
•Assign Resources to a Document Phase
•Include, Exclude and change the order of columns in the Result list
•Sort columns in the Result list
•Assign Resources to a Document Phase
•Print the Query results
•Email the Query results to employees or customers
•Save a Query
•Import Queries from earlier versions of Service Manager
•Copy the Saved Queries file for use by other users.
•Display the results in Graphs
Starting the Document Query Program
Click the Document Query desktop icon.
The Document Query window will be displayed.
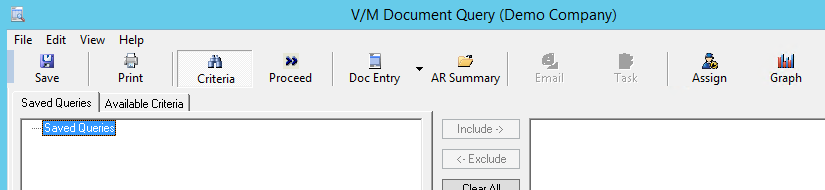
Note that the Document Query window has two tabs - Saved Queries and Available Criteria. The general idea is to create a query in the Available Criteria tab and then save it into a Query Group. The query can then be run at any time from the Saved Queries tab, which is shown by default when you click the Document Query desktop icon. The example below shows two saved queries in a Query Group named Site 1100.
Toolbar
![]()
•Save – Frequently used searches can be saved for future use
•Print – Print the query results on the Document Query Report
•Criteria – Toggle the criteria panes off and on
•Proceed – Perform query, i.e., search for selected criteria
•Doc Entry – Display the selected Document in Document Entry
•AR Summary - Displays the A/R Documents for the selected Document
•Email – Email the query results to employees or customers
•Task - Generate a task for each Time Estimate.
•Assign – Assign a Resource to a Job
•Header - Update the Header details for the selected Jobs in bulk
•Graph - Display the results graphically
•Auto - Automatically refreshes the results list after a specified period in seconds.
Creating a Query
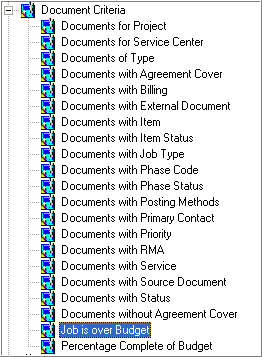
Click the Available Criteria tab. The available query criteria will be displayed.

Build the query
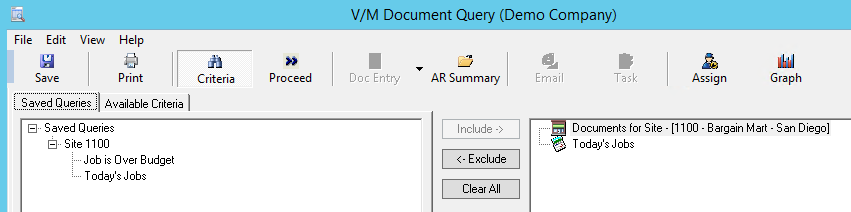
As an example, we will build a query that displays all Jobs for Site 1100 that are Over Budget.
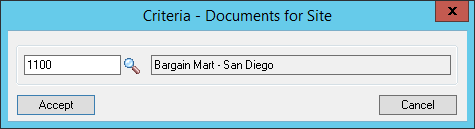
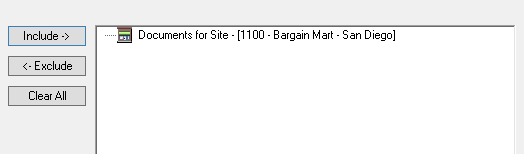
Double-click Documents for Site. Alternatively, highlight Documents for Site and then click [Include].
Select Site 1100 and then click [Accept].
Note that the query will show in the right-hand pane of the Document Query window while it is being built.
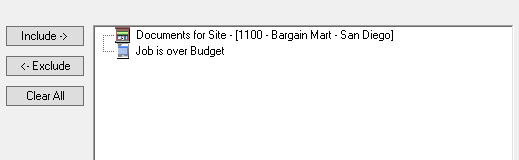
Double-click Job is over Budget. Alternatively, highlight Job is over Budget and then click [Include].
Note again how the query is being built.
Run the query
Run the query to test it.
Click the Proceed toolbar icon to run the query.
![]()
The query results will be displayed in the Results pane at the bottom of the window.

The Results pane is flexible and customizable. To change the columns that are displayed and their order (left to right), select View » Options.
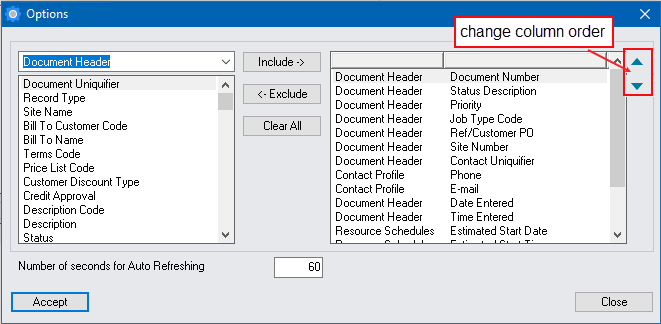
Include or Exclude columns as required and change their order (left to right) using the up and down arrows ![]() .
.
Change the Auto Refresh number of seconds if the results list is needed to be automatically refreshed.
The result list can be sorted in ascending or descending sequence using any column as a Sort By field. Initially, the results will be listed by Document Number in ascending sequence.
Click the column header of the column to sort the results by. Click it again to change the sequence. The blue arrow to the left of the column name indicates the sort sequence.
![]() - ascending sequence
- ascending sequence
![]() - descending sequence
- descending sequence
Note:
This flexibility of column display exists throughout Service Manager although it may not always be stated.
Save the query
Click the Save toolbar icon to save the query.
![]()
The Save Query dialog will be displayed.
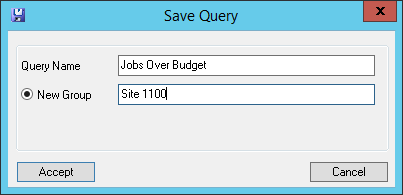
Type a Query Name and Query Group Name and then click [Accept].
Note:
Duplicate Query Names are not allowed.
A Warning message will be displayed.
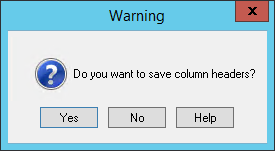
Click [Yes] to save the current state of the column headers (including column width). When you run the query, you can either load the set of column headers saved with the query or use the default set.
Saved Queries
Saved Document Queries are stored in a single XML file per user. This file can be copied and used by other users. Refer Standardizing Queries across all users.
Running a Saved Query
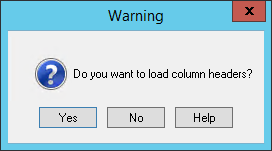
To run a saved query, you must highlight it in the Saved Queries tab and then click [Include].
You will be prompted to either load the set of column headers saved with the query or use the default set.
The query will show in the right-hand pane of the Document Query window.
Click the Proceed toolbar icon to run the query.
![]()
All the Documents that match the criteria will be listed in the Results pane. You can sort the results by clicking the appropriate Column header.

Deleting a Saved Query
To delete a Saved Query, highlight the relevant query and then press Delete or click ![]() .
.
Renaming a Query Group
To rename a Query Group, right-click the relevant Query Group and then select Rename Group.
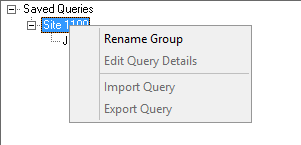
The Rename Group dialog will be displayed.
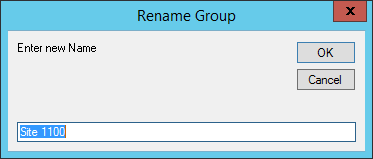
Type the new Query Group Name and then click [OK].
Renaming a Query / Moving a Query to another Query Group
To rename a Saved Query or move a Saved Query to another Query Group, right-click the relevant Saved Query and then select Edit Query Details.
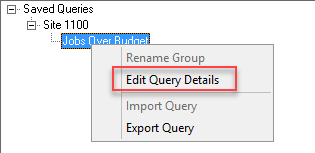
The Edit Query dialog will be displayed.
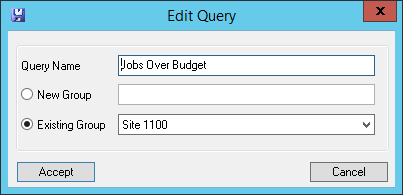
Type the new Query Name and/or change the Query Group, and then click [Accept].
Displaying a Quick View of a Document
Highlight the Document and then select Quick View from the Doc Entry toolbar icon drop-down.
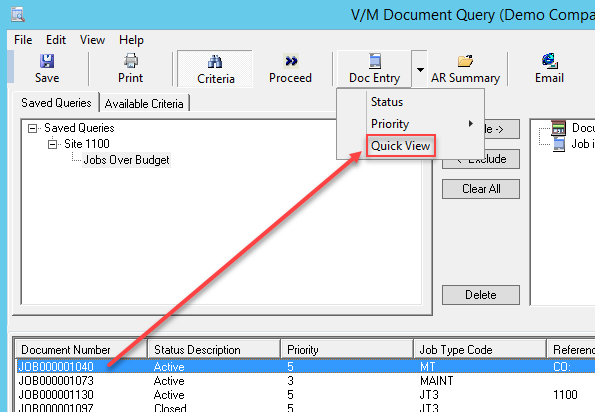
The Document tree will be displayed without loading Document Entry.

Double-click any line to open it in Document Entry.
Displaying a Document in Document Entry
Double-click a Document to display it in Document Entry. If Document Entry is open already, simply drag and drop the Document into Document Entry.
Assigning Resources to a Document/Phase
Click the Assign icon to manage Resource assignments on a Document.
![]()
The Document Assignments window will be displayed.
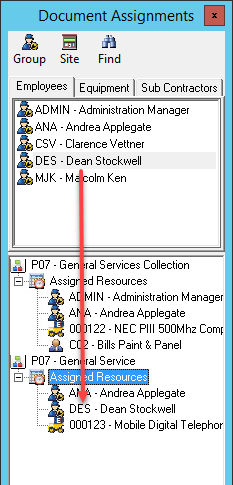
The Document Assignments window has three tabs, one for each type of Resource:
•Active Employees
•Internal Equipment
•Subcontractors
To assign a Resource to a Phase, drag the Resource from the list at the top of the window to the appropriate Phase Assigned Resources node at the bottom of the window.
You may also remove a Resource from a Phase. To do this, highlight the Resource in the Phase and then press Delete.
Emailing the Query Results
Click the Email icon on the toolbar to email a summary of results to your employees or customers.
![]()
The Setup / Send Emails window will be displayed.

Select the document(s) to email and the email recipients. Note that an email recipient can be an employee and/or a site contact.
Click the Layout icon on the toolbar to change the layout of the email message.
![]()
Click the Send Email icon on the toolbar to send the email message to the selected recipients.
![]()
Printing the Query Results
Click the Print icon on the toolbar to print a summary of results.
![]()
The Document Query Listing window will be displayed.
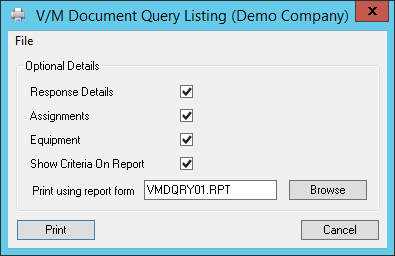
Tick the required options and then click [Print].
Sample Report

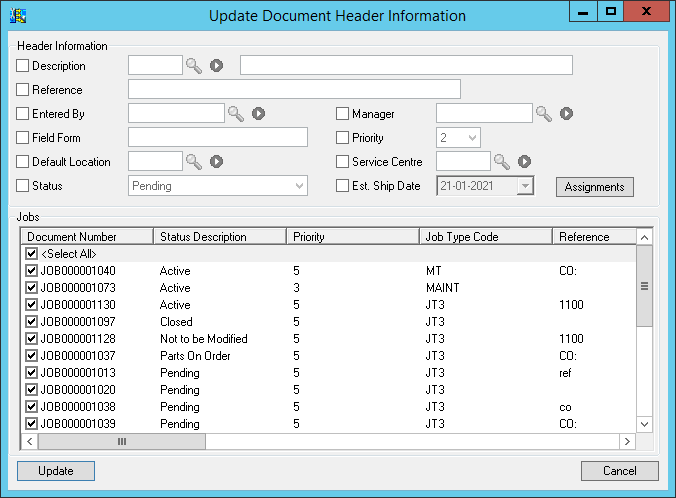
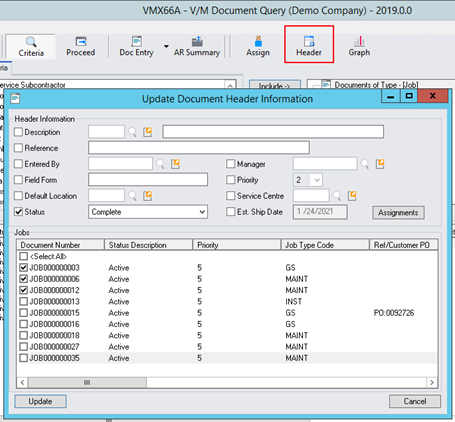
Modify Header Details Across Many Jobs
After running a Query, select the Header icon on the toolbar to modify the Header detail information across multiple Documents.
For example change the job status across 100 jobs at once.
Fill in the information to change the selected documents Header information to.
De-select any documents to exclude the document from being changed.
Click Update to change the information.
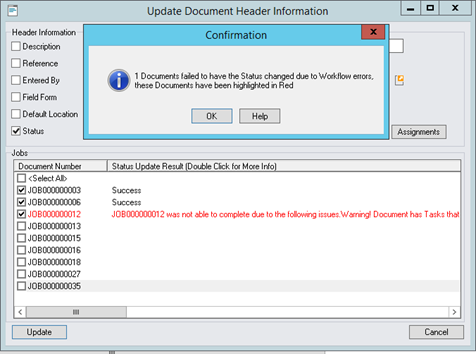
Document Completion through Document Query
If a Completed Status is selected, the Jobs selected from the list will be changed from their current status to Complete by selecting “Update".
A confirmation window displays if any of the selected Jobs failed to update. Further details on the reason why the document failed to complete can be obtained by double clicking on the line to launch the Status Update window.
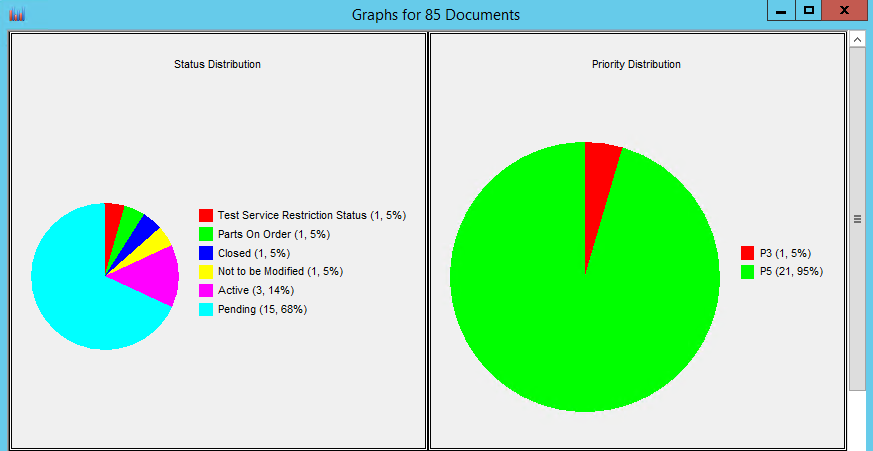
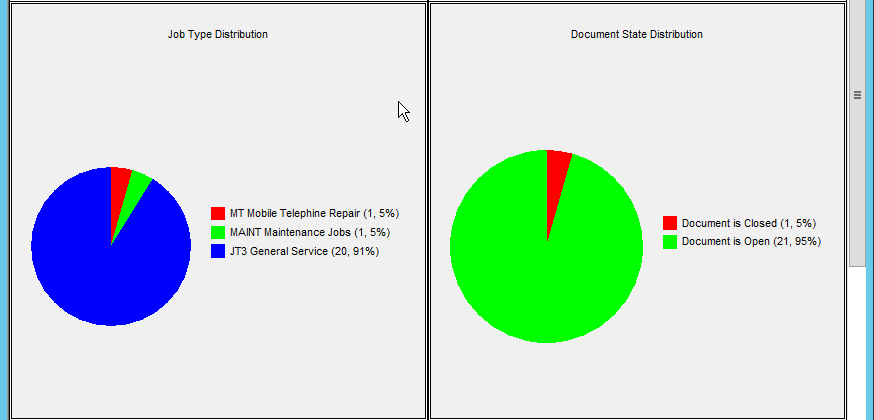
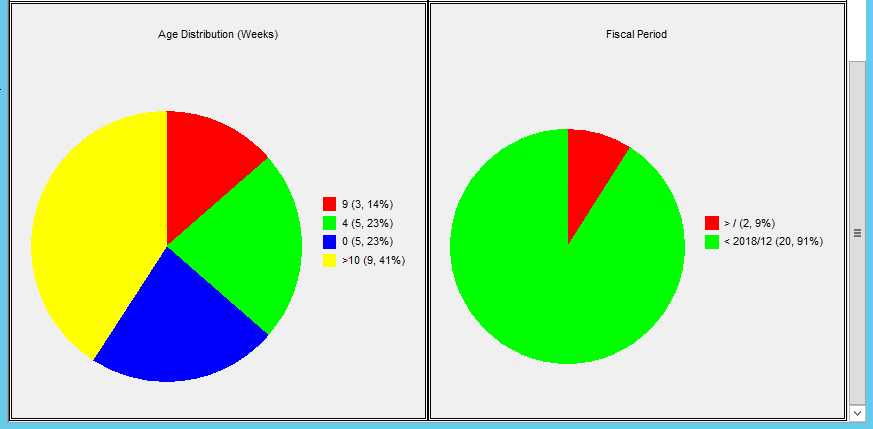
View the Results Graphically
To enable the Graph icon on the toolbar, select View > Show Graphs
Any query which has results returned can have the statistics presented graphically.
Select the Graph icon from the toolbar to present the returned query results in 6 key graphs.
•Status Distribution
•Priority Distribution
•Job Type Distribution
•Document State Distribution
•Age Distribution (Weeks)
•Fiscal Period
Importing Queries from earlier versions of Service Manager
In earlier versions of Service Manager, Document Query queries were saved as individual .dqr files. We suggest that you import these into the new query framework. To do this, click ![]() on the Saved Queries tab. locate the query and then save it in the required Query Group.
on the Saved Queries tab. locate the query and then save it in the required Query Group.

Standardizing Queries across all users
Saved Document Queries are stored in a single XML file named VMDocQueries.tps per user.
This file is located in the following folder:
C:\Accpac\USER\<Sage 300 User Name>
For example: If the user is ANA, the file will be located in C:\Accpac\USER\ANA; if the user is ADMIN, the file will be located in C:\Accpac\USER\ADMIN.
To standardize queries across all users, copy the "master" source file containing all the queries to all the USER folders.
