Vendor Return Authorization (VRA)

Contents
 »
»  » Vendor RA
Overview
The Vendor Return process in its simplest form is as follows:
•A VRA is created for the Equipment requiring repair (or more typically, the Equipment is added to an existing VRA)
•You Return the Equipment to the vendor/manufacturer with a copy of the VRA attached for reference
•The Equipment is repaired
•The vendor/manufacturer sends the Equipment back to you
•You Receipt the Equipment
There are many other more involved scenarios as the vendor/manufacturer may repair the Equipment, replace the Equipment or simply credit the cost of the Equipment.
VRAs can be maintained from Document Entry or directly from the desktop using the Return Authorizations program.
Creating a VRA using the Return Authorizations Desktop Program
Step 1: Enter Vendor information
Click the Return Authorizations desktop icon.
The Return Authorization window will be displayed.

Enter the Vendor Site and the Vendor. These are mandatory fields. Use the Finder![]() to select the required details.
to select the required details.
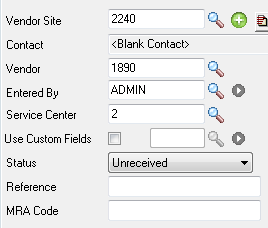
Note:
The Status is set to Unreceived.
After the Vendor details have been entered, click the Save icon on the toolbar to continue with the VRA.
![]()
Step 2: Enter Return Shipment Information
After saving the Vendor information the Return Shipment window will automatically display. Click the Returns icon on the toolbar at any time to enter Return Shipment information.
![]()
The Return Shipment window will be displayed.
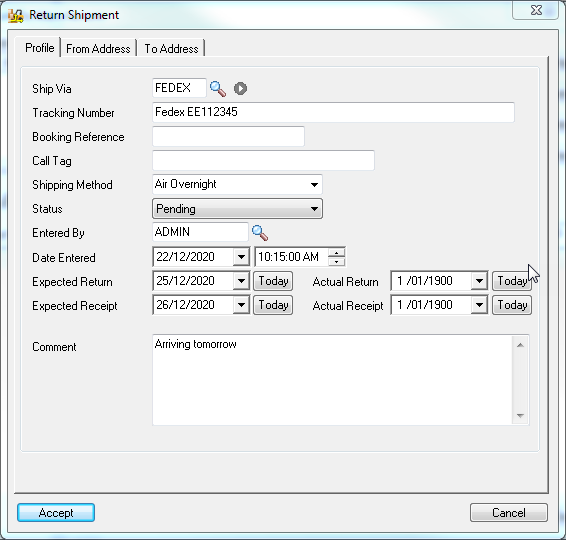
Ship Via - Specify the predefined method of shipment to be used in returning the goods to the vendor/manufacturer.
Enter the Tracking Number / Consignment Note Number, etc.
Enter the redefined Shipping Method.
Click the From Address tab to verify pick-up details.
Click the To Address tab in case the goods are to be sent to an office other than the operator's company address.
Details can be left blank at this time if the customer is responsible for organizing the return shipment details.
Click [Accept] to continue. The Return Authorization window will be displayed. The system will now display the VRA Number.
![]()
Step 3: Add Equipment to Return to the Vendor/Manufacturer
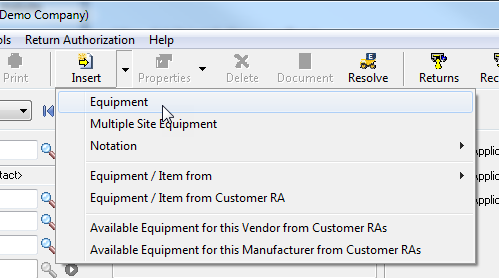
You now need to add the Equipment requiring service to the MRA. To do this, click the Insert icon on the toolbar. Alternatively, click the drop-down list arrow ![]() to the right of the Insert icon and then select Equipment or Multiple Site Equipment.
to the right of the Insert icon and then select Equipment or Multiple Site Equipment.
The RA Equipment window will be displayed.
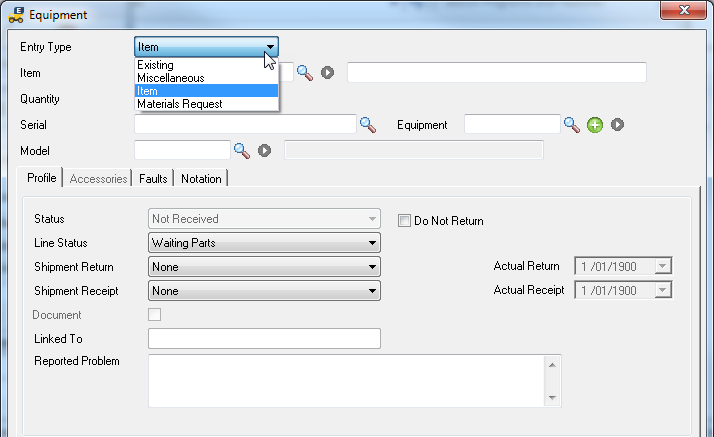
Select the type of record being returned:
Existing – An existing Service Manager Equipment record
Enter a Serial Number or Equipment Number and then press Tab.
Details such as Serial Number, Equipment Code, Model and Model Description will be displayed.
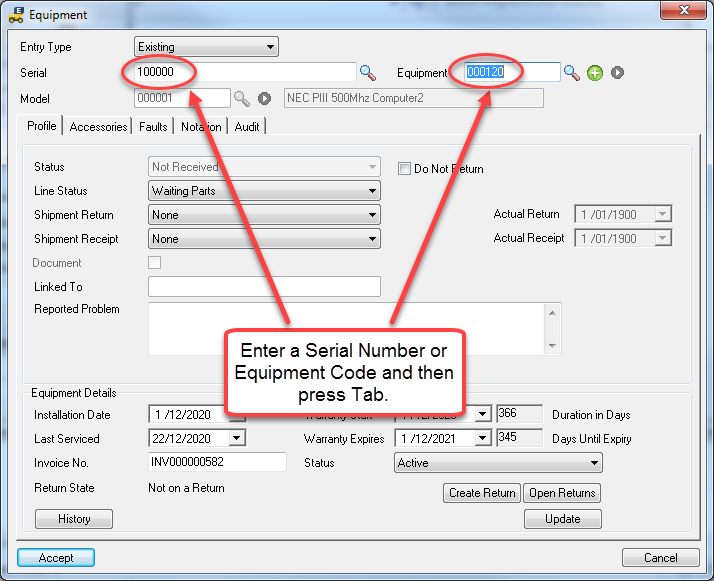
The Equipment Details will be displayed in the lower part of the window.
Warranty information is available as well as History and Custom Fields (if applicable).
The Equipment Status can be updated from this section as well.
Click [Update] to refresh Equipment Details.
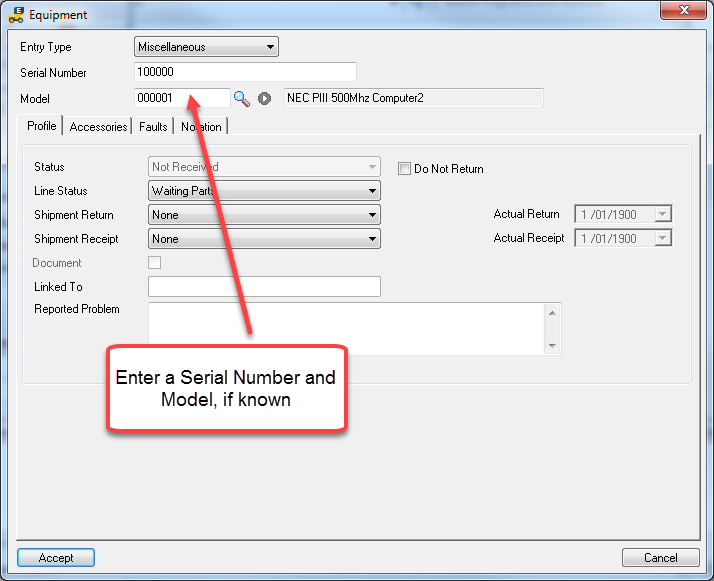
Miscellaneous – Miscellaneous Equipment - used where the Equipment is unknown or cannot be matched quickly to a Service Manager Equipment record
Enter a Serial Number and Model, if known, otherwise leave blank.
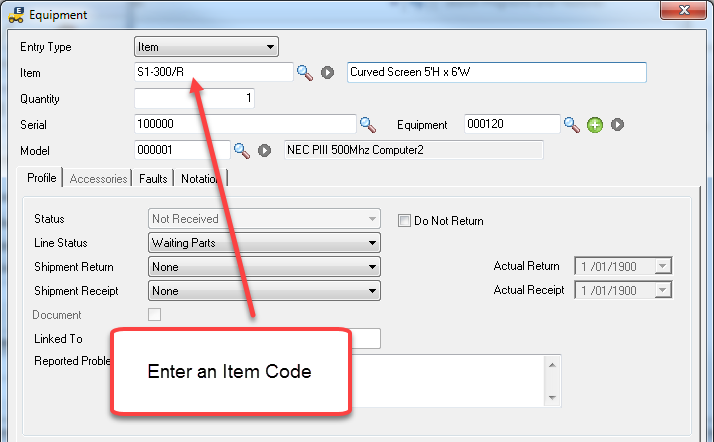
Item – An existing Inventory Item
Enter an Item Code and then press Tab.
Materials Request – Normally used to request parts required for a repair from the manufacturer of the Equipment
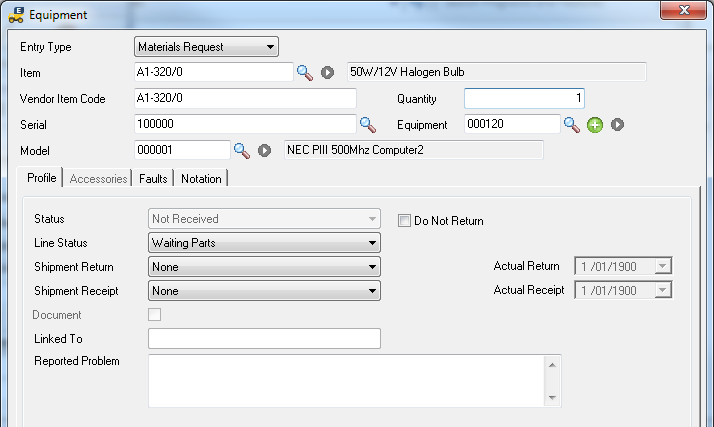
Click [Accept] after all the details have been completed.
This completes the basic creation of a VRA.
Step 4: Return the Goods to the Vendor/Manufacturer
To return Equipment to the Vendor/Manufacturer, click the Returns icon on the toolbar.
![]()
The Return to Manufacturer window will be displayed.
The window has three specific panes: Available Return Shipments, Not Yet Returned and Returned.
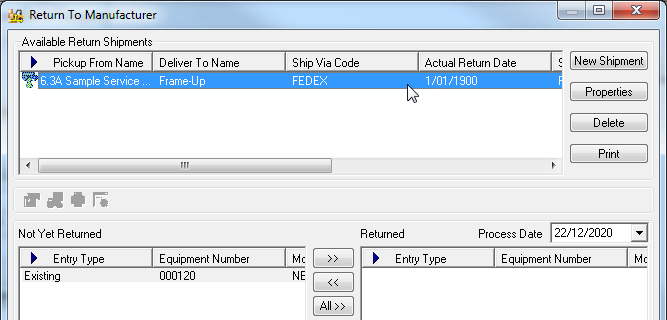
Highlight an entry in the Not Yet Returned pane and then click ![]() to return the Equipment to the Vendor/Manufacturer.
to return the Equipment to the Vendor/Manufacturer.
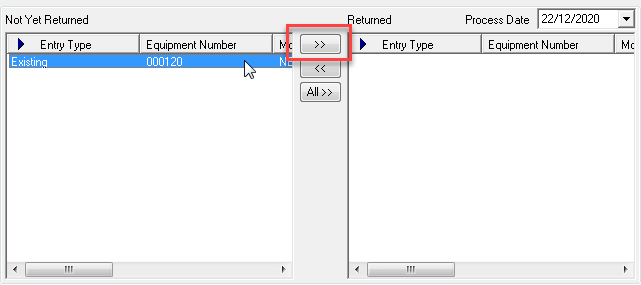
The entry will now be transferred to the Returned pane.
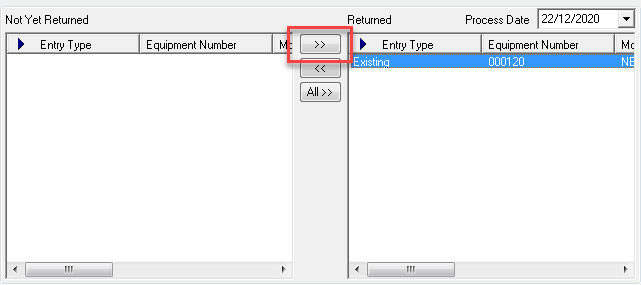
After completing this task, click [Close] to return to the Return Authorization window.
Notice the updates on the Return Authorization window. The Entry Type now has a green tick through it and the RA Status has been automatically changed to Received.

The RA has been completed and dispatched.