Bulk Generate Requisitions/Purchase Orders by Job, Phase or Billing Group

Contents
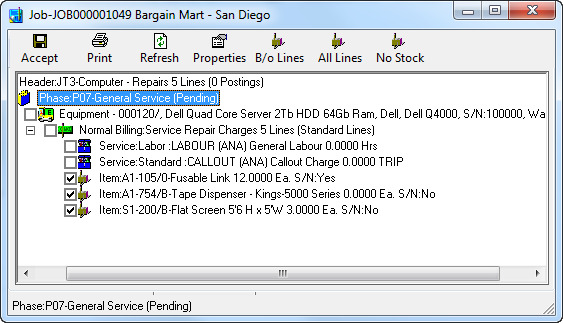
It is possible to bulk create Requisitions or Purchase Orders for all Service or detail lines. This can be applied at Job, Phase or Billing Group level from within a Job.
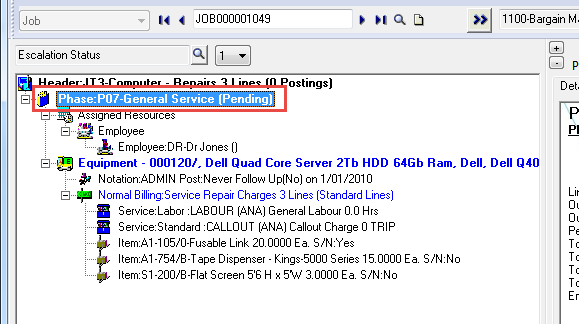
Click on the node you wish to bulk create lines for. In the example above, the Phase is selected so all detail lines in the Phase will be ordered.
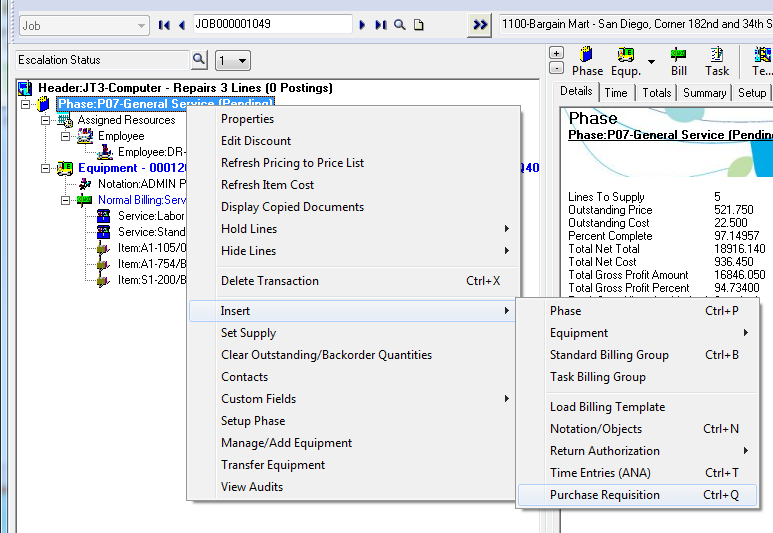
Click the New Purchase Requisition ![]() fast icon or right-click on the Phase and select Insert » Purchase Requisition.
fast icon or right-click on the Phase and select Insert » Purchase Requisition.
The Create/Manage Purchase Requisitions window is displayed.
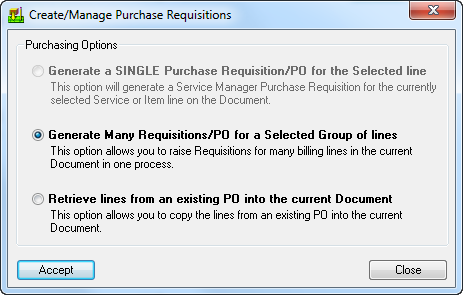
Click [Accept].
If vendors do not exist in Inventory Control for the item detail lines you will be asked to enter each vendor code manually. If vendor codes do exist, the detail lines will automatically be created when posted.
After clicking [Accept], the Requisition Manager program will automatically launch providing the user with the option to select all detail lines (click header), or pick and choose the detail lines to be ordered.
After selecting the required Services and/or Items, click the ![]() icon.
icon.
The Select Vendor window will be displayed. There are two options on this form: Specify a Vendor for all lines chosen and Let Service Manager decide the Vendor.
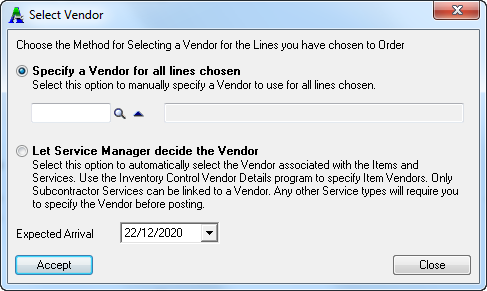
Specify a Vendor for all lines chosen allows you to select the Vendor Code, but will apply this code to all detail lines selected. i.e., these can be manually modified if required.
Let Service Manager decide the Vendor causes Service Manager to check the item vendor specified in I/C Vendor Details (will select first item vendor code), or check the Subcontractor Vendor Code as specified in Service Manager Subcontractor Setup.
For other service types such as standard or labor services the user must specify the vendor code manually.
Using either option it is still possible to edit the vendor code manually by selecting the unposted entry and double clicking to edit the vendor code.
The next step is to Post the transactions and actually create the Purchase Orders or Requisitions as applicable in the Sage 300 Purchase Orders module.
Click the Post icon to post the Purchase Orders
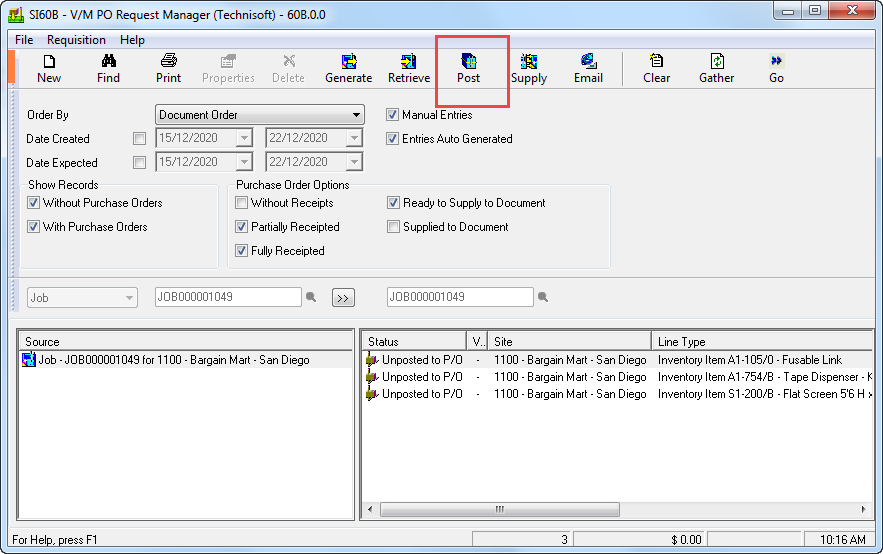
The Post to PO Window will open where you can select the Items and/or Services as applicable and then click [Post] to create the Purchase Order.
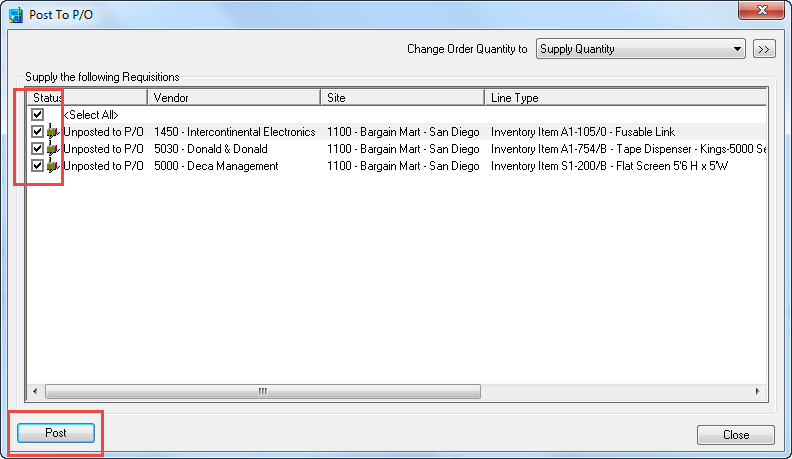
The Post Purchase Orders window will be displayed.
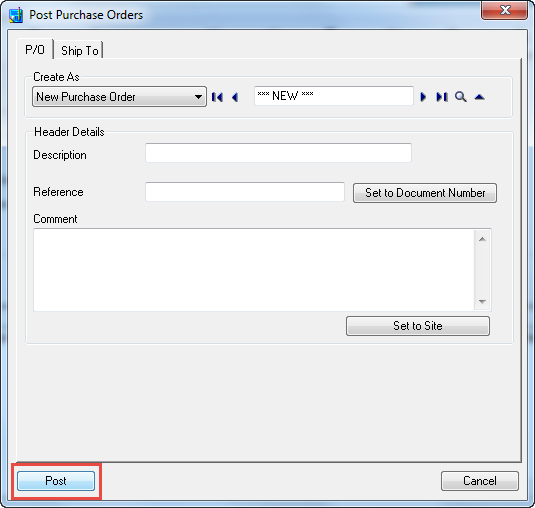
Complete the optional fields and then click [Post]. All items will be added to Purchase Orders and the detail lines in the Jobs will be updated accordingly. An option allows you to print the Purchase Order at the time of posting.
The following shows the Purchase Order that has been created.

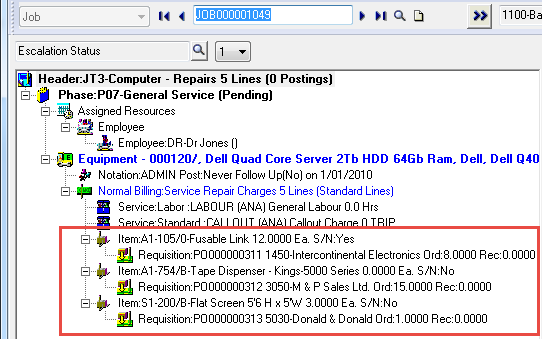
All detail lines will be updated in the Job with the relevant Purchase Order Number. The resulting tree view shows detail lines displaying Purchase Order details.