Workgroup Filter

Contents
The Workgroup Filter is designed to assist the user manipulate the Resource Filter on mass. Workgroups are set up in the Workgroups file within the V/M General section of the Sage 300 Desktop. Only Employees can be assigned to a Workgroup.
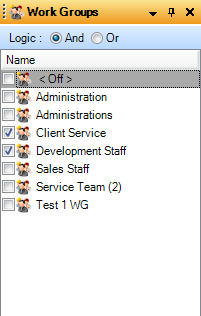
The Workgroup filter only contains one column called Name. The first Checkbox is always <Off> followed by any Workgroups created in the database. The And / Or Logic enables the user to select multiple Workgroups and display only Employees that have been assigned to all selected Workgroups if And is selected, or display all Employees assigned to any of the selected Workgroups if Or is selected.
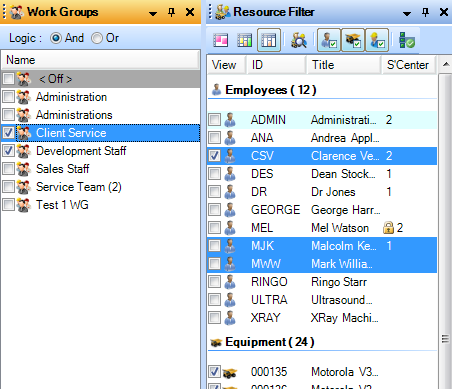
When a particular Workgroup is highlighted by clicking on the name, (not ticking the checkbox), all employees belonging to that Workgroup will be highlighted within the Resource Filter.
By clicking, dragging and dropping a Workgroup from the filter onto Calendar Day View, Advanced Scheduling will automatically open the Add Appointment Window for the first Employee where Appointment Details can be entered. Selecting OK to the Add Appointment window will then raise a new Add Appointment window for the next Employee of the Workgroup but the Appointment details previously entered will be remembered.
Clicking, dragging and dropping a Workgroup from the filter onto the Job List Resource display will instantly add all resources belonging to that Work Group into the Resource List. A confirmation box will appear asking to create appointments for the selected Resources that match the assigned Phase estimates if this option has been set to Ask in the Options Application.
If a Workgroup is ticked then the Resource Filter will un-tick every Employee who does not belong in that Workgroup. Only Employees belonging to the ticked Workgroup will appear in the Calendar and Resource Views.
Right clicking within the Workgroups Filter window opens a menu which gives the user options to:
![]()

•Select - Options to tick All, All Except, All Above, All Below, Only and None.