Billing Templates

Contents
Purpose
Billing Templates provide a means of defining reusable Billing Groups which include Services, Items, Notations, etc., which can then be inserted into a Document. Billing Templates are used to avoid repetitive data entry, improving both accuracy and efficiency.
Related Topics
An Example
Your company is in the printer repair business and one such repair is a replacement lamp kit for the most commonly sold laser printer on the market. The process of creating a template for this scenario is detailed below.
Creating the Billing Template
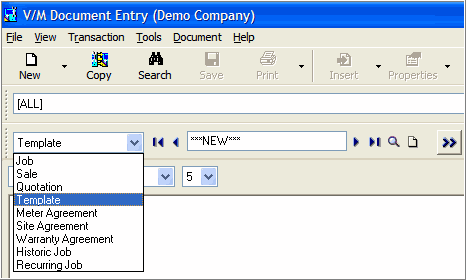
In Document Entry, select Template from the drop-down list.
Click the Go ![]() button. The Template window will be displayed.
button. The Template window will be displayed.
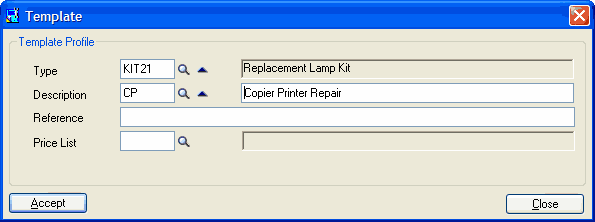
Type or select the Job Type and Description this Template will represent.
For example, create a Template named KIT21 – Replacement Lamp Kit with a Description of CP - Copier Printer Repair. Type a Reference and select a Price List if required. The Price List is defaulted from the Job Type or Company Options (if the Job Type Price List is blank).
Click [Accept]. The Billing Options window will be displayed.
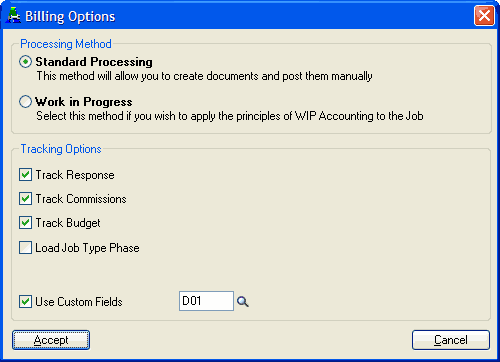
Select the Billing Options required.
Click [Accept] to continue. As the Load Job Type Phase check box is cleared, the Phase window will be displayed.
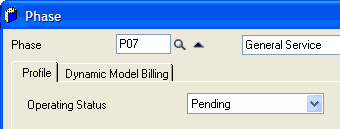
Select the Phase options required.
Click [Accept].
The Header and Phase will appear in the Document tree. If you click Save, the Template will be saved and will be assigned the next available Template Number.

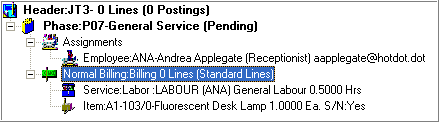
Add a Billing Group to the Template. We know the Job will take 30 minutes to complete and there is one part required for this repair. We can introduce these items into the Billing Group.
Note: A Template can have many Billing Groups. Any of the Billing Groups in a Template can be loaded into a Job or Sales Order. Simply tick the ones you want.
Click the Insert Billing Group Line ![]() fast icon.
fast icon.
The Billing window will be displayed.
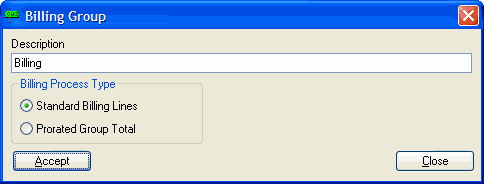
Click [Accept]. The Billing Group is added to the Document tree.

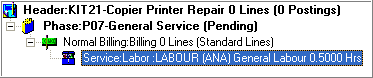
Add the required Service to the Billing Group.
Click the Insert Service Line ![]() fast icon.
fast icon.
The Service window will be displayed.
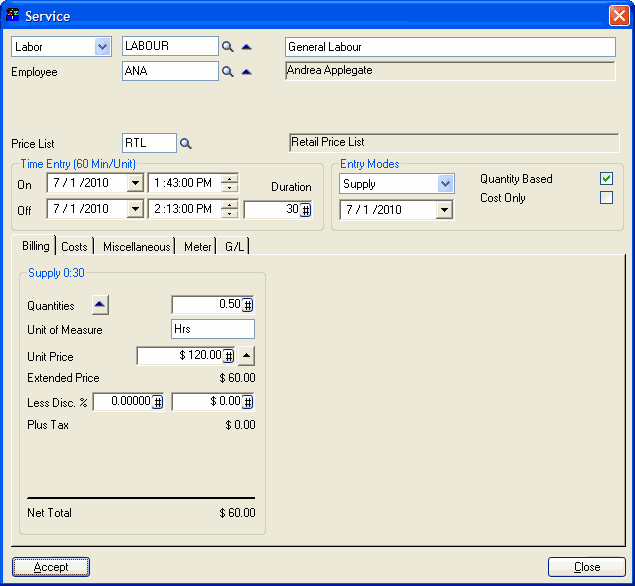
Select the Service, Employee, Price List, Unit Quantity - 0.5 Hours or Duration - 30 minutes, and Unit Price.
Click [Accept]. The Service line is added to the Document tree.
Add the required Inventory Item to the Billing Group.
Click the Insert Item Line ![]() fast icon.
fast icon.
The Item window will be displayed.
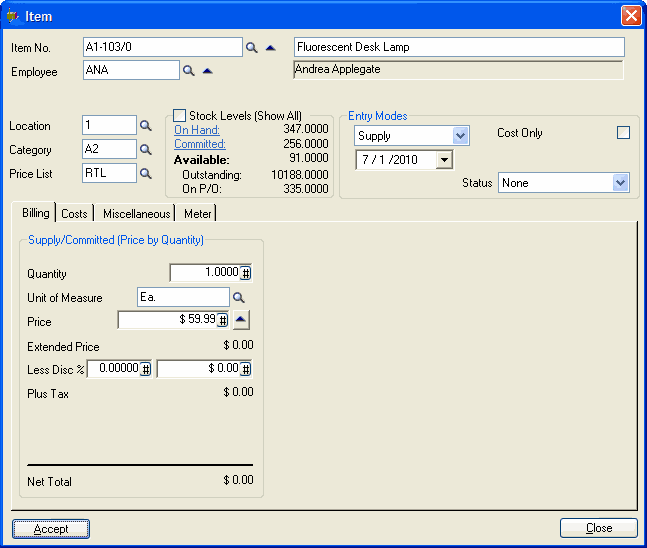
Select the Item by Finder![]() or Item Number. Verify details such as Stock on Hand, Price List and Unit Price.
or Item Number. Verify details such as Stock on Hand, Price List and Unit Price.
Click [Accept]. The Item line is added to the Document tree.
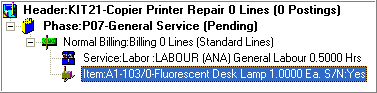
The Document tree now contains a Header, Phase, Billing Group, Labor and Parts all on the one Template.
Click the Save icon on the toolbar to save the Template.
It is possible to create a Template that has many more Items, Services and Phase entries. That is the real benefit of this feature.
Using the Billing Template
Start by creating a new Job with basic details and standard processing options.
Insert the Billing Group from the Template. Right-click on the Phase, select Insert » Load Billing Template or simply click the ![]() fast icon.
fast icon.
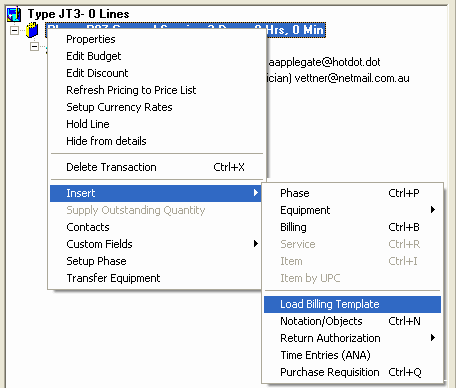
The Load Billing Template window will be displayed.
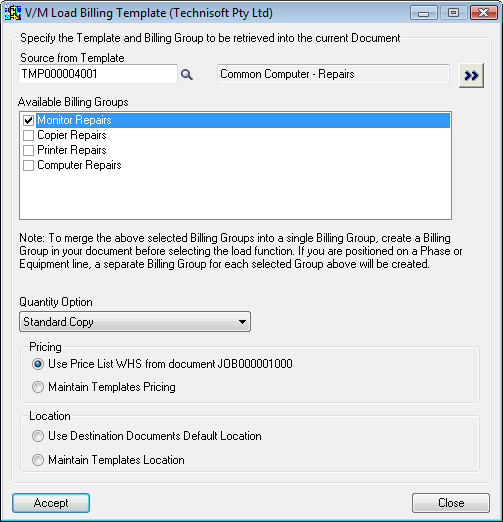
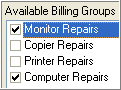
Select the Template that contains the Billing Group to be loaded into the Document.
Select the Billing Group(s) required. If the Template contains more than one Billing Group, all Billing Groups in the Template will be shown in the Available Billing Groups list. Select the Billing Groups required.
Note:
•If you are positioned on a Phase or Equipment line and select multiple Billing Groups from the Billing Template, a separate Billing Group for each Billing Group selected will be created.
•To merge all the lines from selected Billing Groups into a single Billing Group, you must be positioned on or within a Billing Group in your document before selecting the Load Billing Template function. Create a new Billing Group in the document if required and position on that Billing Group. All the lines from the selected Billing Group(s) in the Billing Template will be inserted into the new Billing Group.
Select the required Quantity, Pricing and Location options.
Click [Accept] to continue.
This now creates a Billing Group with a Service line and an Item line as defined in the Billing Group selected from the Billing Template.