Templates

Contents
 »
»  » Template
Overview
A Template can be used in two ways:
•as a source Document from which new Documents can be created, i.e., as a Document Template
•as a source Document that contains reusable Billing Groups containing Services, Items, Notations, etc., that can be selected individually and used for billing purposes, i.e., as a Billing Template
This is a functional difference only. From Service Manager's viewpoint, a Template is a Template, regardless of what it is used for.
Related Topics
Ways of Creating a Job » New from Search
Copy Documents » Promoting a Quotation to a Job
Creating a Template
To create a Template, click the drop-down list arrow ![]() to the right of the
to the right of the ![]() icon and then select Template.
icon and then select Template.
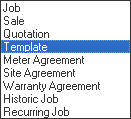
Alternatively, Select Document Type Template, Click New ![]() and then click Go
and then click Go ![]() .
.
The Template window will be displayed.
Template Profile
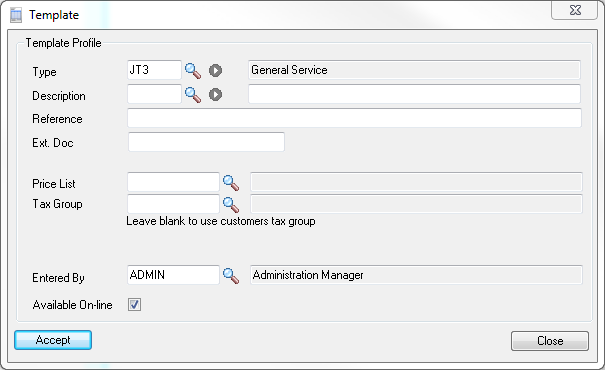
Select a Job Type and Description. Price List will default from the Job Type and can be overridden if required.
Select the Available On-Line check box to specify the Template is to be made available in Field Portal or the Employee Portal.
Click [Accept].
Billing Options
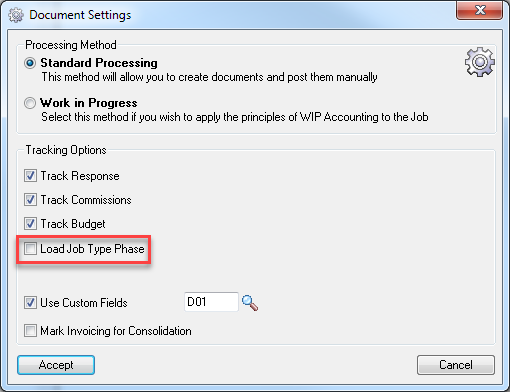
Select the required Billing Options and then click [Accept].
Phase
If you clear the Load Job Type Phase check box in the Billing Options window, you will need to enter the Phase information for the Template.
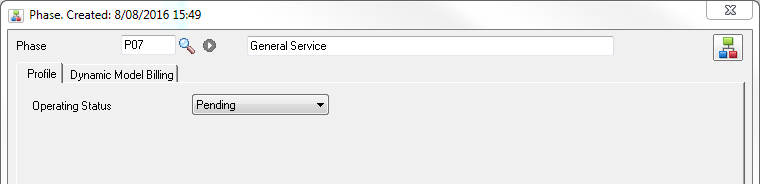
Enter or select the Phase. Click [Accept]. The Template will now be displayed in the document tree.
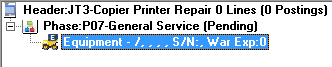
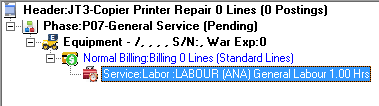
Document tree
![]()
Add an Equipment marker. The marker has no details associated with it at this stage.
Add a Billing Group and then add a Service line.
Equipment
Insert an Equipment marker using the Insert Equipment ![]() fast icon. The Equipment marker will be added to the Document tree.
fast icon. The Equipment marker will be added to the Document tree.
Billing Group
Insert a Billing Group using the Insert Billing Group Line ![]() fast icon.
fast icon.
Service Line
Add the Service using the Insert Service Line ![]() fast icon.
fast icon.
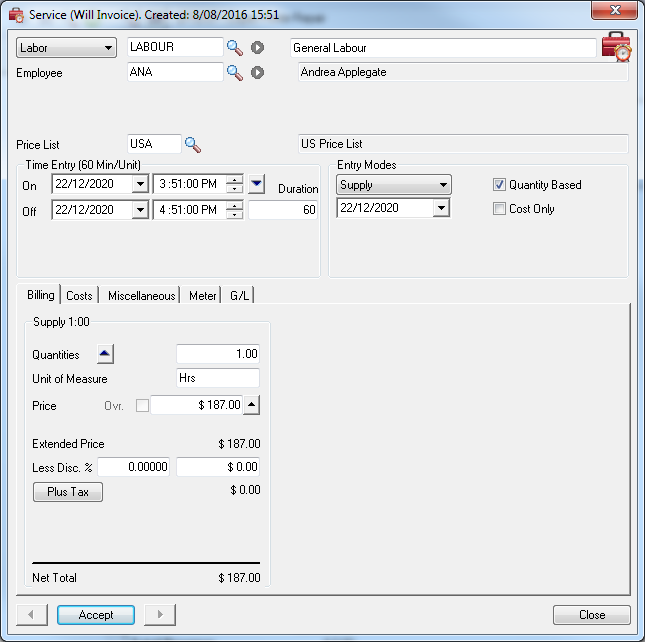
Enter the details as required - Service Type, Employee, Price List and a Time Entry. Click [Accept] to continue.
Templates can be assigned an Expiry Date. This is a useful tool to remind both staff and customers of special offers, etc., that could be on a monthly basis, for instance.
We have inserted a monthly aligned notation and will set the template to expire at the end of the month. We do not need to be concerned with creating a new job from a template that contains outdated notations.
Also within this template we have assigned another Phase, Billing Group and Service line. Any combination of services, items and phases is acceptable in a template.
Creating a Job from a Template
Display the Template to use as the Source Document for the Job.
Click the Copy icon on the toolbar. The Create New Documents window will be displayed, preloaded with the Template as the Source Document.
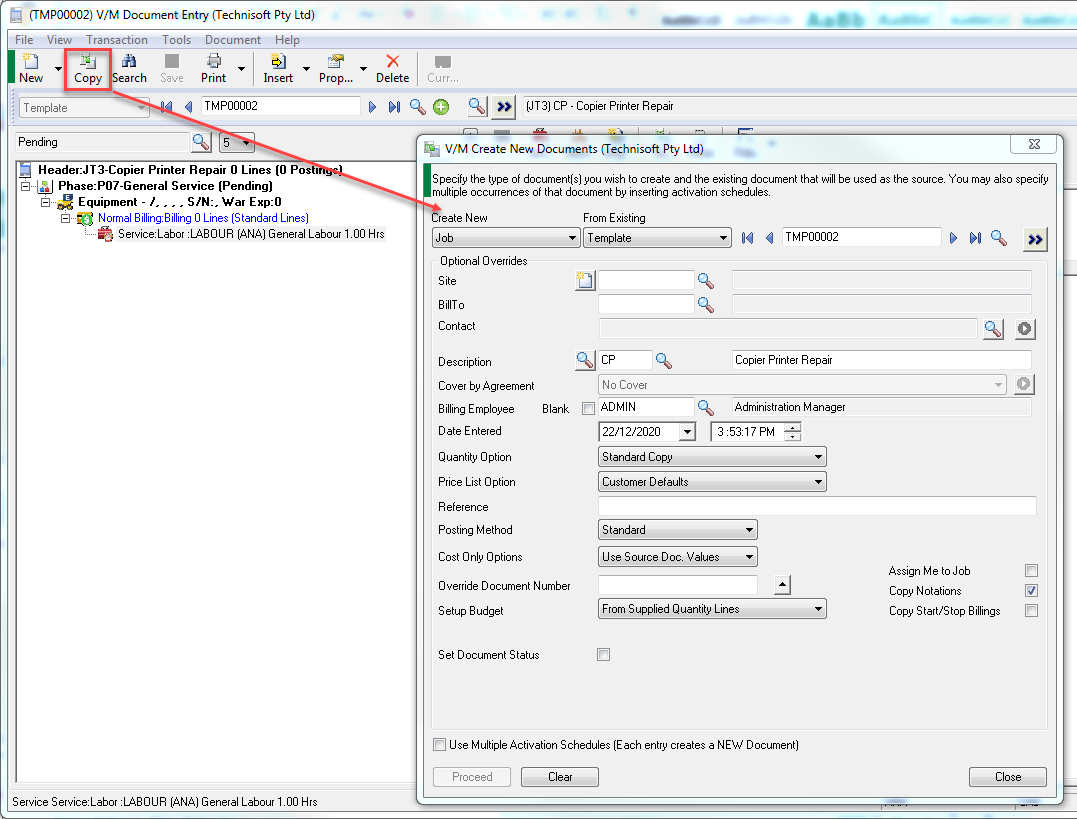
If you click the Copy icon when no Documents are loaded in Document Entry, you will need to specify that the Source Document is a Template and search for the required Template yourself.
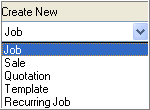
To create a Job, Select Job on the Create New drop-down list.
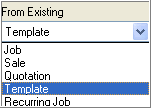
Select Template on the From Existing drop-down list.
Type or select the Template Number using the Finder![]() or record navigation arrows.
or record navigation arrows.
![]()
Click Go ![]() . This will load the Template details.
. This will load the Template details.
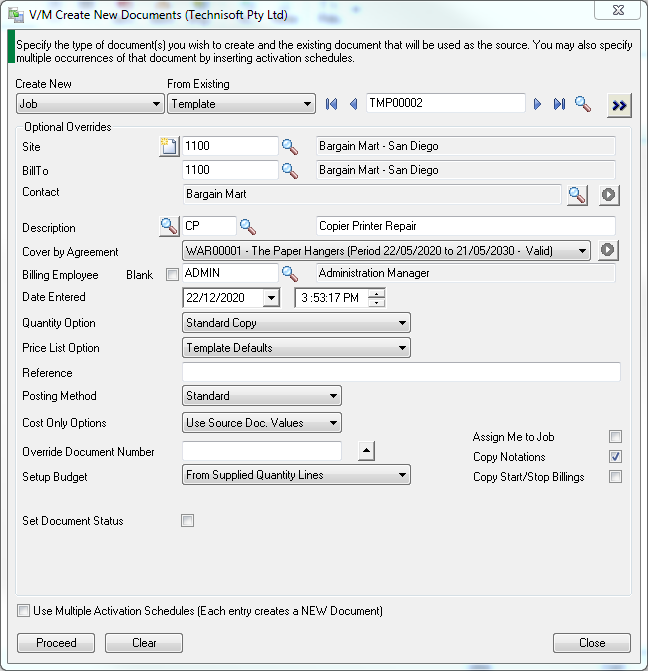
Enter the Site Number and change the other fields as required.
Note:
The Equipment field will only be displayed if the Template contains Equipment lines. If you enter an Equipment Code, all Equipment lines in the resultant Job(s) will have the same Equipment Code. Alternatively, if you leave the Equipment Code blank, you will be able to change each Equipment line to the correct Equipment record after the Job has been created.
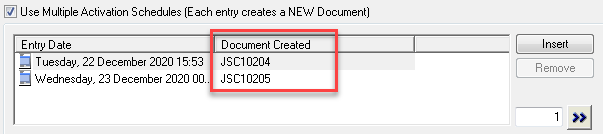
Tick the Use Multiple Activation Schedules check box to create multiple occurrences of the Job. Insert the required Schedule(s).
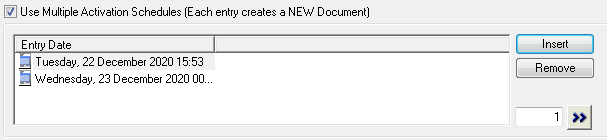
Click [Proceed] to create the new Job(s).
A Warning message will be displayed.
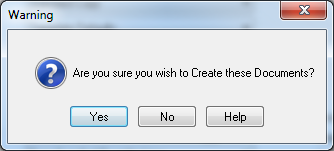
Click [Yes] to continue.
The Job(s) will be created.
A Confirmation message will be displayed.
Click [OK] to continue. The system will return to the Create New Documents window.
Click [Close] to continue. The new Job will be displayed in Document Entry. In the case of multiple Jobs, the first Job will be displayed.
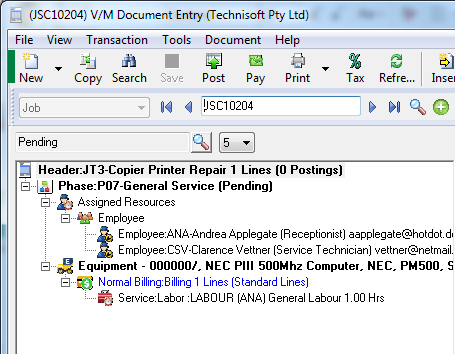
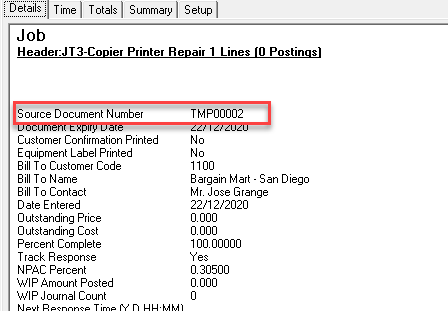
Note that the Source Document Number shows the Template used to create the Job.
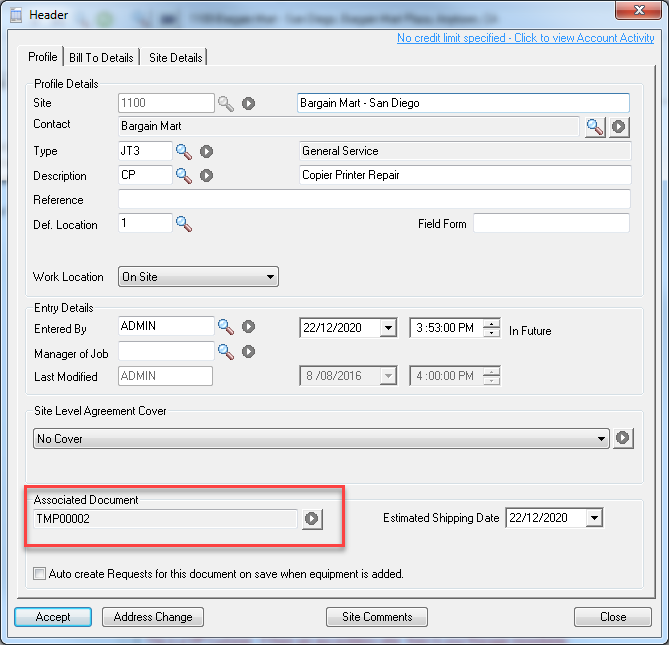
Once a new Job has been created from the Template, view the Job Header. Note that the Associated Document field shows the Template used to create the Job.
Click [Accept].