Historic Jobs

Contents
 »
»  » Historic Job
Service Manager allows you to specify when an aged or completed Job will be archived as a historical Job.
In Company Options » Defaults tab, there is a field named Age Documents after.

A Job will become a Historic Job after the number of days specified in this field after the Job Status is set to Completed.
We recommend that you specify a figure of 7 - 14 days. This will prevent unnecessary Completed Jobs remaining in the current Job pool, which in turn will improve system performance when using Finders![]() , Job Manager, etc.
, Job Manager, etc.
During Day End Processing, Service Manager will examine all Jobs, check the status on all Jobs, and will change the status on all Completed Jobs that are aged beyond the Age Documents after value, to a status of Historic Job. Historic jobs will not be displayed in the current Job pool.
Viewing a Historic Job
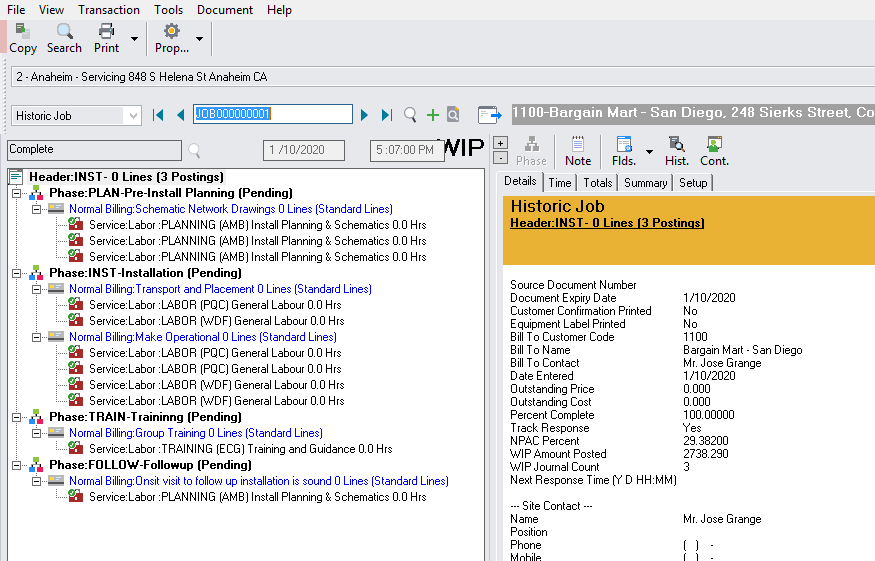
To view a Historic Job, from the Document Entry drop-down list set the Document Type to Historic Job and then use the Finder![]() to search for the required Job.
to search for the required Job.
Note the reduced icon toolbar, as Historic Jobs cannot be modified.
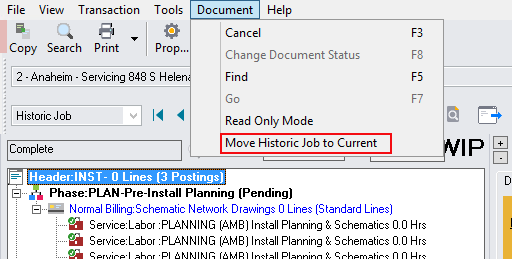
Reactivating Historic Jobs
You may reactivate a Historic Job, for example, when a Cost was not entered against a Job for some reason. The costing can be applied to the Job, posted and processed in order for the balance sheet to reflect the true costing to the job.
To reactivate a Historic Job, click the Document menu and then select Move Historic Job to Current. You must have Post Invoices security to be able to do this.
Service Manager will then prompt for confirmation of this process.
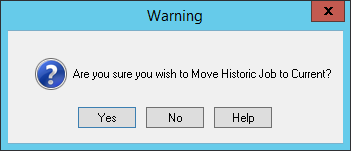
Click [Yes] to continue.
The Select Status window opens where the Job status can be changed.
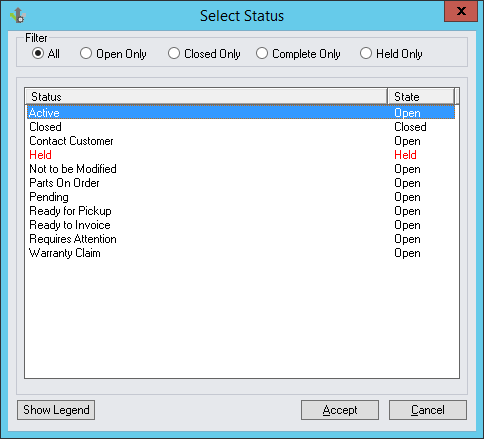
The Job is then reactivated.