Company Options

Contents
 »
»  »
» 
Overview
Once you have activated Service Manager, the next task is to set up the company-wide Service Manager default settings. These are set up in Company Options and G/L Integration. Your Sage 300 Solution Provider would normally perform this setup.
In Company Options you set up company contact information, document defaults, processing functions, commission settings, numbering conventions, tracking options for financial distribution statistics, graphic file locations, custom statuses and business hours.
In G/L Integration, you set up all company-wide G/L options. In particular, you need to define the default General Ledger account codes. These will represent the default codes that will be used by Service Manager if not overridden by Job Type or Service Code settings.
When a new Document is created, in the absence of any operator intervention, these default settings will be used.
Company Options can be changed at any time. Any changes made will generally only apply to future transactions.
Rebuild Online Program Language Resource Tables
From the Company Menu option an option to Rebuild Online Program Language Resource Tables exists
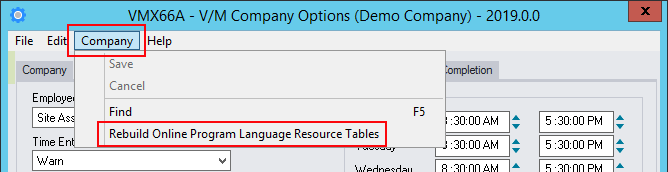
The Resource Tables need to be rebuilt in the following cases:
•as part of the installation process of the Customer Portal, Employee Portal and Field Portal add-ons
•when upgrading an installation of Service Manager with a new build (e.g., release version to Product Update 1) or new version (e.g., 2018 to 2019)
•when Description fields in Company Options are changed
Refer to the relevant Add-On documentation for additional information
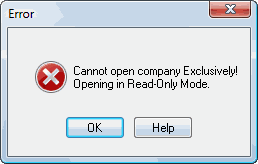
The following Error message will be displayed if you are locked out of edit mode.
Exit all other Service Manager screens before trying again. Other Service Manager users may need to do the same. |
Related Topics
Company tab
The fields in the Company tab store information pertaining to your company and will appear on company reports.
You may also place these fields on user specific reports.
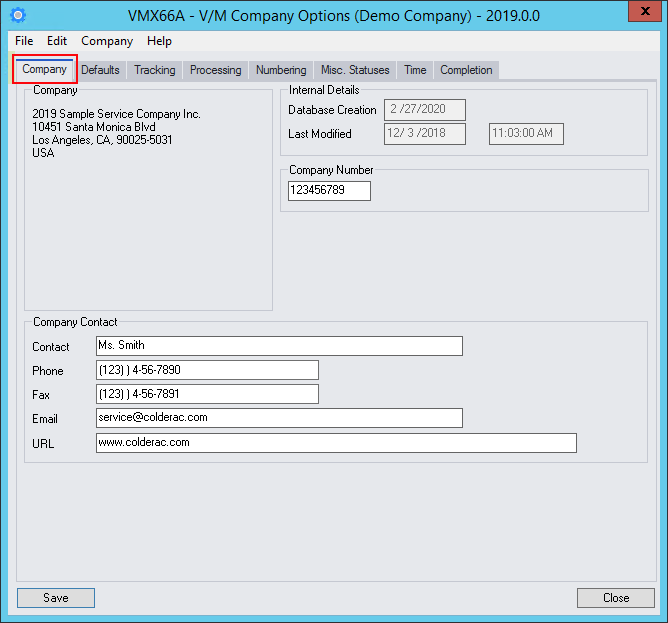
Enter the required information and then click [Save]. Select the Defaults tab.
Company |
The information that appears here is automatically obtained from the Sage 300 Common Services Company Profile. This information cannot be modified directly from Service Manager. It you wish to change this information, select the Common Services window from your desktop and then select Company Profile.
You may need Security clearance to modify this program. |
Internal Details |
|
Database Creation |
This date is created when you activate your Service Manager Company Database. |
Last Modified |
The date and time Company Options were last modified. |
Company Number |
Many Corporation Acts in various countries issue registered Company Numbers to uniquely identify a Company. Store your Company Number in this field. It can be used on reports if required. You can store other information here if the Corporation Acts in your country have different regulations. |
Company Contact |
|
Contact |
Enter information relating to the primary person in charge of your Service Manager system in these fields. You may wish to enter the Company Web URL and Company email address to avoid unnecessary information being distributed to the person defined as the Company Contact. |

Defaults tab
These fields in the Defaults tab retain default values used throughout Service Manager. When a new Document is created, in the absence of any operator intervention, these default settings will be used.
A/R Customer defaults, as opposed to Site Detail information, should be changed from within Accounts Receivable.
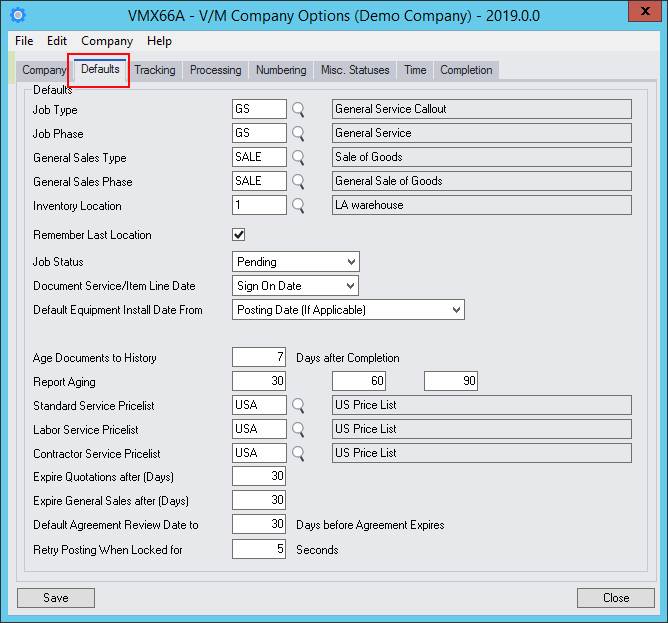
Enter the required information and then click [Save]. Select the Tracking tab.
Enter the default Job Type you wish to appear when creating new Documents. The operator can override the default from within the Document at any time. If you leave this default blank, when creating new documents, the field will be blank and the operator will be required to make an entry. You can also attach default Job Types to Site records. When you specify a Site that has a default Job Type, the Company default you set here will be overridden. |
|
Enter the default Job Type Phase you wish to appear when creating new Documents. The operator can modify or delete the default from within the Document at any time. If you leave this default blank, when creating new documents the field will be blank and the operator will be required to make an entry. If you create default Job Phases within Job Types, they will override the Options default when that Site is specified. |
|
Enter the default General Sales Type you wish to appear when creating General Sale Documents. The operator can override the default from within the Document at any time. If you leave this default blank, when creating new documents the field will be blank and the operator will be required to make an entry. There are no overrides available at Site Level. |
|
Enter the default General Sales Phase you wish to appear when creating new General Sales Type Documents. The operator can modify or delete the default from within the Document at any time. If you leave this default blank, when creating new documents the field will be blank and the operator will be required to make an entry. If you create default General Sales Phases within General Sales Types, they will override the Options default when that Site is specified. |
|
The Location you specify here will be used as a default during all transaction entries for Inventory Items. Type in a Location code or use the Finder |
|
Check Box - If you tick this check box, the system will remember the Location code during each Document Entry session to enable quicker data entry. |
|
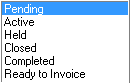
Select a default Job Status from the drop-down list. This Status will default when creating new Documents, but can be modified by the operator at any time.
|
|
This is used to define the default transaction Process Date when entering Services or Items at detail line level from within Document Entry. |
|
Default Equipment Install Date From |
This is used to define the default Equipment Installation Date when a new Equipment record is created. |
Once a Job/Document has been completed, the next time you run a Day End process, it will compare the completed date with Day End Process Date. If the period (in days), is greater than or equal to the Age Jobs period, the Job will be moved to History. |
|
Report Aging |
Once a Job/Document has been completed, the next time you run a Day End process, it will compare the completed date with Day End Process Date. If the period (in days), is greater than or equal to the Age Jobs period, the Job will be moved to History. |
This Inventory Control Price list will be default to all new Standard Services during setup. Each Service must have a valid price list specified for base rate fall back purposes. |
|
This Inventory Control Price list will be defaulted to all new Labor Services during setup. Each Service must have a valid price list specified for base rate fall back purposes. |
|
This Inventory Control Price list will be defaulted to all new Subcontractor Services during setup. Each Service must have a valid price list specified for base rate fall back purposes. |
|
Specify the number of days you wish to add to the entry date of a new Quotation to apply to the document expiry date. Expired Quotations may be purged from the system via the Clear History program. You may modify the individual expiry date for each Quotation at any time. All expired Quotations are still fully operable even after they have expired. |
|
Specify the number of days you wish to add to the entry date of a new Sales Order to apply to the document expiry date. Expired Sales Orders may be purged from the system via the Clear History program. You may modify the individual expiry date for each Sales Order at any time. All expired Sales Orders are still fully operable even after they have expired. |
|
Default Agreement Review date to nn Days before Agreement Expires |
Set the default Agreement Review Date to nn days before the Agreement expires. Refer Creating a Site Agreement. |
Retry Posting When Locked for nn Seconds |
During posting the system will hold a lock on the system so that only one user at a time can post. If the system can't hold a lock due to another user posting, it will retry every nn seconds. After nn seconds a message will inform the user that posting couldn't be performed. |

Tracking tab
This section allows you to specify the tracking features and functions as required.
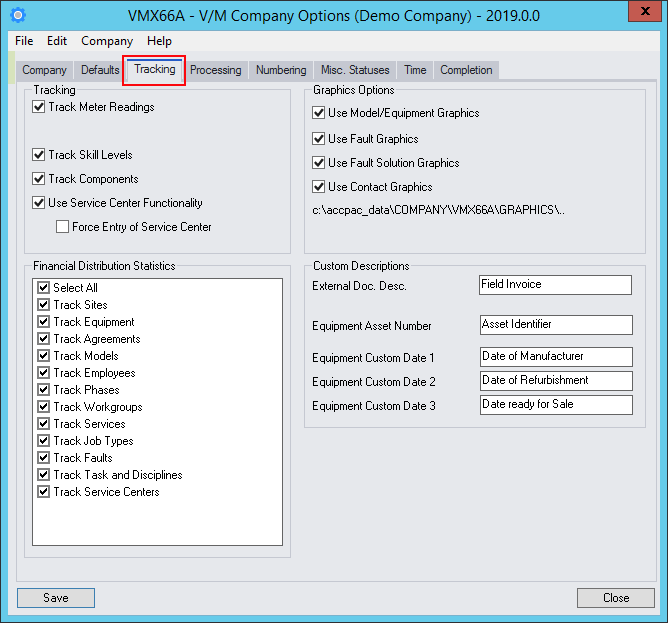
Enter the required information and then click [Save]. Select the Processing tab.
Tracking |
|
Track Meter Readings |
Check Box - Tick this check box to enable Meter Processing. Clear this check box to disable Meter Processing. |
Track Skill Levels |
Check Box - Tick this check box to enable the Employee Skills facility of Service Manager. If you do not require Employee Skill tracking, clear this check box. |
Track Components |
Check Box - Tick this check box to enable the Equipment Component functionality of Service Manager. If ticked, you will be able to create Component Equipment for Master Equipment to one level. Component Equipment may not be a master to other Component Equipment. The facility gives you the ability to define parent/child relationships between Models and therefore automatically create Component Equipment when you create a Master Equipment record. |
This check box is only available if you have the optional Service Manager Service Center Add-On installed. Check Box - Tick this check box to enable Service Center functionality. Multiple Service Centers can be defined in the Service Center Setup program. Tick the Force Entry of Service Center check box if a Service Center must be selected for a document. |
|
Graphics Options |
Ticking the Model/Equipment, Faults, Fault Solutions, or Contacts check boxes allows you to display graphics for these records in various locations throughout Service Manager. |
Financial Distribution Statistics |
Distribution statistics can be tracked on Sites, Equipment, Agreements, Models, Employees, Phases, Work Groups, Services, Job Types, Faults, Service Centers (if the Service Manager Service Center Add-On is installed), and Tasks and Disciplines by ticking any combination of check boxes. Financial Distribution Statistics are statistics obtained from revenue and cost billing transactions (i.e., calculated from Standard Services, Labor Services, Sub Contractor Services or Items), processed on Invoices, Credit Notes or Cost Only documents. Using source data from these transactions, further financial statistics such as Gross Profit, Totals and the Proportion of Total Business are also calculated from this common base across all categories selected. The Proportion of Total Business statistics can be calculated by setting the base to Document Count, Sales, Costs or Gross Profit. Financial Distribution Statistics are Marketing based and should not be confused with individual record specific statistics, which are generally process related. |
External Doc. Desc. (External Document Description) |
Enter the description you wish to appear for referencing external documents to the current document. e.g., Field Forms |
Equipment Asset Number |
Enter the caption description you wish to display for the Asset Number field in the Equipment record. If this description is left blank the Equipment record will show the label as Asset Number. |
Equipment Custom Date 1, 2, 3 |
Enter the caption descriptions for up to three custom date fields which can be displayed in the Equipment record. If the caption is left blank then the relevant date field will not be shown in the Equipment record. |
Processing tab
This section allows you to specify the processing features and functions as required. These fields allow you to set tailoring flags that control the way Service Manager functions.
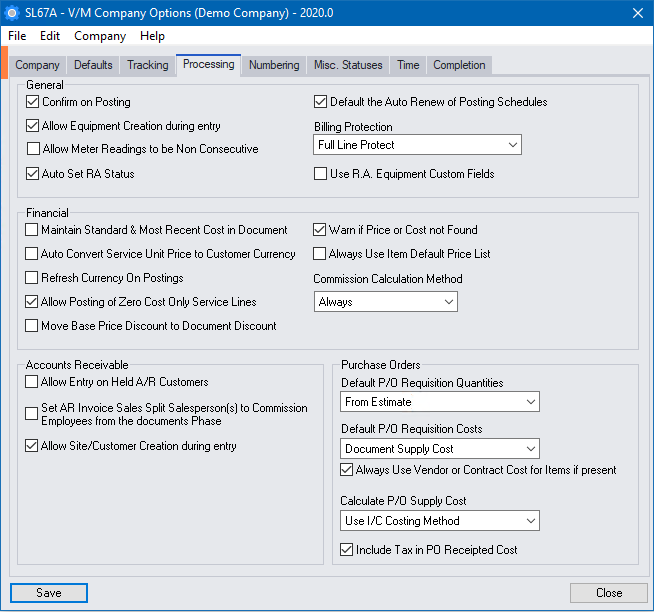
Enter the required information and then click [Save]. Select the Numbering tab.
General |
|
Confirm on Posting |
Check Box - Tick this check box to force a Confirmation before posting will continue when any of the Post buttons are clicked. |
Allow Equipment Creation during Entry |
Check Box - Tick this check box to allow the operator to create a new Model record during entry of Equipment. |
Allow Meter Readings to be Non Consecutive |
Check Box - Tick this check box if non consecutive Meter Readings are allowed. |
Check Box - Tick this check box for Return Authorization (RA) Status to change automatically depending on the situation of the RA. This may not always be advisable, especially if you stray away from "normal" procedures. Clear this check box to stop the automatic change of the RA Status. Refer to the Return Authorizations section in the Service Manager User Guide for additional information about RA Status. |
|
Default the Auto Renew of Posting Schedules |
Check Box - Tick this check box to create new schedule entries automatically at the expiry of an existing schedule, based on the last posted schedule. Refer Auto Renewing Recurring Billing or Recurring Jobs. |
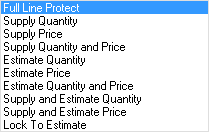
This facility allows you to protect Document Service and Item Billing lines. You have the option to select to protect either the entire line or key elements only. This feature is tied to the Sage 300 security settings. A user must therefore have that security level to be able to unprotect the entire Document so changes can be made. New lines and notations can be maintained at any time however new lines become protected once the Document is saved. Refer to the Billing Protection section in the Service Manager User Guide for additional information about setting up Billing Protection in Service Manager. |
|
Check Box - If you tick this check box, when adding an Equipment record to a Return Authorization (RA) and modifying the Equipment Custom Fields, those fields will be saved in the RA Equipment detail line, but will not update the master Equipment Custom Fields for that Equipment record. This feature provides the ability to enter Equipment onto an RA and maintain specific values in the Custom Fields for that Equipment without updating the master Custom Fields for the equipment record in question. |
|
Financial |
|
Check Box - Tick this check box to retain the Standard Cost and Most Recent Cost of Items in Documents, and retain that Cost after Day End Processing. This will only apply to Items that use a Standard Cost or Most Recent Cost Costing Method. If this check box is cleared, the Average Cost is stored as the posted value on Jobs and Invoices. |
|
Auto convert Service Unit Price to Customer Currency |
Auto convert Service unit price to Customer currency will check the currency tables in a multicurrency system and convert a price "on the fly" using the latest rate for that currency (if one exists) regardless of whether a rate has been set up in the Price List tables for that Service. This check box is only available and visible if you are using multicurrency accounting. This option can be overridden by security access granted. |
Check Box - Tick this check box to allow refresh of the currency rate when posting an invoice. This option is only available and visible if using multicurrency accounting. This is particularly useful for updating the currency rate used to process recurring invoices in a Multi Currency Database. Each time a new invoice is due for billing, this option will cause the specified rate type (usually today’s Spot Rate for the current Sage 300 Session) to be used. That can be relevant for Agreement postings or Recurring Invoice postings. Remember creating a Currency Revaluation Batch in the GL or AR may still update values in those modules but will not affect values in Service Manager. |
|
Allow Posting of Zero Cost Only Service Lines |
Check Box - Tick this check box to allow posting of Cost Only Service lines with a zero total. |
Check Box - Tick this check box to apply the price list discount value determined from the pricing lookup as a direct discount in the document's discount field rather than a net discounted value (base price reduction) in the price field. This option offers better visibility of the discount value being provided and discounts will be posted to the Discount account |
|
Warn if Price or Cost not Found |
Check Box - Tick this check box to raise a warning if the Price or Cost cannot be found. |
Always use Item Default Price List |
Check Box - Tick this check box to default the Price List on the Item to the Item Default Price List. |
Never - Disable commission tracking company-wide. Always - Calculate commission regardless of profitability. On Min NPAC% - (On Minimum Net Profit After Commission (NPAC) %) - Service Manager provides a method of calculating commission whereby the Job/Document must have a profit after paying commission of at least the specified %. This prevents the payment of commission on non-profitable Jobs. For example, if you set the NPAC rate to 10% and calculate commission, commission will only be applied to the Document if the profitability after applying the calculated commission is greater than or equal to 10%. Refer to the Employee Commissions section in the Service Manager User Guide for additional information about the commission tracking process in Service Manager. |
|
Accounts Receivable |
|
Allow Entry on Held A/R Customers |
Check Box - Tick this check box to display a Warning message when creating a new Document or modifying an existing Document if the Customer is On Hold. The flag ties closely in with the Security Option in Administrative Services for allowing Posting if a Customer is On Hold |
Set AR Invoice Sales Split Salesperson(s) to Commission Employees from the Document's Phase |
Check Box - Tick this check box to transfer the Commission Employees allocated in the Document's Phase to the AR Invoice Salesperson. The Employee Code and AR Salesperson Code must be the same |
Allow Site/Customer Creation |
Check Box - Tick this check box to allow the operator to create a new Customer record in A/R when creating any type of Document. |
Purchase Orders The following fields will only be visible if the Service Manager Purchase Orders Add-On has been installed |
|
States how the default quantity for Purchase Requisitions is derived. Both Document Entry and the Service Manager Purchase Orders Add-On » Requisition Manager check this field and will default the PO quantity from the document line depending on the setting. |
|
States how the default cost for Purchase Requisitions is derived. |
|
The above three settings will be overridden and the PO will use the Vendor or Contract Cost for Items if available. |
|
Calculate P/O Supply Cost |
States how the Supply Cost is calculated. |
Include Tax in PO Receipted Cost |
Include Tax in PO Receipted Cost will use the Purchase Orders cost inclusive of tax when supplying a receipt to a detail line that has been ordered from within Service Manager using the Service Manager Purchase Orders Add-On. This can be useful where tax is included in the landed cost of an item but should not be used where VAT or GST tax regimes are used. |

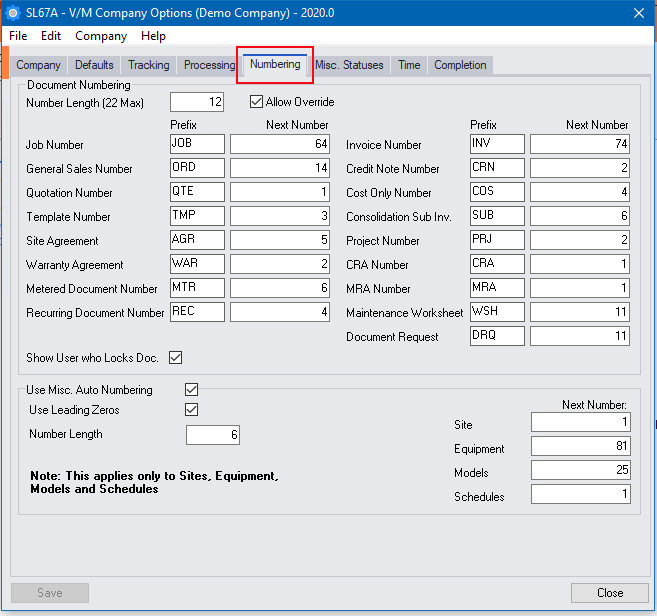
Numbering tab
This section allows you to set and standardize your numbering convention throughout Service Manager.
Enter the required information and then click [Save]. Select the Misc. Statuses tab.
Document Numbering |
|
Number Length |
Documents are identified by a combined Prefix and Number. You must set the length of the Document Number, as it is called. This must be no more than 22 characters. The actual Number part of the Document identifier will be padded with zeros. |
On Document creation Users can manually enter the Document Number |
|
Prefix |
The Prefix is alphanumeric and has a maximum length of six characters. |
Next Number |
Next Number relates to the next number that will be used when a Document of that type is created. After the Document is created, the Next Number will increment automatically. |
Display the User Code of the person who is causing a Document to be locked. |
|
Use Misc. Auto Numbering |
Check Box - Miscellaneous Auto Numbering relates to the codes allocated to new Sites, Equipment, Models, and Schedules. If you do not require Miscellaneous Auto Numbering, i.e., numbers will be allocated manually, then clear this check box. |
Use Leading Zeros |
Check Box - The codes allocated can be set to use leading zeros |
Number Length |
Specify a maximum length up to 12 characters. |
Next Number |
Next Number relates to the next number that will be used when a code of that type is created. After the code is created, the Next Number will increment automatically. The Next Number operates the same as for new Documents. |
Misc. Statuses
Descriptions allow you to create user definable Statuses that will be used throughout your Service Manager System.
Note:
If you modify a Description, the change will be inherited system wide. That is, all existing Documents will reflect the change.
Enter the required information and then click [Save]. Select the Time tab.
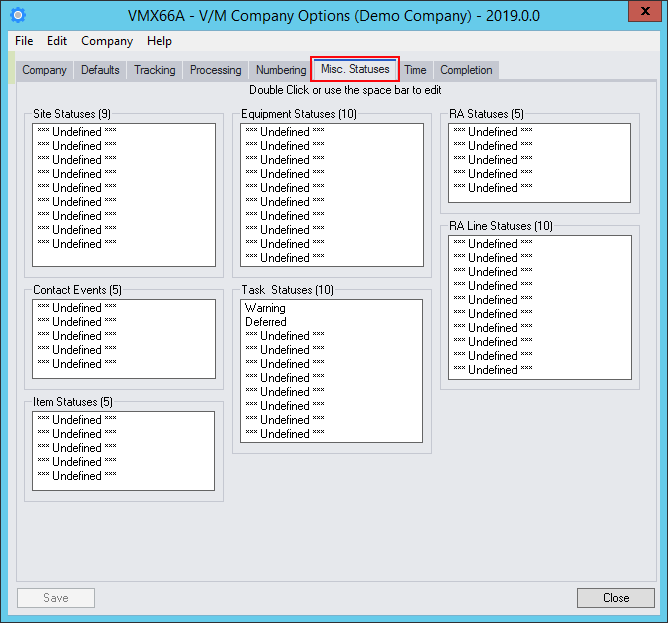
There are 9 user definable Site Statuses available. Click on a field to modify it. Site Statuses are set when creating or modifying a Site and may be used to classify the Site prior to it becoming a valid Customer Site. Once a Site becomes a valid Customer, we recommend that you classify the Site as such. Refer Site Setup for additional information. |
|
There are 10 user definable Equipment Statuses available. Click on a field to modify it. The Statuses you create will become available during Document Entry. |
|
There are 5 user definable Statuses available. Click on a field to modify it. The Statutes you create become available when you add or modify an RA record. |
|
There are 10 user definable RA Line Statuses available. Click on a field to modify it. |
|
There are 5 user definable Contact Events available. Click on a field to modify it. The Contact Events you create become available when you add or modify Site Contacts. Contact Events are used to sort information you wish to send to Contacts. |
|
There are 3 un-configurable task statuses (Pending, In Progress, Complete) and 10 additional user definable Task Statuses available. Click on a field to modify it. Refer Task Setup for additional information. |
|
There are 5 user definable Item Statuses available. The Statuses you create will become available during Document Entry. |
Time tab
Enter the normal business hours for the company on the Time tab.
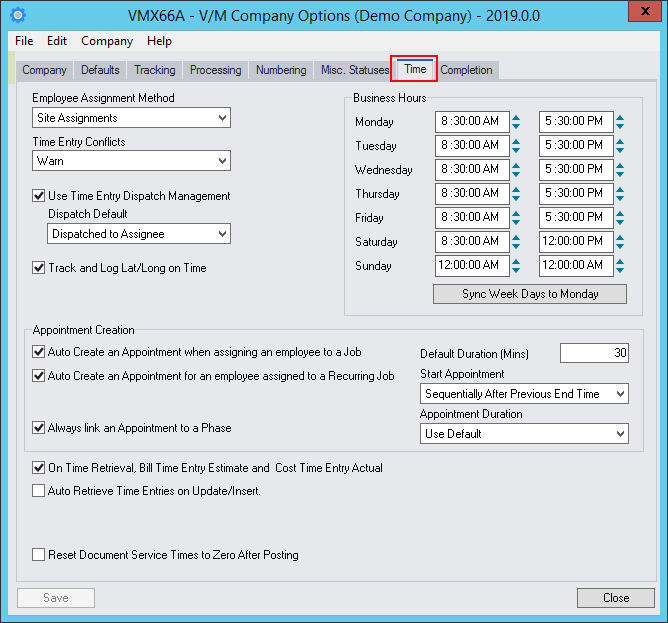
Employee Assignment Method |
The Employee Assignment Method determines how Employees are automatically assigned to Jobs. If set to Site Assignments it will use the Site Assignments as set in the Site Master file for a customer. This can be very useful if you wish to identify who usually works at a Site, but it can equally be cumbersome if it is not possible to send those Employees if there are scheduled elsewhere, so setting this field to Manual Assignments can often be advantageous as assignments can be quickly added to Jobs using other tools.
Select the mode of Assigning Employees to a Job. Choose between Manual, Auto load from Site Assignments, or Auto load from Phase Work Group Assignments. |
Time entry conflicts can have various levels of tolerance. The system can be set to Prohibit, Warn or Ignore Time Entries that conflict with each other. |
|
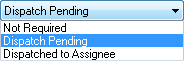
Use Time Entry Dispatch Management |
Dispatch management can be turned on or off. When a Time Entry is entered the default Dispatch State can be set.
|
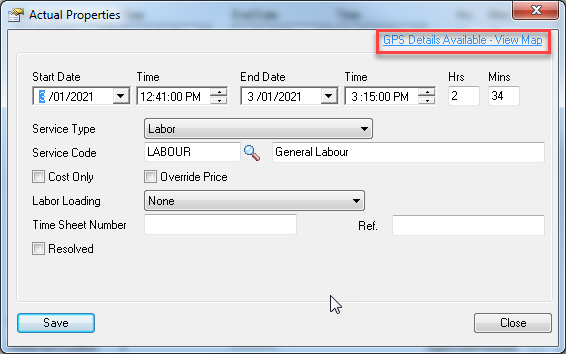
The Latitude and Longitude coordinates can be captured when Time Entry recordings are started or stopped using Field Portal. Actual Properties display a message "GPS Details Available-View Map" and clicking this link will open Google Maps with a pinpoint on the location.
|
|
Enter the normal Business Trading hours. A warning will alert the operator if the requested time falls outside normal trading hours. You can override this function and schedule a Job etc., outside business hours at any time. Click [Sync Week Days to Monday] to set all weekdays the same as Monday. |
|
Appointment Creation |
|
Auto. Create an Appointment when assigning an employee to a Job |
Check box - Tick the check box to automatically create an Appointment (Time Entry) when an Employee is assigned to a Job.
|
Auto. Create an Appointment for an employee assigned to a Recurring Job |
Check box - Tick the check box to automatically create an Appointment (Time Entry) for Recurring Job assignments when the Recurring Job becomes due and is created. |
Always link an Appointment to a Phase |
Check box - Tick the check box to keep the Phase and Appointment linked. If the Phase is moved the linked Appointment moves at the same rate of movement. |
Default Duration (Mins) |
The default duration of the automatically created Appointment can be set in minutes. |
Start Appointment |
The automatically created Appointment Start Date/Time can be set to start: At Phase Start Time - the same time as the Phase's start time At Start of Business Hours - the opening time specified in 'Business Hours' Sequentially After Previous End Time - 5 minutes after the Resources last appointment on the appointment date. |
Appointment Duration |
Use Default - create the Appointment with the defaulted duration (Mins) Phase Duration - create the Appointment with the same duration as the Phase duration |
On Time Retrieval, Bill Time Entry Estimate and Cost Time Entry Actual |
Check box -Tick to bill the time entry Estimate quantity (effectively the budgeted quantity), and cost the time entry Actual quantity when retrieving a time entry to the document. |
Time Entries can be Automatically retrieved to a new Billing Group when the Time Entry has been inserted or edited. |
|
Reset Document Service Times to Zero After Posting |
Check box - Tick this check box to reset Service times to Zero once the document has been posted |
Completion tab
This section allows you to validate how a 'Complete' status can be set for a Document.
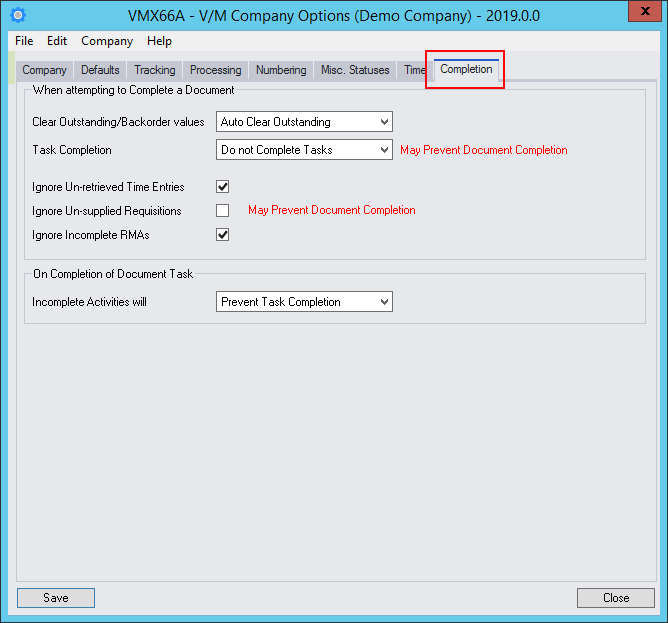
When Attempting to Complete a Document |
|
Clear Outstanding/Backorder values |
Do not Clear Outstanding - leave outstanding backorder quantities on the document and prevent the document from being set to a “Complete” status. Auto Clear Outstanding - clear any outstanding backorder quantities in the Document automatically when the “Complete” status is selected. There may be other reasons a “Complete” status cannot be set. Those reasons will be reported so action can be taken to resolve them. |
Task Completion |
Do not Complete Tasks - leave the Task incomplete until manually set to a “Complete” status. This may prevent the document from being set to a “Complete” status. Auto Complete Tasks - set the Task/s status to “Complete” in the document automatically. That may allow a “Complete” status depending on other options. |
Ignore Un-retrieved Time Entries |
Check box - tick the check box to ignore time entries so that a Document can be set to a Complete status. If this check box is not selected then the job will not be able to be set to a Complete status until all Time Entries with actual time are retrieved to the job. |
Ignore Un-supplied Requisitions |
Check box - tick the check box to ignore un-supplied Requisitions so that a Document can be set to a Complete status. |
Ignore Incomplete RMAs |
Check box - tick the check box to ignore incomplete RMAs so that a Document can be set to a Complete status.
If this check box is not selected then it may prevent the document from Completing until the RMA is completed. |
On Completion of Document Task This option generally affects the state Activites are left in when the Task is set to a Complete status. |
|
Incomplete Activities will |
Remain Incomplete will leave incomplete Activities in a Task in their current state when the Task is completed. i.e. incomplete Activities will remain incomplete even though the Task has been set to “Complete”. Prevent Task Completion will ensure a Task cannot be set to “Complete” if it has incomplete Activities. Note this option may also prevent the document from completing. Auto Complete will automatically complete all incomplete Activities in a Task when the Task status is set to “Complete”. |
Enter the required information and then click [Save] and [Close].