Transferring Equipment

Contents
Scenario
A Manufacturer sells goods to a Dealer. The Dealer sells to an End User.
The End User has a warranty claim and sends the Equipment back to the Manufacturer. The Manufacturer opens the Search form and scans the Equipment Serial Number to find that the Equipment belongs to the Dealer. The operator can now click [Transfer] and create the new End User Site and transfer the Equipment to that Site in one step. Remember too that the Equipment History has a full audit of the transfer from and to.
Solution
Equipment can be transferred to another Site very easily. There are several ways to do this.
1. Document Entry - Search
•Open Document Entry.
•Click ![]() . The Document Entry window must be blank when you do this. The Search window will be displayed.
. The Document Entry window must be blank when you do this. The Search window will be displayed.
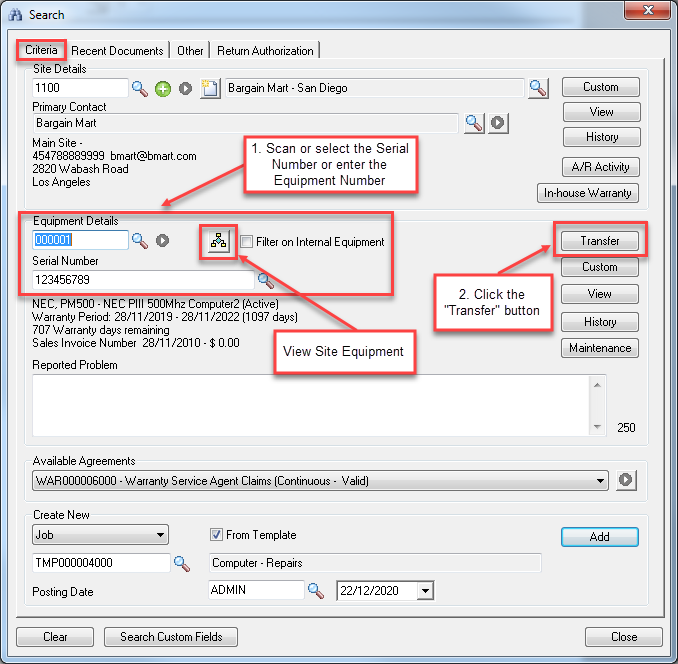
•Click the Criteria tab.
•Scan or type the Equipment Serial Number in the Serial Number field, or type or select the Equipment Number.
•Click [Transfer]. The Transfer Equipment window will be displayed.
![]()
•At this point you can transfer the Equipment to an existing Site or you can create a new Site and then transfer the Equipment to the new Site.
Type or select the Site to transfer the Equipment to in the Transfer to Site field. To create a new Site and then transfer the Equipment to it, click the Quick Create icon ![]() . The Quick Create window will be displayed. Sites are created in the Site Profile tab, however you must first specify the Customer Code in the A/R Profile tab.
. The Quick Create window will be displayed. Sites are created in the Site Profile tab, however you must first specify the Customer Code in the A/R Profile tab.
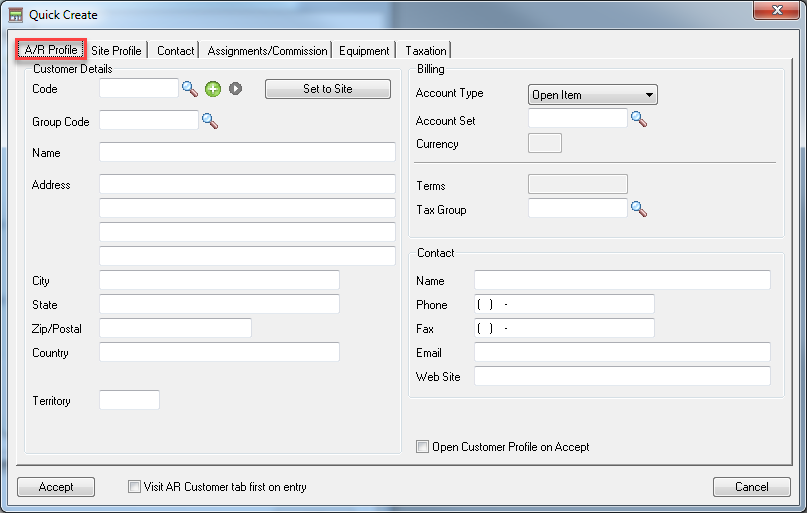
Complete this form and then click [Accept] to return to the Transfer Equipment window. The new Site Number will be automatically entered into the Transfer to Site field.
![]()
•Tick the Return to Inventory check box to return the Equipment to Inventory. This will be done on the I/C Shipments window which will be displayed.
•Click [Transfer]. This will move the Equipment to the specified Site. The Site Details on the Search window will change to reflect the new location of the Equipment.
![]()
Note:
A warning will be shown when you transfer equipment to another site if the equipment was listed with specific cover on an Agreement for the original site. If there are any components, you may receive warnings for these equipment as well if they were also on an Agreement. The equipment will be disassociated from the Agreement when transferred.
![]()
2. Document Entry - From a Phase
•Open Document Entry.
•Open a Job.
•Right-click on a Phase and select Transfer Equipment. The Transfer Equipment window will be displayed.
![]()
•You can transfer Equipment from another Site to the current Job/Site.
•Type or select the Site to transfer the Equipment from in the Transfer From Site field.
•Type or select the Equipment to transfer in the Equipment field.
•Tick the Add Equipment to Job check box to add the Equipment to the selected Phase.
•Click [Transfer]. This will move the Equipment to the current Site.
3. Document Entry - From Equipment
•You can also transfer Equipment from the current Job/Site to another Site.
•Right-click on the Equipment and select Transfer Equipment. The Transfer Equipment window will be displayed.
![]()
•Select Transfer Equipment to a Specified Site from this Job/Site.
•Type or select the Site to transfer the Equipment to in the Transfer to Site field or to create a new Site and then transfer the Equipment to it, click the Quick Create icon ![]() to create the new Site. The new Site Number will be automatically entered into the Transfer to Site field.
to create the new Site. The new Site Number will be automatically entered into the Transfer to Site field.
•Tick the Return to Inventory check box to return the Equipment to Inventory. This will be done on the I/C Shipments window which will be displayed.
•Click [Transfer]. This will move the Equipment to the specified Site. It will not move the Equipment from the current Job.
4. Equipment Setup
•Go to V/M Setup » V/M Equipment » Equipment.
![]()
•Select the Equipment to be transferred.
•Change the Site Code to the new Site.
•Press Tab. A Warning message will be displayed.
•Click [Yes] to continue.
•Click [Save].
•You can also do this in Document Entry by double-clicking the Equipment node.
From the Equipment tree you can quickly transfer multiple Equipment to different Sites.
•Display the Equipment tree. This can be accessed from a number of screens by clicking [Equipment] or the View Site Equipment icon ![]() .
.
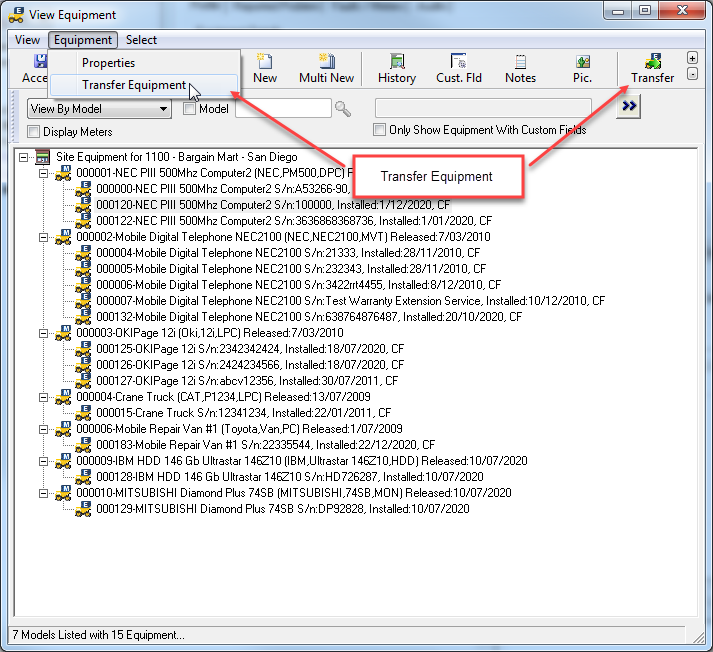
•Select the node that contains the Equipment to transfer.
•Select Equipment » Transfer Equipment or click ![]() . A Warning message will be displayed. Click [Yes] to continue.
. A Warning message will be displayed. Click [Yes] to continue.
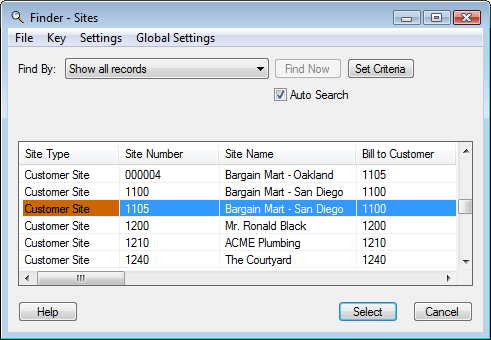
•From the Site Finder, select the Site to transfer the Equipment to.
•The Transfer Equipment window will be displayed.
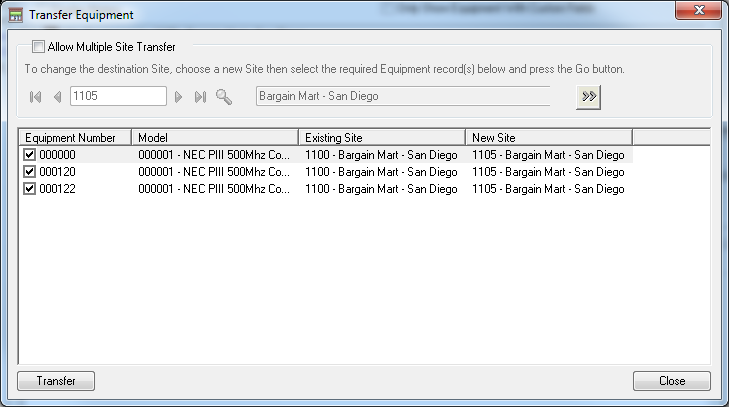
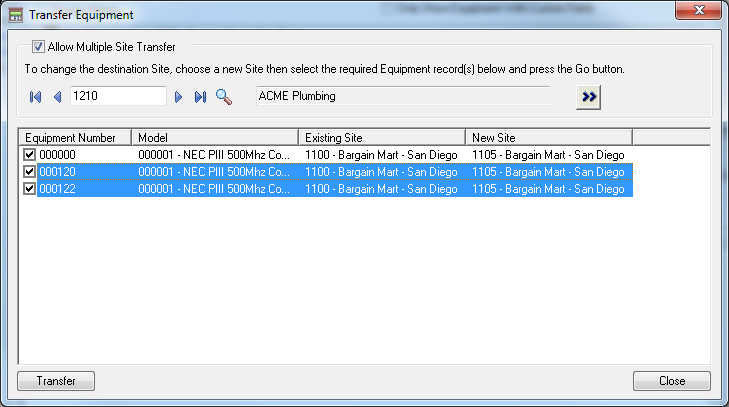
•It is possible to transfer any of the Equipment listed to a single Site (the one you selected from the Site finder) or you can transfer some Equipment to one Site and some to another. To do the latter: tick the Allow Multiple Site Transfer check box; change the destination Site; select the Equipment records to transfer to that Site and then click ![]() .
.
An example is shown below where Equipment 000120 and 000122 are to be transferred to Site 1210.
A Warning message will be displayed. Click [Yes] to continue. Note that the New Site for Equipment 000120 and 000122 has changed to 1210.
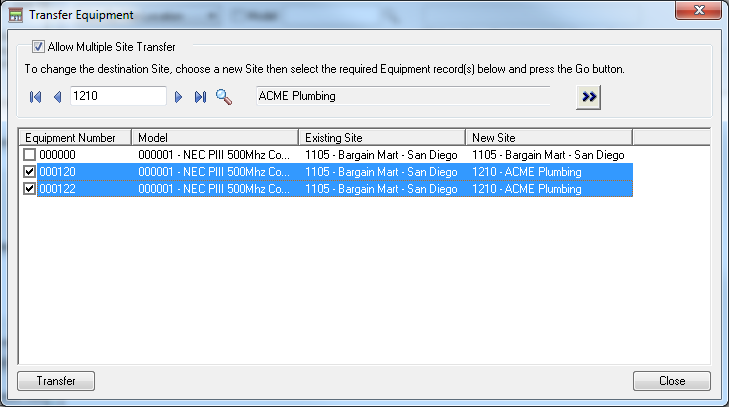
Clear the check box of each Equipment that is not to be transferred.
Click [Transfer]. Each Equipment that is ticked will be transferred from the Existing Site to the New Site.