Job Details Tab

Contents
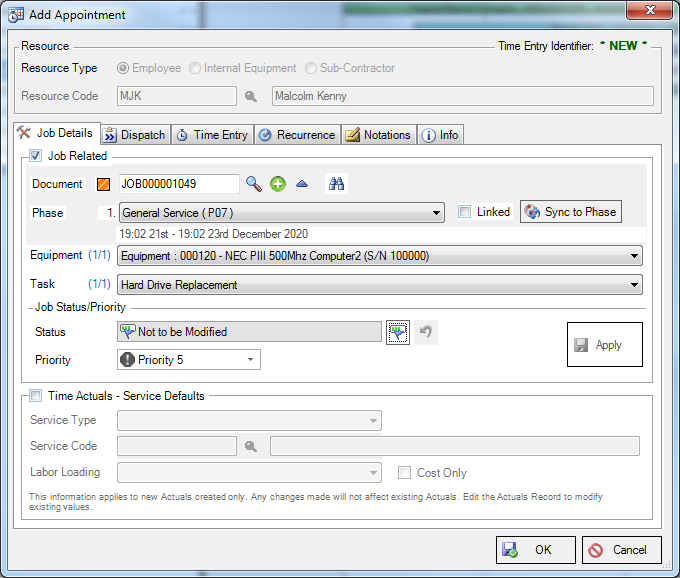
The Job Details Tab consists of a Job Related group and a Time Actuals - Service Defaults group.
If in Calendar View there is no pre-selection of a job available under the Job Related group as this feature is only available while working in the Job List View with a Job currently selected.
Step 1. Apply the Appointment to a Job
A document will need to be found or created to post the Appointment to.
![]() The Search button will launch the Finder Window where an existing document can be chosen.
The Search button will launch the Finder Window where an existing document can be chosen.
![]() The New button will launch the Document Entry program in Add mode where a new document can be created for a Site and have the Job Type and its Phases specified.
The New button will launch the Document Entry program in Add mode where a new document can be created for a Site and have the Job Type and its Phases specified.
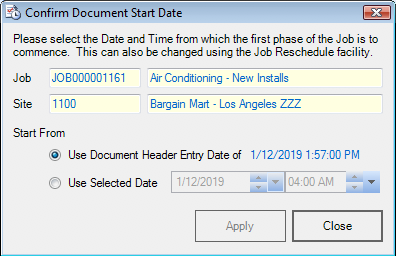
Creating a New Document - When creating a Document in Document Entry, care must be taken when editing the Entry Details within the Header's Profile tab as the first phase loaded will begin on the date and time specified in the Entry Details group, which is the login date and time by default.
Track Response must be ticked when creating a Document in Document Entry otherwise the job will not appear in Advanced Scheduling. If there is no scheduling on a job then there is no need to show it in Advanced Scheduling and Track Response is not required to be ticked.
Once the Document has been created an Align Job Time warning box will appear confirming the date and time the job is to start, based on what was entered into the Entry Details group. If Apply is selected it will align the phases to the job start date.
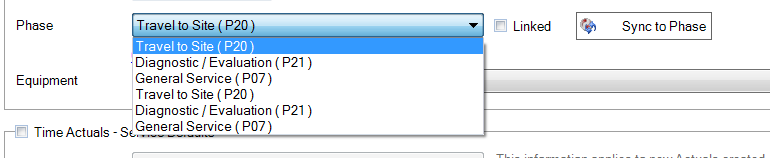
Step 2. Select the Phase
The Phase desired to be allocated to the appointment can be chosen from the drop down list and there is an option to sync the Appointment to that phase. Syncing to Phase will use the timing of the selected phase as the timing of this new Appointment. Timing of Appointments is maintained in the Estimates group of the Time Entry tab.
Step 3. Choose Equipment
The Appointment can be linked to the chosen Job's Equipment by selecting from the drop down list.

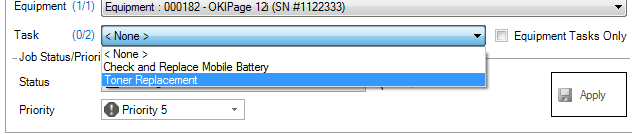
Step 4. Select a Task
The Appointment can be associated with either a Task or Billing Group for selected Equipment or Phase if desired.
Step 4. Determine Job Status and Priority
Select the appropriate Status for the Job by using the selector icon.
Click on Show Legend to display the Status Settings for the selected Status.
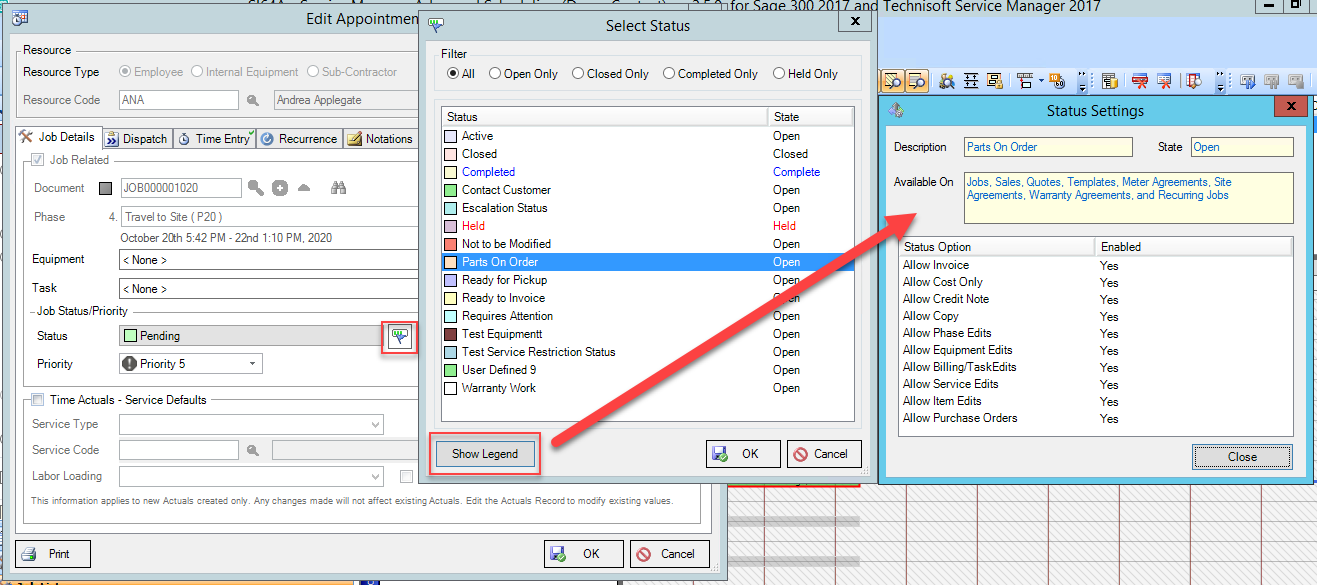
Select Priority for the Job by using the drop down arrow.
Select Apply to save changes to the Document.
Step 5. Input Actuals default information
The Time Actuals - Service Defaults group displays the defaults entered in the Employees Set-Up program. Even if the Check box is not ticked the defaults will show. Time Actuals can be overridden when the check box is ticked.