Notation List

Contents
Job Header and Equipment Notes
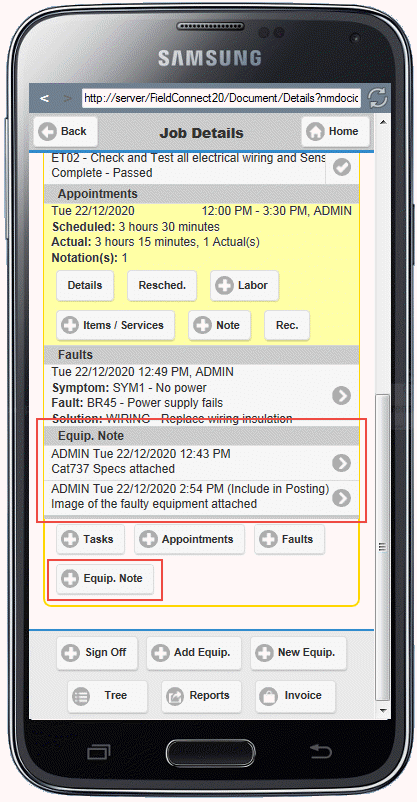
The Job Details screen shows Notations for Job Header and Equipment details in list format similar to the image below. It shows:
•Who inserted the notation
•The date and time
•If it will be included in posting
•The first notation line
Equipment Master Record and Model Record notes will also appear in the Equipment Details section if the option has been enabled from the Configuration utility.
Clicking or tapping an existing Notation will open the Edit Notation screen where information can be viewed or edited.
To add a new Notation select the + Job Notation button within the Job Header or the + Notations button within the Equipment record of the Job Details Screen to open the Add Notation screen.
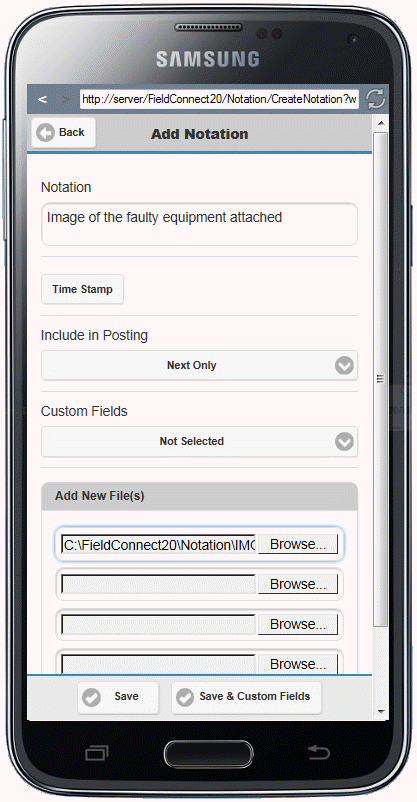
Within the Add Notation screen the User can:
•Enter the text for the notation
•Select options for Posting - Never, Next Only or Always
•Upload a local file from the device if Upload had been configured. Most modern phones also let the user take a picture and upload it in one operation.
The Timestamp can be automatically inserted to new Notations by enabling the New Notation Auto Timestamp check box in the Field Portal Configuration tool.
Selecting Save on the footer will Save the Notation and reload the Job Details screen.
Selecting Save & Custom Fields on the footer will Save the Notation and move to the Custom Fields Screen if Custom Fields were selected during the Add Notation process
Appointment Notes
To view, edit or add notations on individual Appointments the User can:
•Select the + Note button within the Scheduled/Actual list of the Job Details screen for Non-Equipment and Equipment related entries.
•Select + Note on the footer of the Appointment Details Screen
•Click an existing Note under the Notations section of the Appointment Details screen