Job Details Screen

Contents
The Job Details screen is accessible either from a Job type Search or as a cross-link from a Job related Appointment. It is the main start screen designed to cut out several layers of drill down between screens and therefore simplifying workflow for field technicians
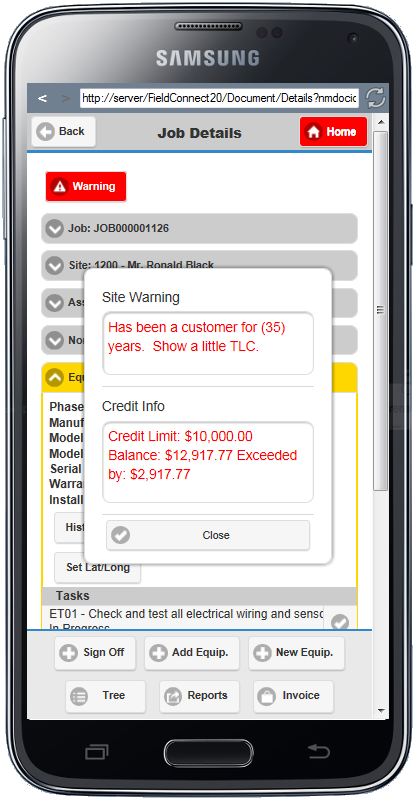
If a Red Warning button is showing on the top of the Job Details screen it is advising there is a Site Warning, the customer has a credit issue, or there is a General or Critical Notation on the Job. Clicking on the warning button will open a window to display details.
The Sections of the Job Details screen are displayed in Field Portal as follows:
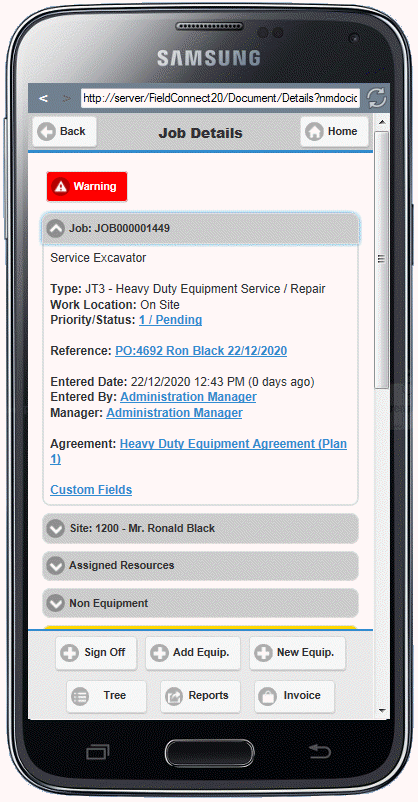
•Job header details including Document Number, Job Type, Work Location, Priority and Status, Reference, Entered information, Agreement Cover, and Custom Fields if they exist for the Document.
•Site information. The user can show the physical address or latitude/longitude of the site location in Google Maps on their device. The user can select New Job for Site which opens the Create Job feature. If Custom Fields exist for the site a link will display where Site Custom Fields can be viewed and modified. Site Notations can be viewed. Set Lat/Long co-ordinates can be set to override the physical address.
•Assigned Resources displays a list of the Resources currently assigned to the Job.
•Non-Equipment related Tasks, appointments and Job Notations listed for the Job
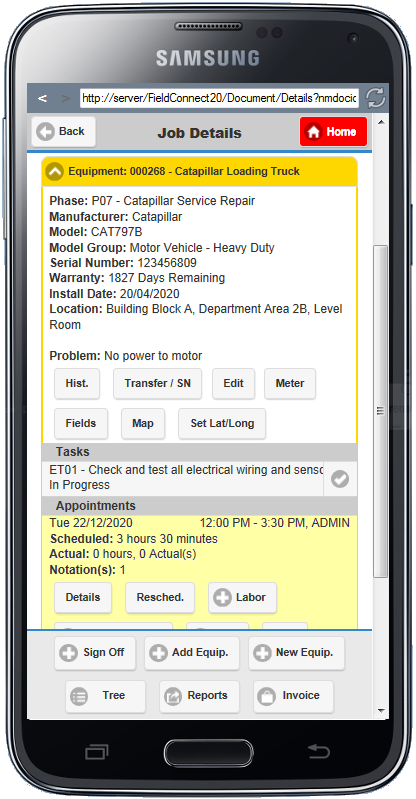
•Equipment related Tasks, Appointments and Job Notations listed for the Job
Note: If the user is a Manager of the Job, they will see all Appointments and not only those for the current user.
Clicking an appointment from the Daily Schedule will open the Job Details screen with the relevant Appointment highlighted in the expanded Non-Equipment or Equipment related section. If the appointment is Equipment Related, the Equipment section will also be highlighted.
Expanding the various sections of the Job Details screen allows for viewing details and drilling into fields when clicking on any blue underlined text. Some of these fields can be modified.
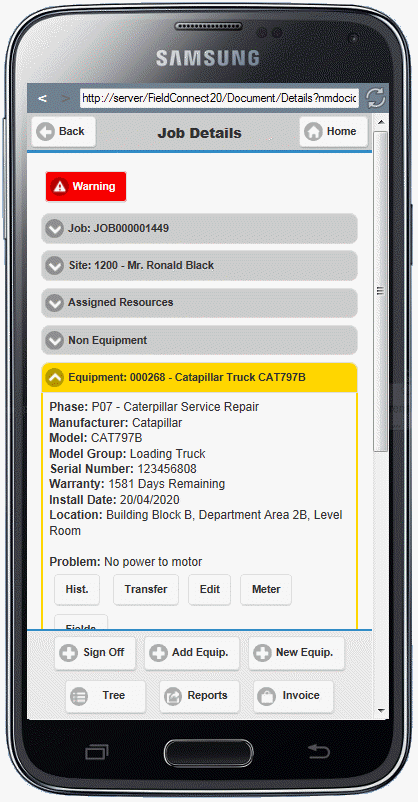
If Equipment has been linked to the Appointment then Equipment details will be displayed. Equipment related Tasks, Appointments, Faults and Notations will be included on the Job Details Screen within the relevant Equipment section.
The Equipment section gives the user an option to see the History for that Equipment on past jobs as well as to Edit or Transfer the Equipment to another Job for allocation on other future Time Entries. Meter Readings can be entered and if Custom Fields exist for the Equipment Model then clicking the Custom Fields link will open the Custom Fields screen where details can be viewed or edited.
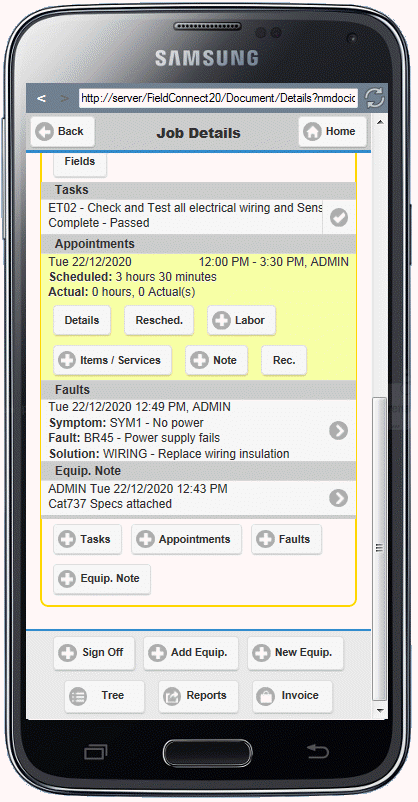
On screen, clicking/tapping on each section (Tasks, Appointments, Faults, Note) will open the details screen where existing information can be viewed or modified.
Non-Equipment related New Tasks, Appointments, and Job Notes and Equipment Related Tasks, Appointments, Team Recording, Faults and Equipment Notes can be entered by clicking the buttons within the Non Equipment or Equipment toggle sections of the Job Details screen.
On the footer the following actions are available:
•Sign Off - Allows for optional capturing of the client signature.
•Add Equip. - Adds an Equipment Line for an existing Equipment Record to a selected Phase of the current Job.
•New Equip. - Create Equipment using a function similar to Service Manager's Equipment program. After saving, the Add Equipment screen displays where the newly created equipment can be added to the Current Job.
•Tree - Views the Job in Document Tree style similar to the Service Manager Core Product. From the Tree, lines can be inserted directly into the Job without the need to go through the Appointment process. See the Document Tree section of this guide for more detail.
•Reports - Opens the Reports window where available reports can be generated. Any report can be included to the Field Portal report list. See the Reports section of this guide for more detail.
•Invoice - Opens the Post Invoice window where outstanding time and billing can be retrieved, payments collected and the invoice previewed or posted. See the Invoice section of this guide for more detail.