Consolidated Invoice Processing

Contents
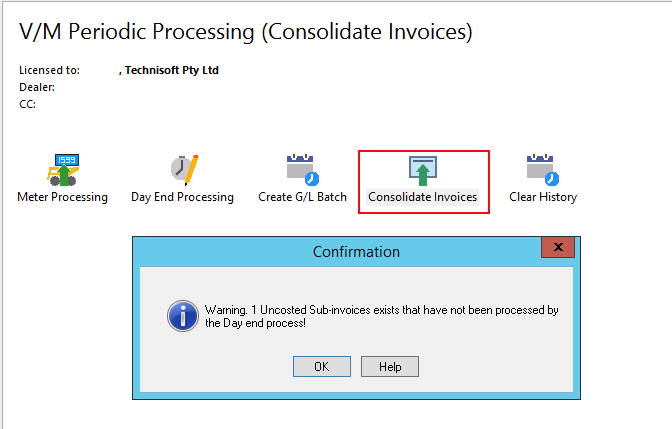
Consolidation of Sub-Invoices can be performed once the Sub-Invoices have been processed by the Service Manager Day End function.
Sub-Invoices must be posted in the Document and processed by the Day End process before they will be visible in the Consolidate Invoice program.
If there are un-processed Sub-Invoices a Confirmation window will display.
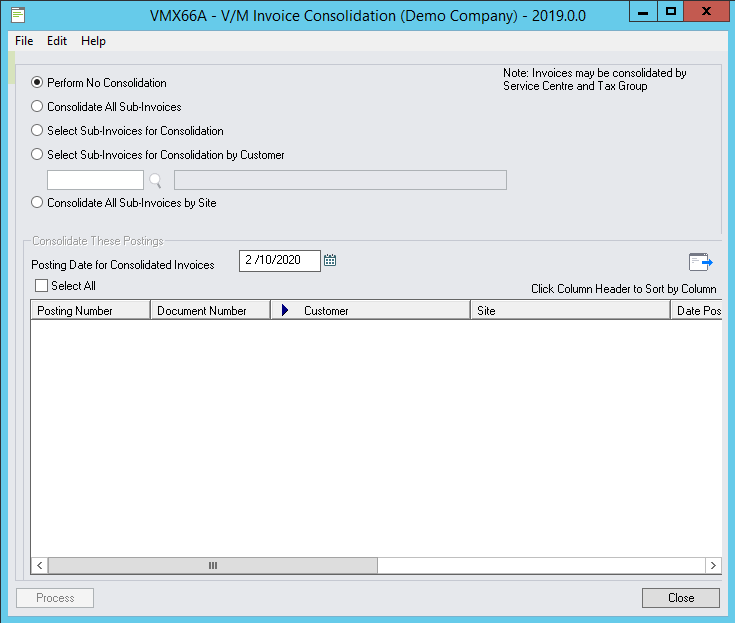
Options
There are five consolidation options to help filter Sub-Invoices in the list.
Perform No Consolidation (Default). |
No results will populate in the list |
Consolidate All Sub-Invoices |
Note that choosing this option will not allow individual selection of a Sub-Invoice. Select >> to load all Sub-Invoices in the list box. All Sub-Invoices will be consolidated by Customer to separate consolidated invoices in Accounts Receivable. i.e. one consolidated invoice will be created per customer. |
Select Sub-Invoices for Consolidation (recommended) |
Select >> to load all Sub-Invoices in the list box. Check a Column Header to sort data in the list by that column. Sub-Invoices may be checked individually for consolidating to one invoice by Customer. Check all Sub-Invoices to be consolidated. |
Select Sub-Invoices for Consolidation by Customer (recommended) |
Although there can be many Sites per Customer, this option allows selection by specific Customer only. Choose a Customer and select >>. All Sub-Invoices for that Customer will display. Check all invoices to be consolidated. Once the list is finalized select Process to proceed with the consolidation. All Sub-Invoices will be consolidated to a separate consolidated invoice in Accounts Receivable for the Customer selected. i.e. one consolidated invoice will be created for that customer. |
Consolidate All Sub-Invoices by Site |
Note that choosing this option will not allow individual selection of a Sub-Invoice. Select >> to load all Sub-Invoices in the list box. All Sub-Invoices will be consolidated by Site to separate consolidated invoices in Accounts Receivable. i.e. one consolidated invoice will be created per Site. |
It is possible to sort columns by clicking a column header.
Posting Date for the Consolidated Invoice
The Posting Date for the Consolidated Invoice can be manually changed.
It is set to the Sage 300 Session Date by default.
Changing the Posting Date for the Consolidated Invoice allows the invoice to be posted back to a prior period.
For example if all Sub-Invoices for May have been posted and it is now June and the Consolidated Invoice is being posted, setting the Consolidated Invoice Posting Date back to May would post the Consolidated Invoice back to the May fiscal period (i.e. a different period to the current period). Be sure to check that the previous Fiscal Period has not been locked or an error will occur and the posting will fail.
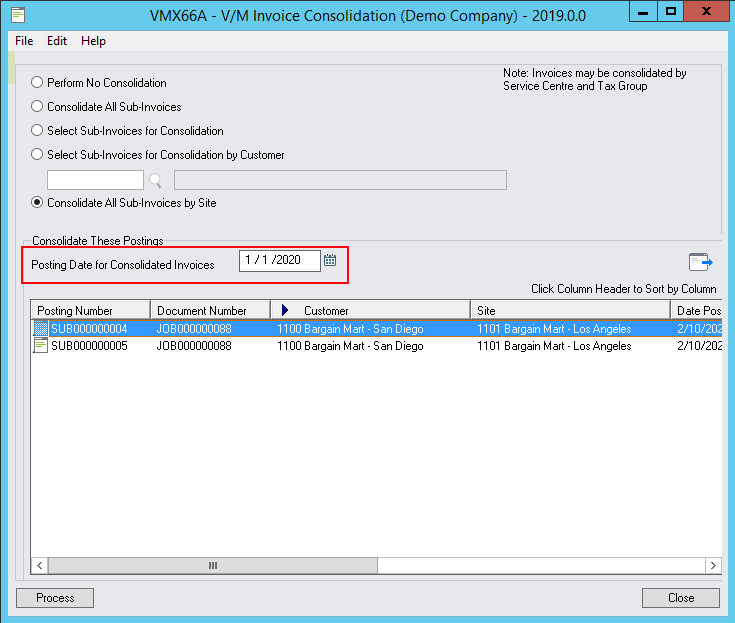
Once the list is finalized select Process to proceed with the consolidation.
General Procedures
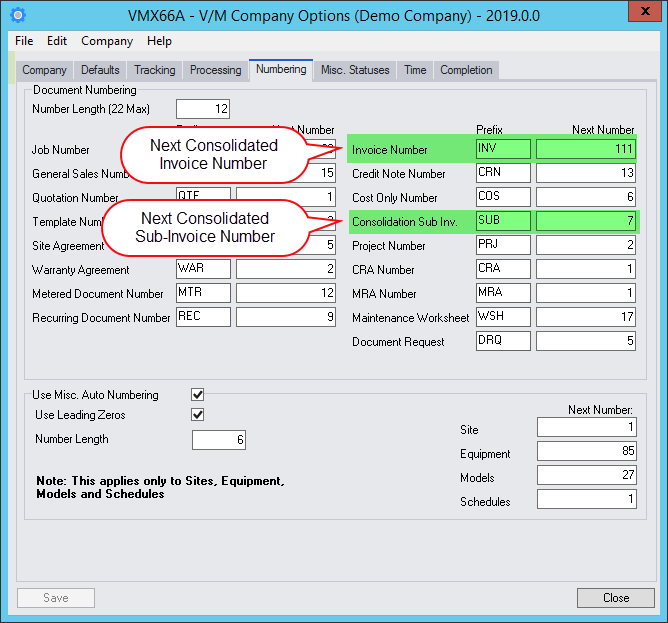
Consolidated Invoice Numbering
For all options above the Day End process allocates a Consolidated Invoice number automatically using the next Invoice Number in the Options table in Service Manager Setup.
If Service Center numbering overrides are used the next consolidated invoice number will be obtained from the Service Center table.
Numbering for Sub-Invoices can be defined in the Options table or in the Service Center table as applicable too.
Printing a Consolidated Invoice
After the Service Manager Day End has completed a form will appear to print the Consolidated Invoice.
A standard report form VMINVCON.RPT is available to allow printing of the Consolidated Invoice.
Custom forms can also be selected using the Browse button or alternatively cancel the print and use the AR Batch to print the invoice.
Select the Delivery Method
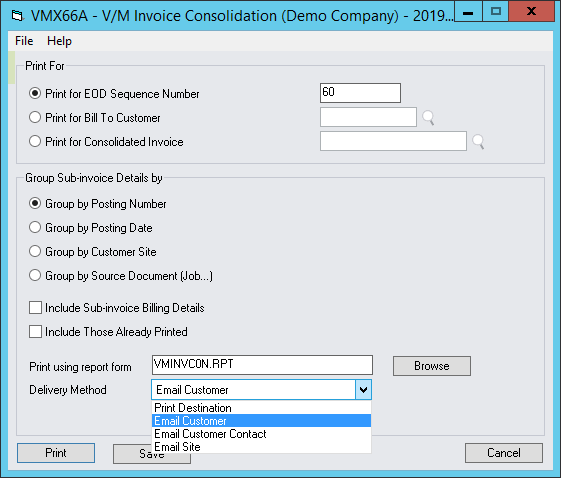
Print For |
|
Print for EOD Sequence Number |
This option will print all Consolidated Invoices processed by the current EOD process. This is the recommended option. |
Print for Bill to Customer |
Select a Customer to print ALL Consolidated Invoice for that customer including the current invoice just processed by Day End. Once printed it is not possible to re select another Customer for printing. To print another Consolidated Invoice go to the Sage Accpac Desktop and select VM Reports, VM Forms, Consolidated Invoice and select a Consolidated Invoice to reprint as applicable. |
Print for Consolidated Invoice |
Select a specific Consolidated Invoice to print. Once printed it is not possible to re select another Customer for printing. To print another Consolidated Invoice go to the Sage Accpac Desktop and select VM Reports, VM Forms, Consolidated Invoice and select a Consolidated Invoice to reprint as applicable. |
Group Sub-invoice Details By Grouping options determine the order that Sub-Invoices information will appear in on the Consolidated Invoice. |
|
Group by Posting Number |
Select this option to Group Sub-Invoices by Posting Number on the Consolidated Invoice. |
Group by Posting Date |
Select this option to Group Sub-Invoices by Posting Date on the Consolidated Invoice. |
Group by Customer Site |
Select this option to Group Sub-Invoices by Customer Site on the Consolidated Invoice. This option is very useful where there are many Sites to one Customer and Site invoices need to be grouped on the consolidated invoice. |
Group by Source Document (Job…) |
Select this option to Group Sub-Invoices by Document Number on the Consolidated Invoice. |
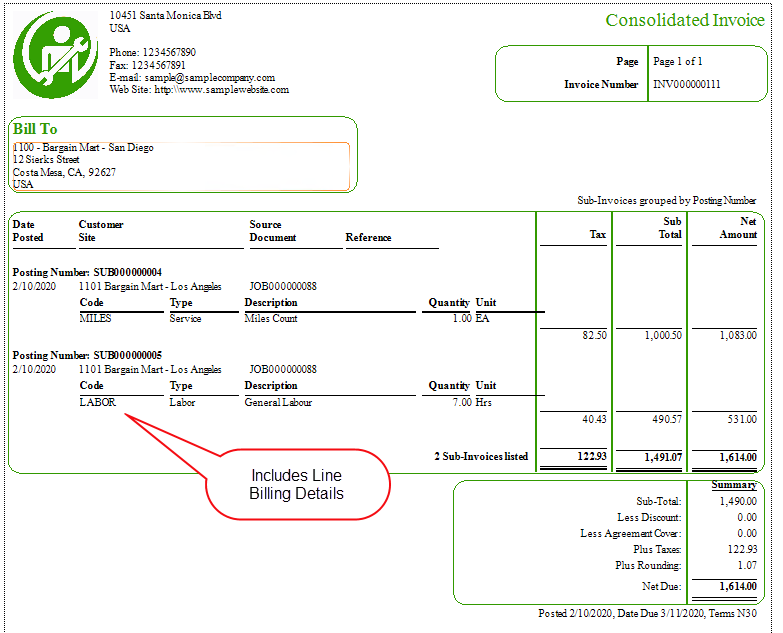
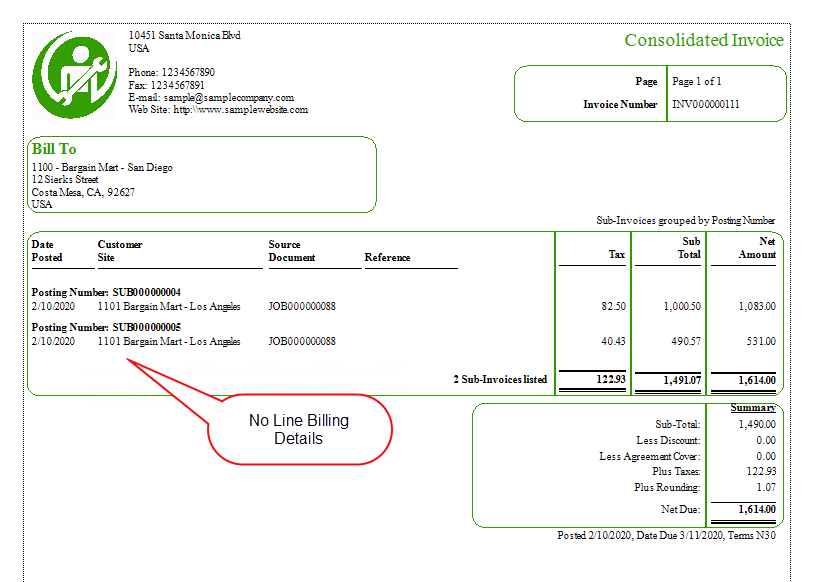
Include Full Sub-Invoice Billing Details |
Check this option on to include details of all Labor and Item transactions from Sub-Invoices on the Consolidated Invoice. The first screen below shows a Consolidated invoice with full Sub-Invoice Detail included. The From below does not include detail. |
Include Those Already Printed |
Check this option on to re-print a previously printed Consolidated Invoice |
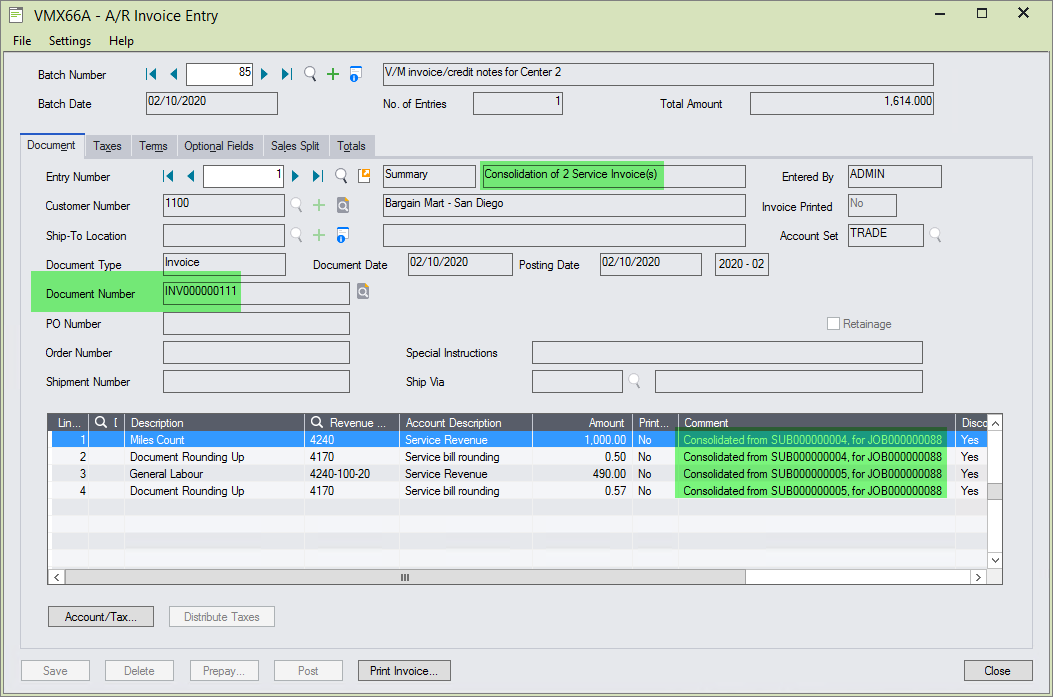
Accounts Receivable (AR) Batch
Service Manager Day End produces an AR Batch containing details of the Consolidated Invoice.
Select Print Invoice if you wish to use the AR Invoice Specification to print the Consolidated Invoice.
Note that the Comment field is populated with the Sub-Invoice number and Document (Job/Sale/Agreement) number.