Common functions

Contents
There are a number of functions common throughout the Customer Web Portal.
Lists
Items Per Page

This is the maximum number of items that will display on a page.
Navigating through a multi-page list
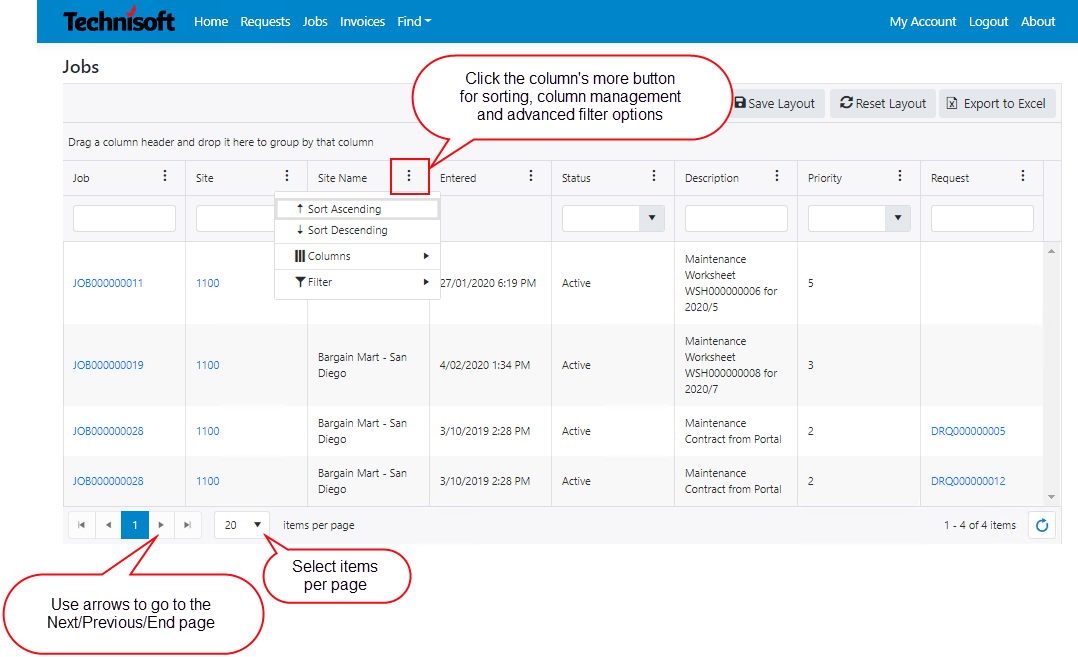
![]()
If there are more items in the list than will display on one page, pages numbers and navigation arrows will be displayed. Click the left arrow to go to the previous page; click the right arrow to go to the next page. The page numbers will take you to a specific page.
Sorting the list
Click a column header to sort the list in ascending or descending sequence based on the content of that column. An up arrow indicates that the list is in ascending order; a down arrow indicates that the list is in descending order. To change from ascending to descending sequence, click the column header again.
You can also click the 3 dots next to the column header to view or apply the ascending/descending sort option.
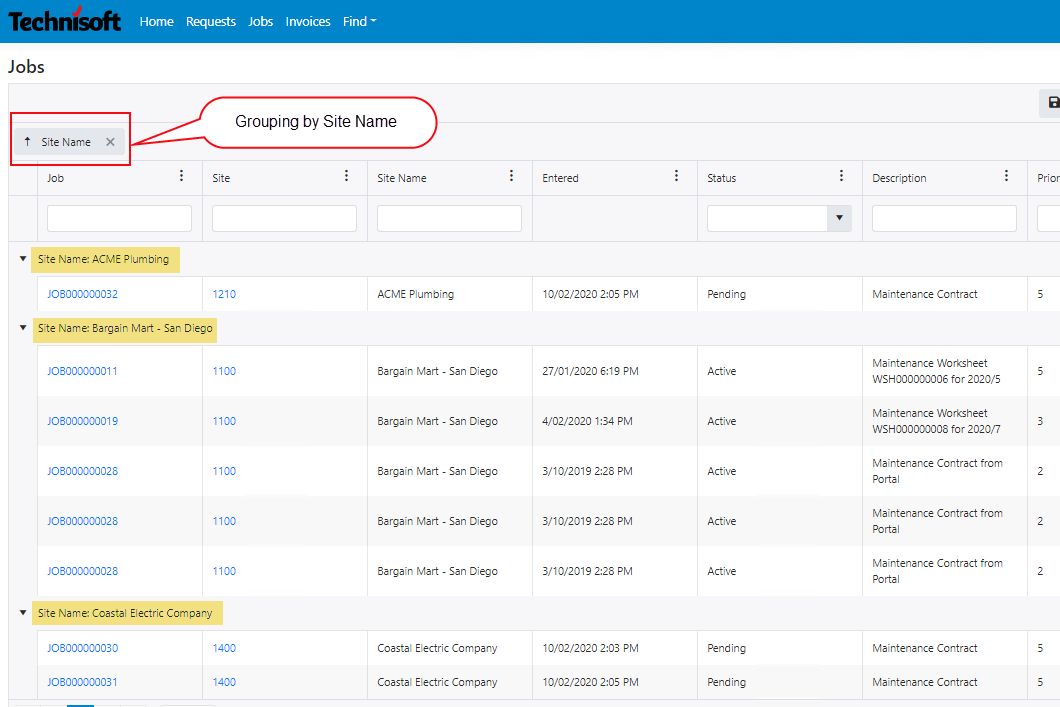
Grouping the list
Click a column header and drag it to the region above the column headers to group the list based on the content of that column. Sorting within groups can be applied by clicking the column header.
Column Management
Click and drag columns to reorder the position of displayed columns.
Resize columns by dragging the edge left or right.
Click the 3 dots next to the column header and select the Columns option. Toggle the check boxes to view or hide the available columns from the list display.
Filters
The drop down box in the tool bar gives you the most important filters.
In the field under applicable column headers, type text or select from the drop down to apply a single filter (per column) to the list.
Advanced Filters can be applied by click the 3 dots next to the column header and select the Filter option. Multiple filters can be applied and lookup values can be entered for advanced filtering functionality.
Layout
If the layout has had sorting, grouping, column changes or filters applied, the changes will not be saved if the page is navigated away from. The changed layout can be remembered by selecting the Save Layout button.
If a user is both assigned as a contact and an admin, this user will get an additional button on the right hand side toolbar of grids to enable this user to save the grid layout for all users or for new users only.
![]()
To restore the default layout the Reset Layout Button can be selected.
Export to Excel
Data showing in the list can be exported to Excel using the Export to Excel button.
Jobs not published to the Customer Web Portal
A Job that is grayed out is not available (has not been published) to the Customer Web Portal. It is still however associated with a Request.
Links
Click any link on the page to display the screen for that entity. For example, on the Request page you can click the following links:
•Request - the Request screen will be displayed for the record selected
•Jobs - the Job screen will be displayed for the record selected
•Sites - the Site screen will be displayed for the record selected
•Equipment - Equipment screen will be displayed for the record selected