Searching for Documents

Contents
Set the required search criteria and then click ![]() . All documents that match the current search criteria will be listed. It's that easy!
. All documents that match the current search criteria will be listed. It's that easy!
Setting the search criteria
![]()
First, you must make sure that the Criteria section is displayed. The Criteria button on the toolbar toggles the Criteria section on and off.
Second, you must set the required search criteria. If you do not set any search criteria then all documents will be displayed.
Service Center
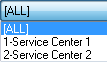
If you are not tied to a particular Service Center then you will be able to list and edit documents from any Service Center. Select the Service Center that you want to work with.
The Criteria section has two tabs: Filters and Criteria.
Filters tab
Use the Filters tab to set Site/Customer, Equipment/Model, Date and/or Document Reference Filters, or to perform a Document Search by Document Number.
The settings in the Filters tab are used in conjunction with the Criteria settings. Both settings are used to determine which documents will be displayed.
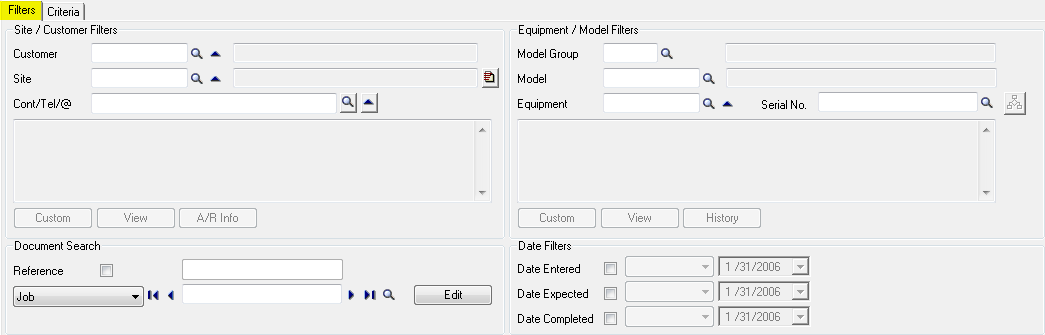
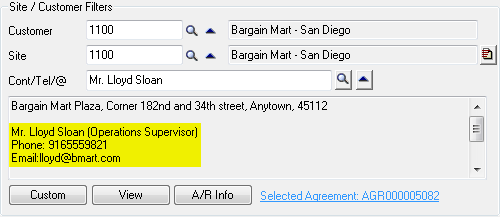
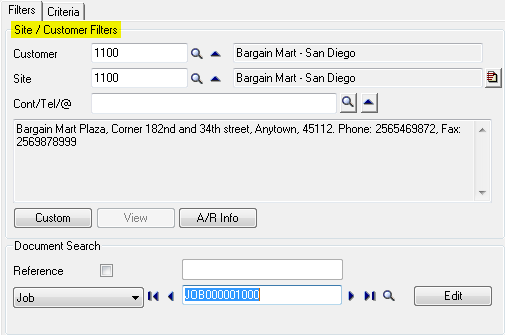
Site / Customer Filters
List documents for a particular A/R Customer
Type or select the A/R Customer Number using the Customer Finder. Press Tab.
List documents for a particular Site
Type or select the Site using the Site Finder. Press Tab. The Site Finder will only show Sites for the selected A/R Customer (if any).
The contact details for the Site will be shown. Site Assignments will also be shown if the Display Site Assignments in Site Details check box is ticked in View » Options.
Click [Custom] to view Custom Fields associated with the Site.
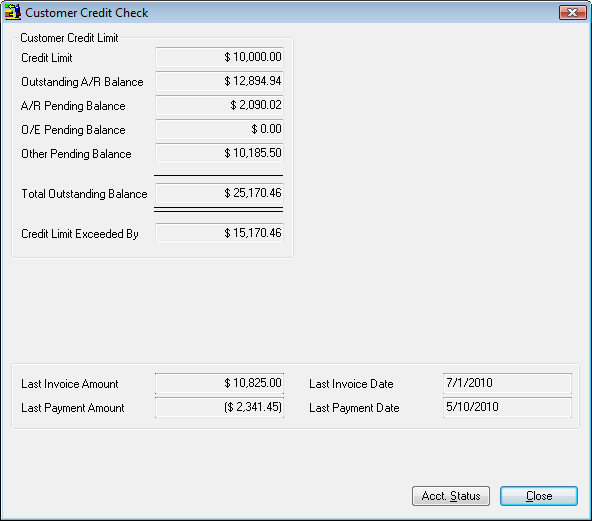
Click [A/R Info] to display the Customer Credit Check, A/R Customer Activity and Credit Status popup screens.
Changing the current Site Agreement
Click the Agreement link to view or change the current Site Agreement.
![]()
Click [A/R Info] to display the Customer Credit Check, A/R Customer Activity and Credit Status popup screens.
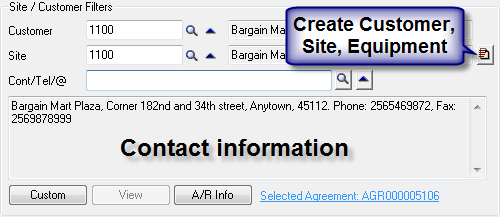
Creating a Customer, Site and/or Equipment
To create a Customer, Site and/or Equipment, click the Quick Create icon ![]() .
.
The Quick Create window will be displayed.
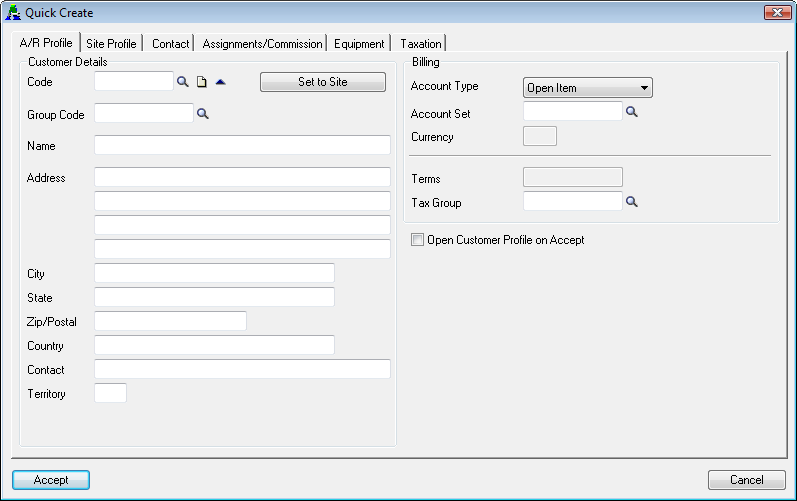
Enter the relevant information and then click [Accept].
The Site will be auto loaded into Quick Document Entry. To view the new Equipment for the Site, use the Equipment finder.
Note:
Equipment can also be created when creating or modifying a document. Some fields such as Equipment Asset Number are not available in Quick Create. To enter these fields you must create the Equipment when creating or modifying the document.
List documents for a particular Site Contact
Select the required Contact using the Contact Finder. Press Tab. The Customer and Site fields will be populated from the selected Contact record.
The Contact Finder will only show Contacts for the selected A/R Customer (if any) and selected Site (if any).
You can also drill to ![]() the Contacts form and select the required contact from the form.
the Contacts form and select the required contact from the form.
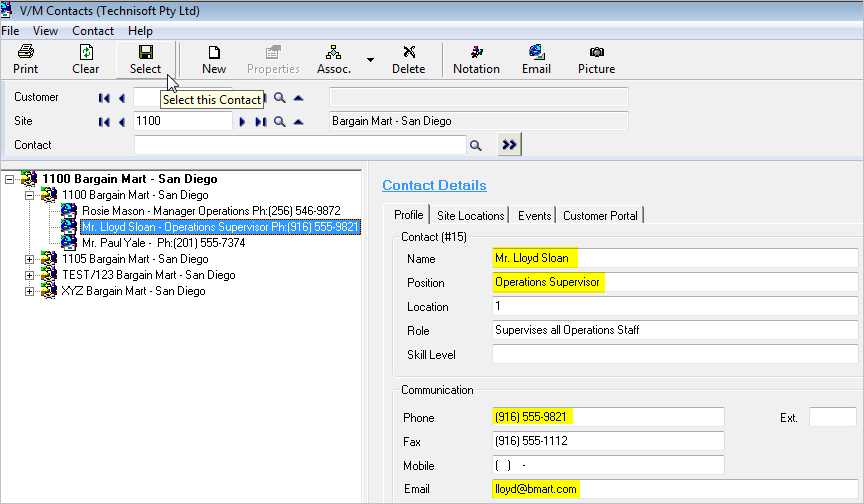
Contact details for the selected Contact will be shown.
Additional information is available.
Click [View] to display a graphic of the site Contact, if one exists.
Contacts can be associated with multiple Sites and even multiple A/R Customers. To show documents for a Site Contact regardless of Site or A/R Customer Number, leave the Customer and Site fields blank.
Equipment / Model Filters
These filters work in a similar way to the Site/Customer Filters.
List documents that contain Equipment of a particular Model Group
Type or select the Model Group using the Model Group Finder. Press Tab.
List documents that contain Equipment of a particular Model
Type or select the Model using the Model Finder. Press Tab. The Model Finder will only show Models for the selected Model Group (if any).
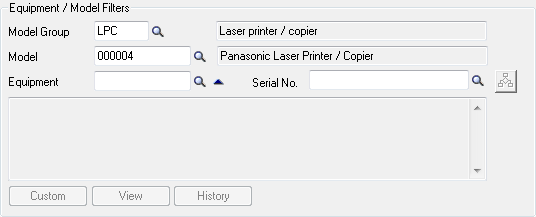
List documents that contain a particular piece of Equipment
Type the Equipment Number or Serial Number, or select the Equipment using the Equipment Finder, Serial No. Finder or by using the View Site Equipment button ![]() . Press Tab. The Equipment Finder will only show Equipment for the selected Model (if any).
. Press Tab. The Equipment Finder will only show Equipment for the selected Model (if any).
Equipment details will be shown.
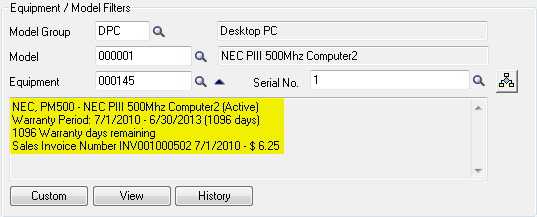
Additional information is available.
Click [Custom] to view Custom Fields associated with the Equipment.
Click [View] to display a graphic of the Equipment, if one exists.
Click [History] to display Equipment History.
Date Filters

There are three date filters: Date Entered, Date Expected and Date Completed. Any of these fields may be used as search criteria.
Tick the check box next to the date criteria that you want to use and select the required date option from the drop-down list. The default is Today (the current Sage 300 session date). If you select Specified, you will need to set a to and from date range.
Note that all filters, including the date filters, are cumulative and work on an AND basis rather than an OR basis. i.e., each criteria that has been set must be true. In the Date Filter example above, the document will only be listed if the Date Entered was within the last 14 days AND the Date Expected was between 6/17/2010 and 7/17/2010.
Document Filter

You can search for documents by Document Reference. In the example above, all documents that have a Reference of PO3456 will be listed. The Document Reference must be an exact match.
Document Search by Document Number
![]()
You can find a document by Document Number and then edit it. To do this, select the required Document Type from the drop-down list and use the Document Finder![]() to locate the required document. Alternatively, click the navigation icons to find the required document:
to locate the required document. Alternatively, click the navigation icons to find the required document:
![]() First record (alternatively, press Ctrl+Home)
First record (alternatively, press Ctrl+Home)
![]() Previous record (alternatively, press the Up arrow)
Previous record (alternatively, press the Up arrow)
![]() Next record (alternatively, press the Down arrow)
Next record (alternatively, press the Down arrow)
![]() Last record (alternatively, press Ctrl+End)
Last record (alternatively, press Ctrl+End)
Click ![]() to edit the document.
to edit the document.
Note that when you navigate through the records, the Site/Customer Filter fields are populated from the document, as shown below.
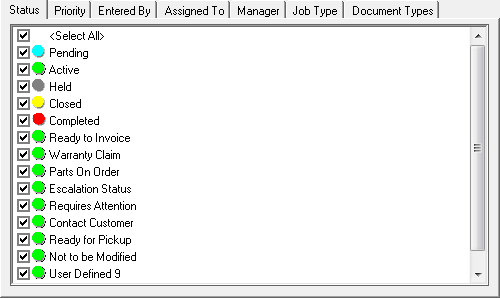
Criteria tab
The Criteria settings are used in conjunction with the Filter settings. Both settings are used to determine which documents will be displayed.
You can select documents that have a particular Status, Priority, "Entered By" Employee, Assigned To Employee, Manager, Job Type and/or Document Type.
For each of these, all you need to do is tick the check box of the applicable value(s) to include in the search criteria.
The settings in the Criteria tab will be retained when you close Quick Document Entry.
Example
To view all Active Jobs regardless of document Priority, "Entered By" Employee, Assigned To Employee, Manager and Job Type:
On the Status tab, clear all check boxes by clearing the <Select All> check box and then tick the Active check box.
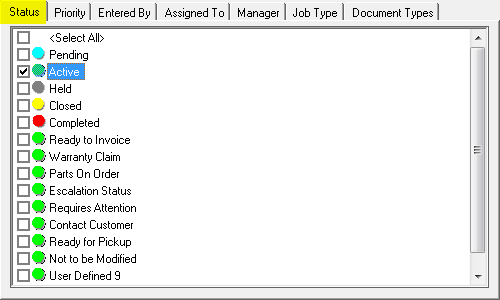
On the Document Types tab, clear all check boxes by clearing the <Select All> check box and then tick the Job check box.
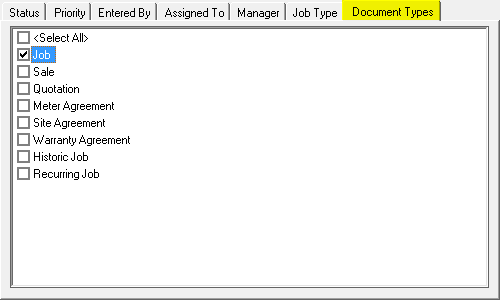
Remember that the Criteria settings and used in conjunction with the Filter settings. If you also set the Site Filter to 1100, you will only get Active Jobs for Site 1100.
Running the search
After setting the search criteria, click ![]() on the toolbar. All documents that match the search criteria will be listed.
on the toolbar. All documents that match the search criteria will be listed.
The Customer Credit Check form will be displayed automatically if the credit limit for the Customer exceeds the specified limit. Refer Checking Customer Credit Status for additional information about displaying customer credit status information.