Creating Documents

Contents
Quick Document Entry provides a quick method of creating Jobs, Quotations and Sales Orders. The same form is used to enter each of these document types and the process is the same. Some data sections of the form are however disabled for Quotations and Sales Orders as they are not applicable.
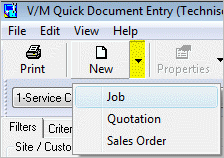
To create a document, click the down arrow to the right of ![]() on the toolbar and then select the type of document to create.
on the toolbar and then select the type of document to create.
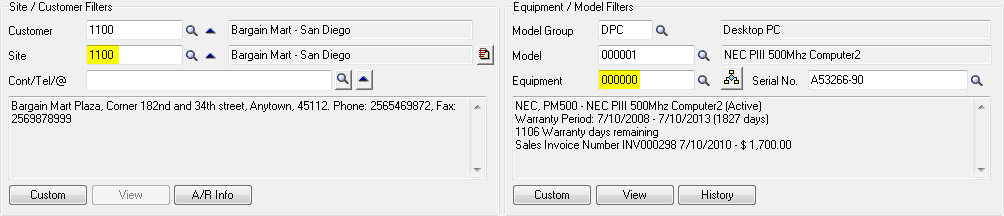
1.All documents require a Site Number.
If the Site Number is currently displayed on the screen as shown below, the new document will be created for that Site.
(If Equipment is also showing, the new document will be created for the Site and Equipment shown.)
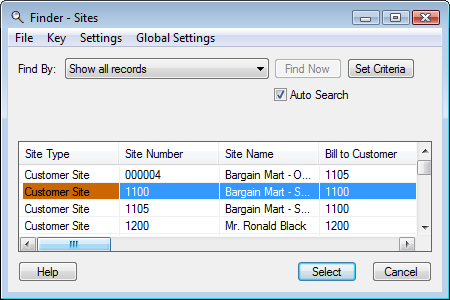
In all other cases, you will need to select the relevant Site.
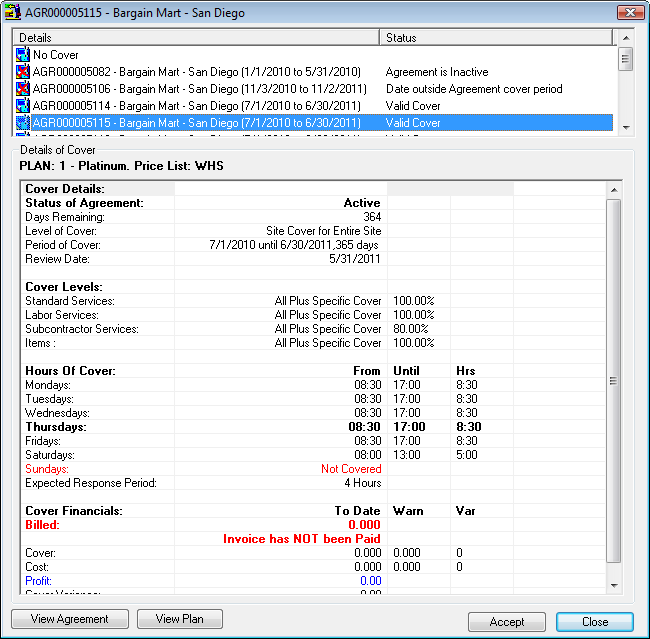
2.For Jobs and Quotations only, select the required Site Agreement and then click [Accept]. If you click [Close] then there will be No Cover.
3.The Document Edit form will be displayed. As this is a new Job, then Job: ***NEW *** will be displayed at the top of the screen.

The Job form consists of Document Header information and four data areas (data grids):
•Phases
•Equipment
•Faults
•Billing
Note:
The size of the data grids is set in View » Options. Refer Edit Mode Control Sizes. The data grids cannot be re-sized in any other way.
Document hierarchy
A document must contain at least one Phase.
Note:
The way in which Phases are initially entered into the Job is set in View » Options. Refer New Document Phase Insert Method.
Resources are assigned to a Phase.
A Phase consists of one or more Equipment and/or one or more Billing Groups.
Faults can be registered against Equipment.
Document Header
Fields in the Document Header should be self-explanatory. A few points to note however, are detailed below.
Site Agreements
To change the current Site Agreement, click the blue underlined Agreement link and then select the required Agreement.
Notations
To add a document notation you must type in the area marked <Type notes here> and then click [Submit]. You may enter multiple notes as shown below.
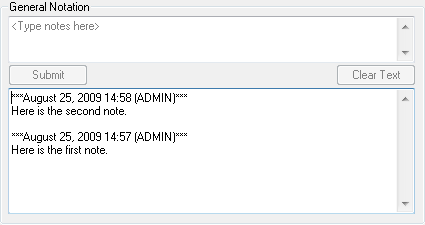
All notations are stamped with the current date and time and the ID of the current user.
Phases
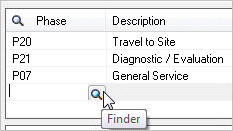
To insert a Phase, click in the Phase grid and then press the Insert key on the keyboard. Select the Phase using the Finder.
To delete a Phase, select the relevant Phase and then press the Delete key on the keyboard.
Press F5 to open a Finder and the Space key to drop down a list-box in a field. This is standard Sage 300 data entry convention.
Note:
Inserting and deleting lines in any of the data grids is performed the same way.
Phase response details will be displayed if Response Tracking is on for the Document and the Allow Edit of Phase Response Details Quick Document Entry option is ticked. Estimated Start/End Date and Time values may be edited. Original Start/End Date and Time values cannot be edited.

Assigning Resources to a Phase
The Employee(s) specified as Standard Assignments for the Site will be assigned to each Phase by default. In the example below, ANA and DES were the Standard Assignments for the Site.
Click the Phase for which you want to change the Resource assignment. Click ![]() on the toolbar.
on the toolbar.
The document may need to be saved before you can continue. The floating Assignments window will be displayed.
The Assignments window has three tabs, one for each type of Resource:
•Active Employees
•Internal Equipment
•Subcontractors
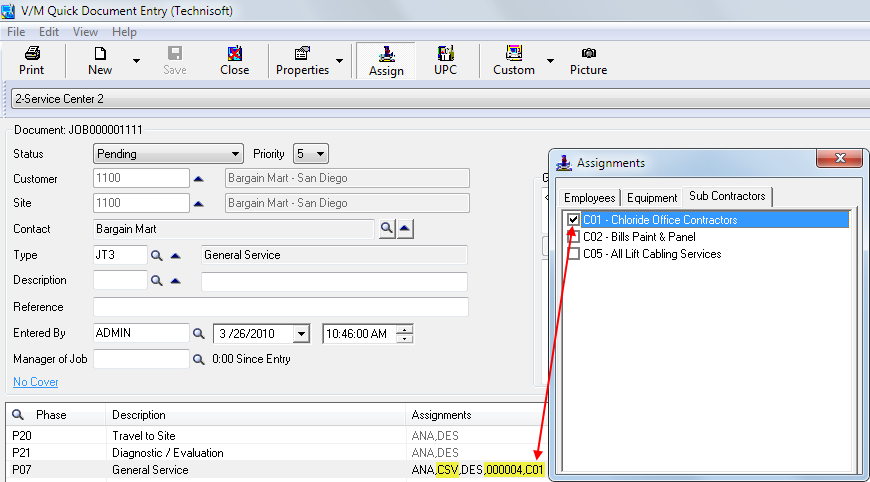
Tick the check box of each Resource that you want assigned to the Phase. In this example, we have also assigned Employee CSV, Internal Equipment 000004 and Subcontractor C01 to Phase P07.
Assigning a Resource will turn Response Tracking on for the Document. Response Tracking must be on and the Allow Edit of Phase Response Details Quick Document Entry option must be ticked for Phase response details to be displayed.
Adding Equipment to a Phase
Select the Phase to add Equipment to.
Click in the Equipment grid and then press the Insert key on the keyboard. The Entry Type will default to Equipment.
Selecting an existing Equipment record
Press Tab to move to the Equipment Number field. Press F5 to display the Equipment finder. Select the Equipment.
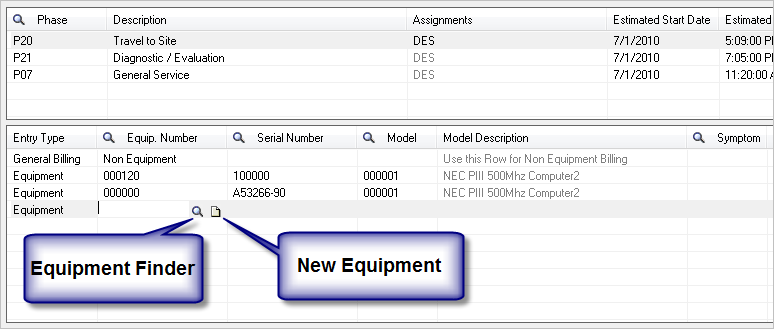
Alternatively, select Equipment using the Serial Number finder.
Creating a new Equipment record
Click New to create new Equipment. The Equipment window will be displayed.
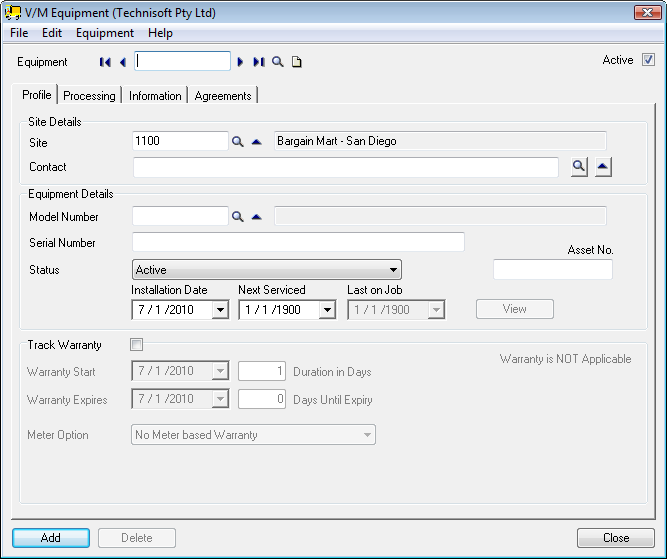
Enter the Equipment details as required and then click [Add].
Note:
Equipment can also be created using the Quick Create function. Some fields such as Equipment Asset Number, are however not available in Quick Create.
Adding a Miscellaneous Equipment record
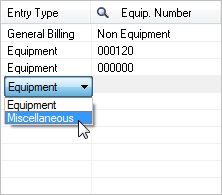
To add Miscellaneous Equipment, i.e., Equipment for which you don't know the Equipment Number, click in the Entry Type column and then select Miscellaneous. Select or type the Model if known.
Logging the problem with the Equipment
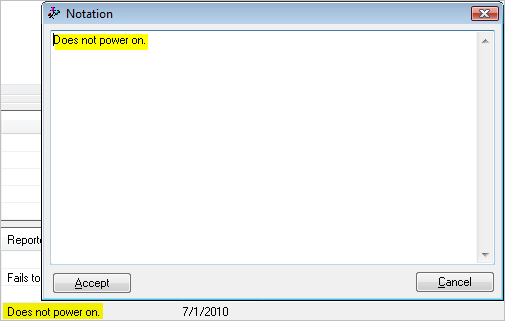
To enter the problem with the Equipment, click in the Reported Problem field and then press F6. A Notation window will pop up into which you can type the Problem. You can type directly into the Reported Problem field, however your view of the field contents will then be limited.
Changing the Equipment Logged Date
Change the Logged date of the Equipment if required.
Selecting the Equipment Warranty Agreement
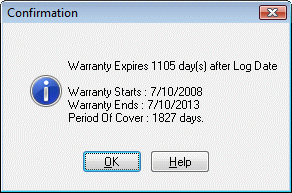
To select or change the Agreement that covers the Equipment, click in the Agreement field and then press F6. Select the required Agreement. The Agreement will be marked as either Valid Warranty or In-Valid Warranty. To show the Period of Cover, click in the Warranty field and then press F6.
Note that an Equipment Agreement takes precedence over a Site Agreement, if one has been selected for the document.
Viewing the Equipment graphic
To view the picture associated with a piece of Equipment, highlight the relevant Equipment line and then click ![]() on the toolbar.
on the toolbar.
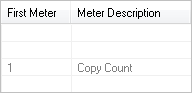
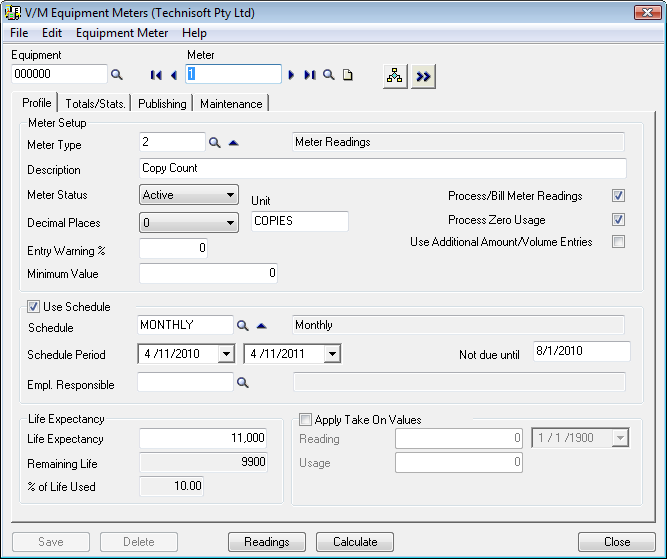
Equipment Meters
Equipment Meter information will be displayed if you tick the Quick Document Entry option, Show Meter Information on Document Edit. The first Meter for the Equipment record will be shown.
Meters may be viewed and Meter Readings entered for the selected Equipment record.
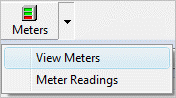
Select View Meters to view Meters for the selected Equipment record.
Select Meter Readings to view or enter readings for the first Meter for the selected Equipment record.
Registering an Equipment Fault
Faults can only be registered against actual Equipment, not Miscellaneous Equipment.
Select the Equipment to register the fault against.
Click in the Faults grid and then press the Insert key on the keyboard.
The Fault is the only field that is required.
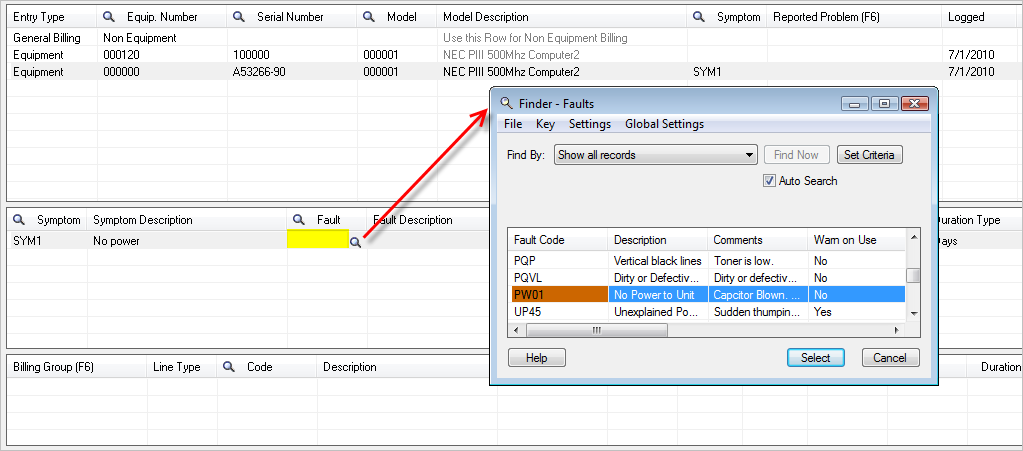
Select the Symptom and Solution, if known. Enter a Duration and Duration Type to fix the Fault, if known.
Note:
The Symptom may be entered on the Equipment record, in which case it will be copied to the fault registration record.
Adding Billing to a Phase
Non-Equipment
To add Non Equipment Billing to a Phase, select the General Billing line in the Equipment grid.
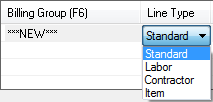
Click in the Billing grid. If this is the first Billing Group for the Phase, the following will be displayed.

Select the required Line Type and Code.

Complete the remaining fields on the line. Note that if a field is not relevant for a particular Line Type, for example, that field will be disabled–you will not be able to enter anything in the field.
Click Insert to add another Billing line. Note that Billing Group that you just entered will change from ***NEW*** to Billing.
Note:
The Billing Group for the new line will default to the Billing Group of the line that was selected when you pressed Insert.
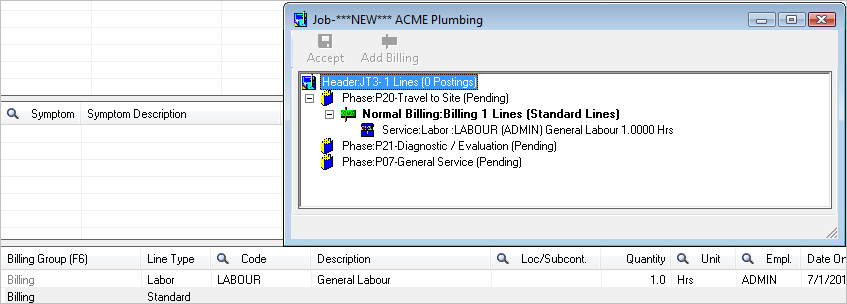
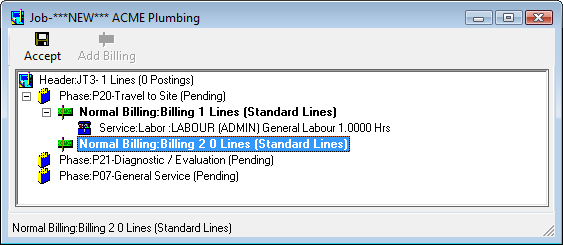
To create a line for a Billing Group that is not currently showing in the Billing grid, press F6 in the Billing Group field. This will display the document tree.
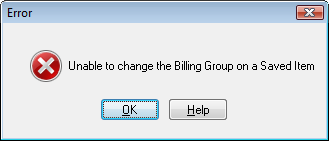
If the following Error message is displayed, click [OK], press Insert and then press F6.
From the document tree you can select any Billing Group that is in bold or you can add a Billing Group to the current Phase and then select the new Billing Group if required.
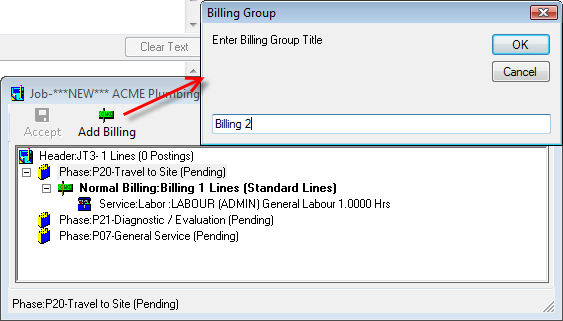
In the example below, we are adding a Billing Group named Billing 2 to Phase P20.
Equipment
Adding billing for Equipment works exactly the same way as adding billing for Non Equipment, however you must first select the relevant Equipment line rather than the General Billing line in the Equipment grid.
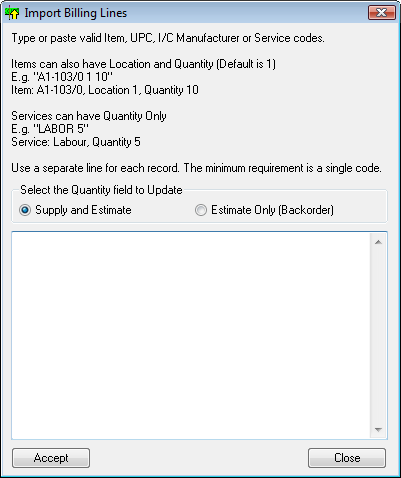
Import Billing Lines
To add billing lines in bulk, select the relevant Phase and Equipment line and then click ![]() on the toolbar. Enter the required billing lines and then click [Accept].
on the toolbar. Enter the required billing lines and then click [Accept].
For further information about inserting billing lines in this way, refer to Insert Billing Lines by Script in the Document Entry section of this User Guide.
Once data entry is complete, click ![]() on the toolbar to save the document.
on the toolbar to save the document.
If the document has never been saved, the Document Number will change from ***NEW *** to the next available number for the current Document Type.