Projects

Contents
 »
» 
Projects can include a collection of Documents created in Service Manager. They can include Quotations, Jobs, Sales or Agreements.
Project documents must be for the same customer. Any number of Documents can be added and they can be for differing Sites. The only proviso is that they must have the same Bill To customer code.
Projects include comprehensive budget and profit analysis from Phase and document detail level to totals for the entire project.
Start the Projects Program
Click the Projects desktop icon.
The Project Manager window will be displayed.
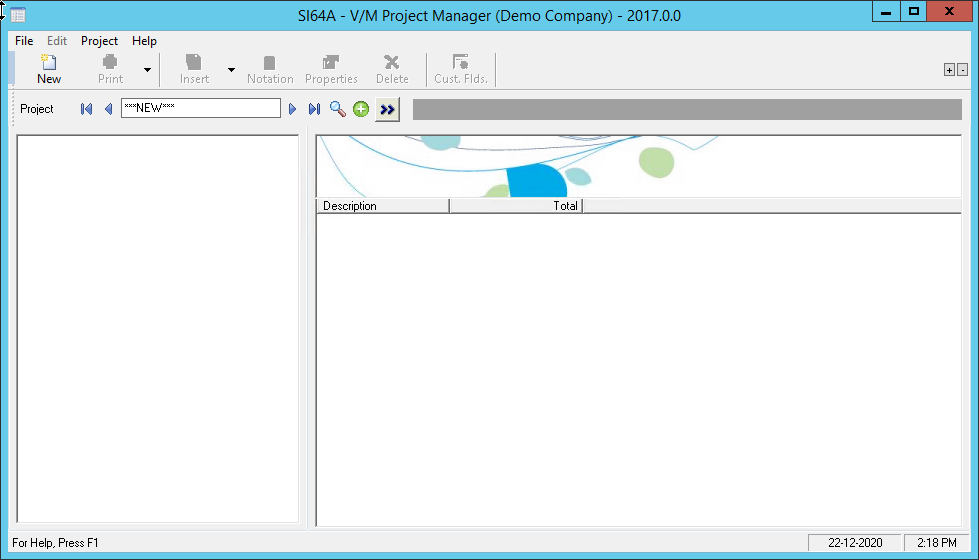
Toolbar
![]()
New - Create a New Project.
Add/Save - Add the Project to the Service Manager database or Save changes made to an existing Project.
Print - Print the Project List
Insert - Insert an Existing Document; Insert & Create from Copy Documents; Insert New Job, Sale Quotation, Meter Agreement, Site Agreement, Warranty Agreement, Recurring Job; Insert Notation
Notation - Insert unlimited notes with attachments
Properties - Display the Properties of the selected node. e.g., display the selected Job in Document Entry.
Delete - Delete the selected node.
Cust. Flds. - Maintain Project Custom Fields
Graph - Display a graphical view of the Project.
Create a New Project
Select an existing Project or click Go ![]() to create a new Project. The Project Header window will be displayed.
to create a new Project. The Project Header window will be displayed.
As an example, the following shows a new project being created for Bill To Customer 1100.
Type the Project Description in the Description field.
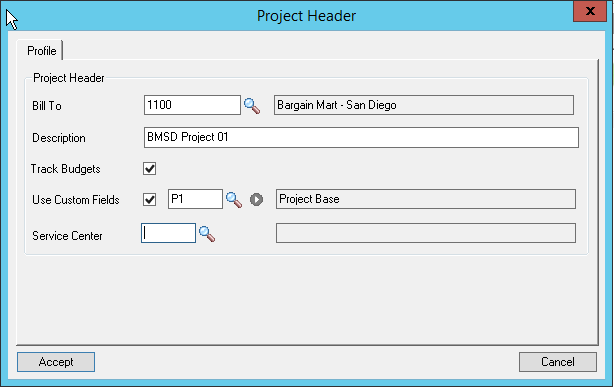
Click [Accept] to continue. Note that the project does not yet have a Project Number.
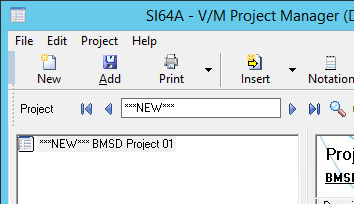
Click the Add icon on the toolbar to add the Project to the Service Manager database.
![]()
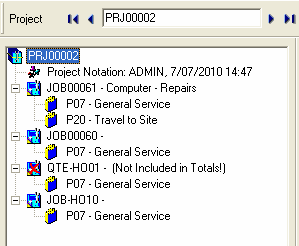
The Project has now been allocated a Project Number - PRJ000000003.

Notice that similar to Document Entry, a tree structure is beginning to form. You can now add Documents to the Project.
Notations
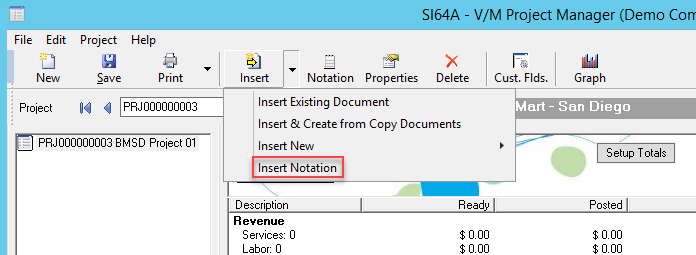
You may wish to insert a notation explaining the project, time frame, responsibilities and any special notes as required.
Click the drop-down list arrow ![]() to the right of the Insert icon and then select Insert Notation.
to the right of the Insert icon and then select Insert Notation.
Enter a Time Stamp and relevant details, add any associated documents in the Objects tab, and email staff of the details or commencement.

Insert New or Existing Documents
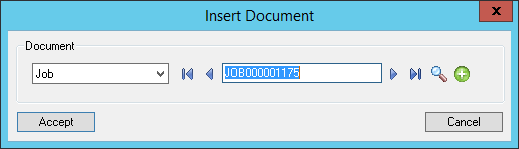
To insert a Document, select Insert Existing Document from the Insert icon drop-down list. The Insert Document window will be displayed. Enter or select the Document Type and Document Number to be inserted.
Note:
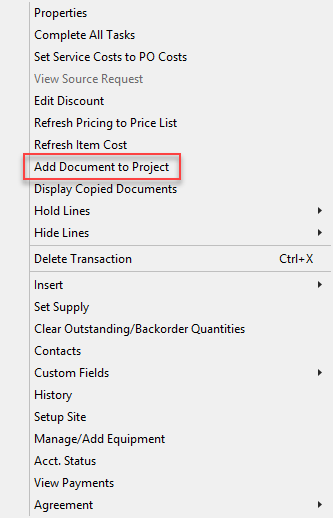
A Document can also be added to an existing Project from within Document Entry. To do this, right-click on the Document Header node in the Document tree and select Add Document to Project.
Select the Job and then click [Accept].
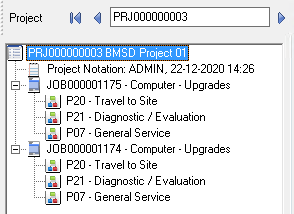
Add a second Job.
The Document Totals for each Job will be rolled into the Project Totals.
The Project now contains two Jobs and they are displayed in the same context as other Service Manager structures. Any Job or Document in the project can be edited (opened) by selecting its Properties. Right-click on the Document and then select Properties or click the Properties icon on the toolbar.
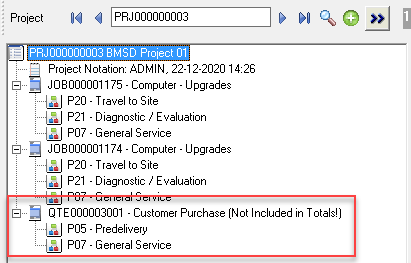
Add a Quotation. Select the Document Type and the Document Number to continue.

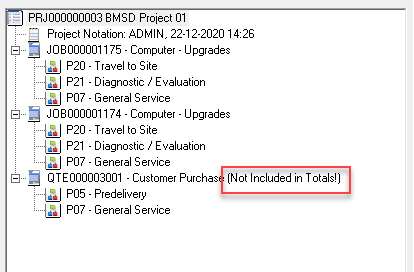
Notice the Quotation in the tree. There is a red cross through the Quotation icon. This indicates the figures (totals) for the quote have not been included in the project totals.
To change this, view the Properties of the quote and select Include in Totals.
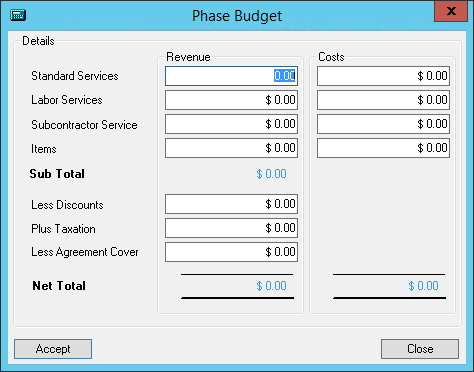
Phase Budgets
If Budgets are being tracked in the individual job, right-click on the Phase to adjust the budget.
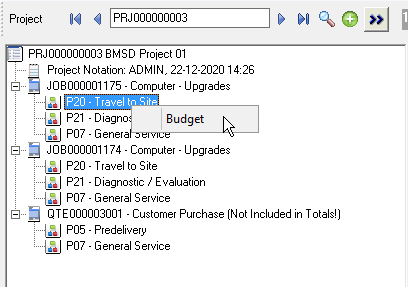
The Phase Budget window will be displayed with budget details that can be modified and saved. The Job then retains this information and the Project inherits them as well.

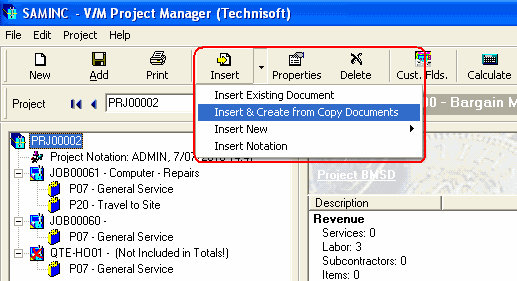
Inserting a Document from "Copy Documents"
You may, for example, create a new Job from a Quotation and insert that Job into the Project.
To create a new document using Copy Documents and insert it into the Project, click the drop-down list arrow ![]() to the right of the Insert icon and then select Insert & Create from Copy Documents.
to the right of the Insert icon and then select Insert & Create from Copy Documents.
The Create New Documents window will be displayed.
An example of creating a Job from a Quotation is shown below.
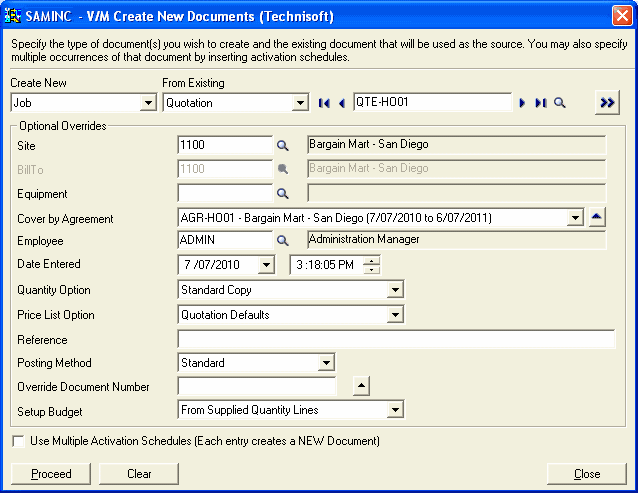
Click [Proceed] to continue.

Click [Yes] to continue. The Job has been inserted into the Project tree.

Click [OK].
Project Totals to include
Click the Setup Totals button to select which document are to be included in the totals displayed on screen as well as which document totals are to be printed in the Project Listing report.

In the Setup Totals window select the check boxes for the Documents to include in the Totals.
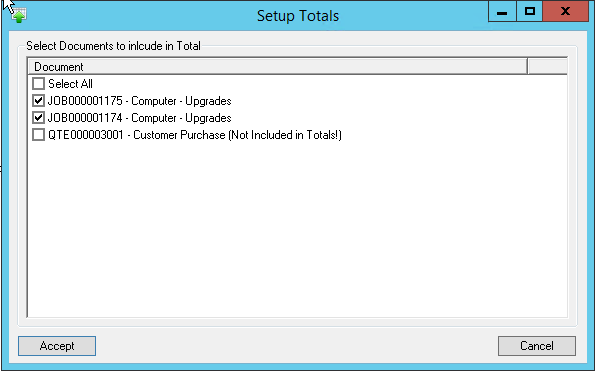
Any Documents that are not included will show as (Not Included in Totals) in the Setup Totals window and in the Project tree
Project Listing Report
Select the Print icon from the toolbar to raise the V/M Project Listing window.
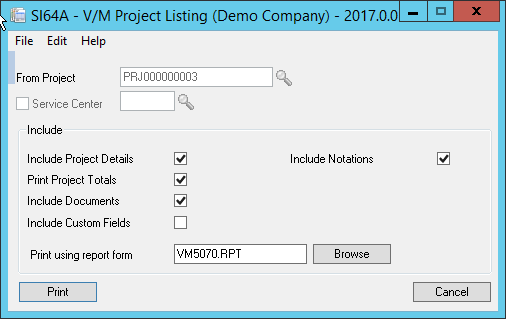
Select the inclusions to display on the report and then press Print
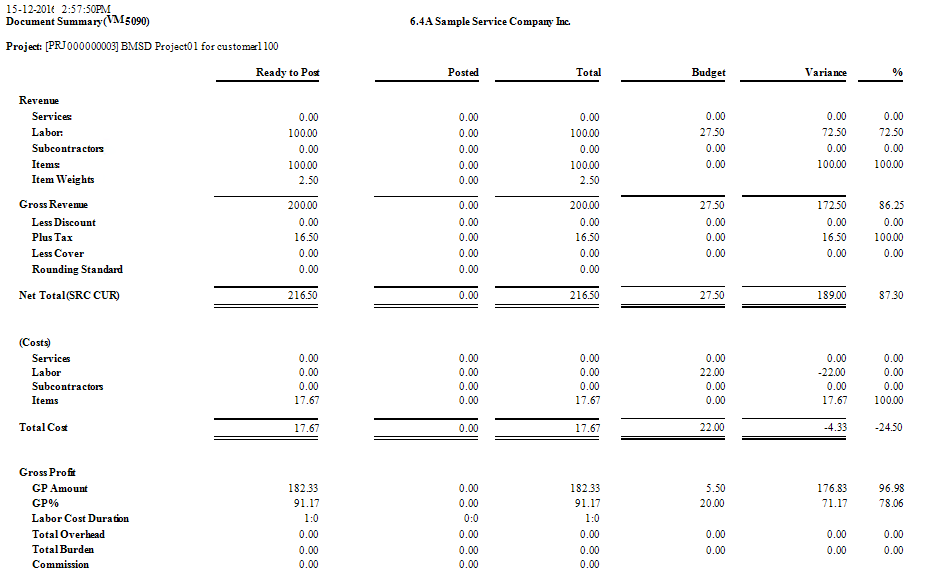
A summary of the Documents included in the Project will be displayed and then the Project Document Summary will display.
Only those documents who have been specified as included in the Project's Totals will appear on the report.
Graphical Project View
To display the timelines associated with the Jobs in the Project, click the Graph icon on the toolbar.
![]()
The Graphical Representation of Project window will be displayed.
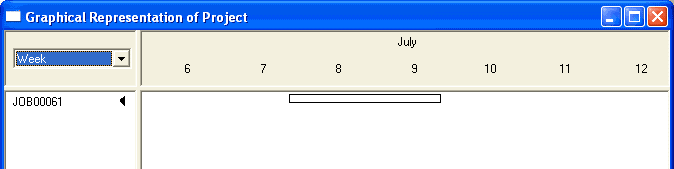
Note that this is a viewer only and modification must be done through Job Manager. To view the details click on the small arrows next to the Job Numbers. This shows the relationship between the Jobs in the Project.
Multi Document Post
Multi Post is featured throughout the Project. There could be numerous jobs, credits or Recurring Billing, etc., that needs to be processed. Multi Post becomes a very powerful tool for project management.

Select Project » Multi Document Post. The Multi Post window will be displayed.
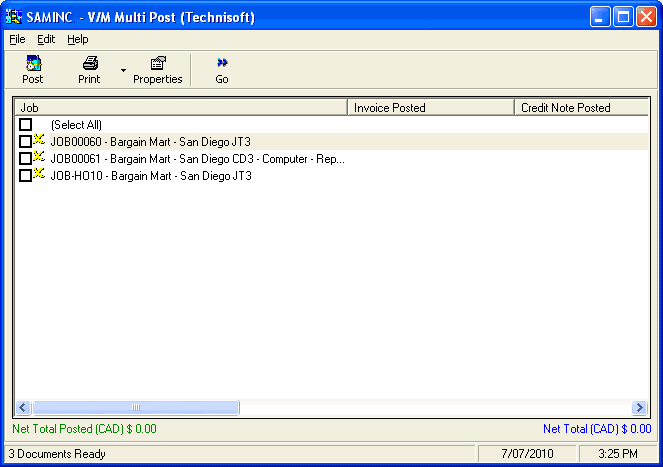
Refer Multi Posting Documents.