Recorder

Contents
The Recorder provides a function whereby time recordings can be captured in Field Portal and then retrieved into a Job for both billing and costing purposes. This useful tool is ideally used as a stopwatch.
Simply start the recorder, stop the recorder and this information is stored as an Actual for the Job. The Actual can then be retrieved and a Billing Group created within the Job containing the support charges associated with it.
Starting the Recorder
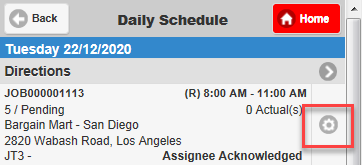
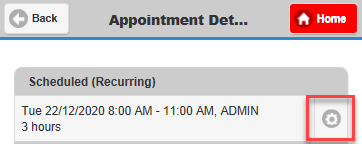
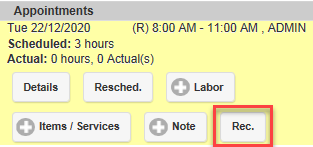
The Recorder can be started for an Appointment in number of different ways. The Recorder screen will default to the Dispatch screen if the appointment has not yet been acknowledged. Dispatch needs to be confirmed prior to Recordings being captured.
•By clicking the cogwheel shortcut to the right of listed Jobs in the Schedules. This will launch the Recorder State window where Start can be selected.
•By clicking the cogwheel shortcut to the right of the Scheduled Appointment in the Appointment Details screen. This will launch the Recorder State window where Start can be selected.
•By clicking the Rec. button in the Job Details page under the Appointments section. This will launch the Recorder State window where Start can be selected.
•By clicking the Record Button in the Add-Appointment window when saving a new Appointment to a Job. This method does not raise the Recorder state window as it automatically starts the recorder and then displays the Appointment Details Page.
![]()
The Recorder state can be easily identified as when there is a recording in progress the Cogwheel shortcut changes from grey to red ![]() and the text for the Rec. button within the Job Details page turns red.
and the text for the Rec. button within the Job Details page turns red. ![]()
Stopping the Recorder
The recorder can be stopped by clicking on the cogwheel shortcuts and Rec. buttons listed in the above methods to Start the Recorder.
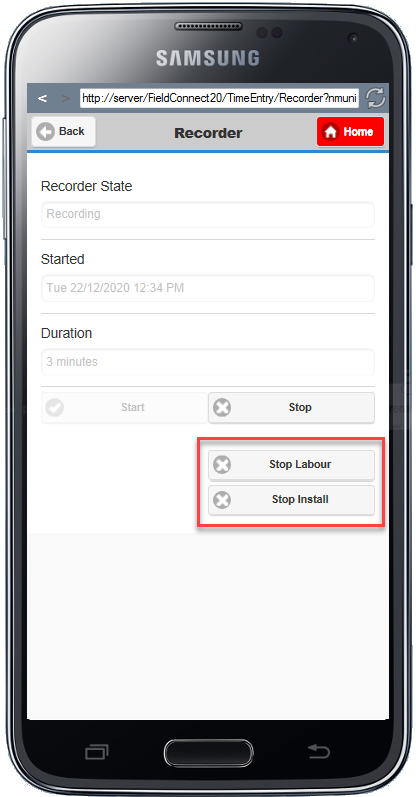
The Recorder State window will be displayed where the Stop button can be selected. Selecting Stop will open the Edit Actual Window where details for the actual can be modified if required and saved or deleted.
There is availability to bypass the Edit Actual Window and save the Actual with Pre-configured and specific favorites for Service Type and Service Code. These favorites are added and maintained through the Configuration Utility, which are displayed as additional Stop buttons in the Recorder State Window.
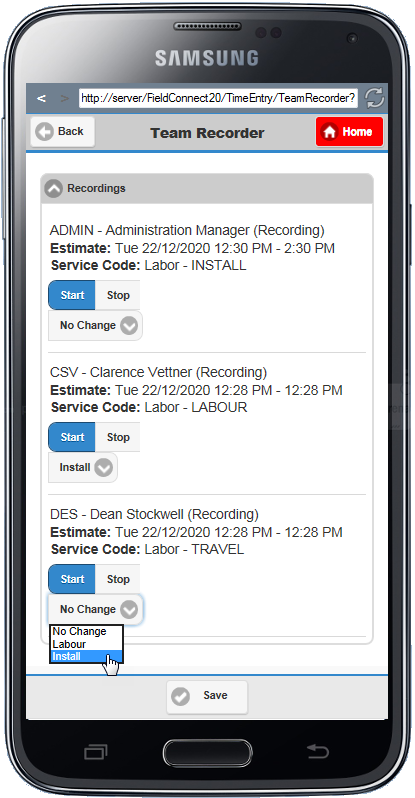
Team Recorder
To access the Team Recorder function the "Enable Team Recorder" checkbox in the Configuration Tool's Settings tab must be enabled.
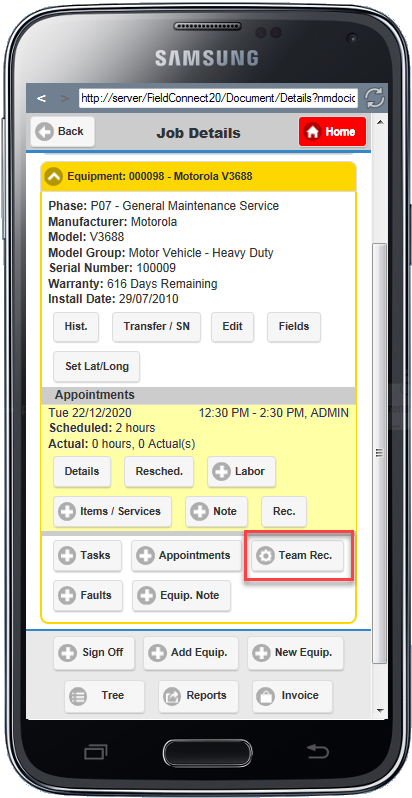
For Jobs containing Equipment there is a Team Recorder button within the Equipment Toggle of the Job Details Screen. Clicking the Team Recorder will launch the Team Recorder window where Recordings can be started for ALL resources Assigned under the Phase of the Job containing the Equipment.
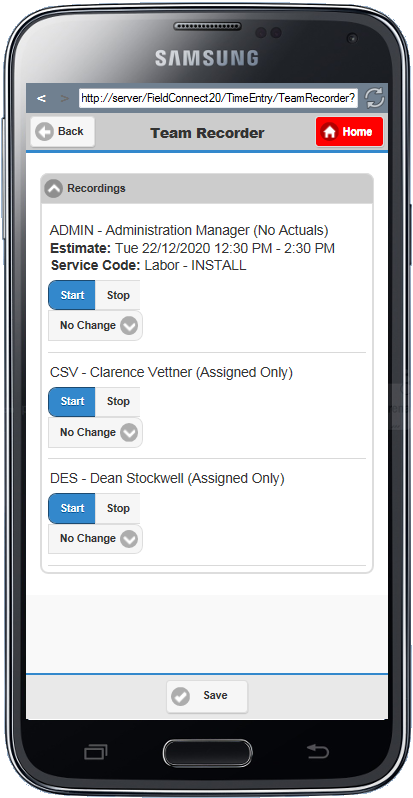
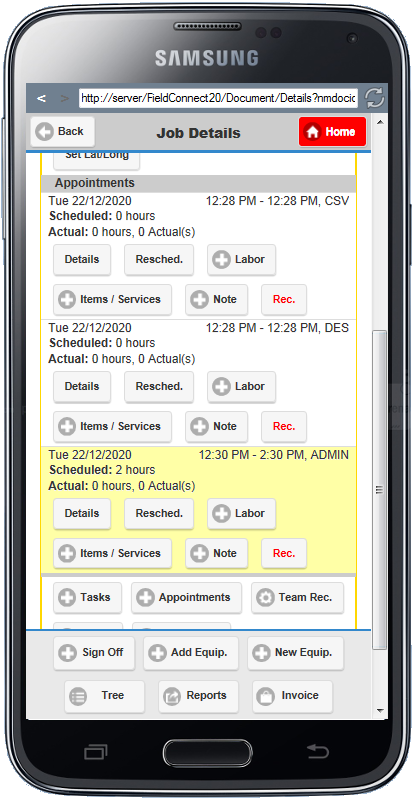
If Employees are assigned to the Phase containing the equipment but do not have an appointment they will appear in the Recordings list with (Assigned Only) next to their Employee code.
Starting the Team Recorder for the Assigned Only Employee will create a zero duration Appointment with the Recorder started. The individual Appointments can be seen in the Job Details screen under the Appointments section of the Equipment Toggle.
The individual Recordings can be stopped by using the Stopping methods outlined in the above section for Stopping the Recorder, or through the Team Recorder button.
The No Change button will set the Actual properties to the Estimated Appointment's Type and Service properties. If there is/was no Estimated Appointment (Assigned Only) for the Employee then the Actual will be created using the Employee's Labor Service Defaults.
Prior to the Recordings being started or stopped it is possible to select the pre-configured Service Codes by clicking on the dropdown arrow. This will overwrite the Service Code of the Appointment and Employee default when saving the Actual.