Meter Processing

Contents
 »
» 
Overview
Meter Processing provides the tools to list Equipment that are due to have their Meters read, enter Meter readings without entering into Jobs or Agreements, and process the readings in batch form.
Criteria such as Meter reading Employee, Site, Zone, etc., may be set to filter meter reading requirements.
Once the readings have been entered, they can be processed, automatically updating their related Meter Agreement Documents to calculate billing due, based on the meter usage since it was last read or billed.
The Multi Post program can then be used to print and post invoices for those meter agreements.
Related Topics
Starting the Meter Processing Program
Click the Meter Processing desktop icon.
The Equipment Meter Entry window will be displayed.

Using Meter Processing
Specify the Criteria
![]()
If the Criteria section is not shown, click the Criteria icon on the toolbar. You can toggle the display of the Criteria section off and on.
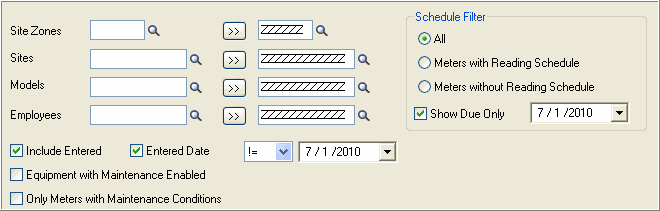
Enter the search criteria.
•Site Zones – Select the applicable Zone(s).
•Sites – Select the Site(s) for which meter readings are to be entered or processed.
•Models – There may be specific Models that need to have their meters read. Select using the Finder![]() or enter the Model number.
or enter the Model number.
•Employees – In a busy Service Center, it may be more practical to enter the results of meter readings by Employee.
•Include Entered – Tick this check box to include Meter readings that have already been entered. Tick the Entered Date check box to filter the results using the date specified.
Note that != means not equal to.
•Equipment with Maintenance Enabled – Tick this check box to limit the search to include only Equipment with Maintenance Enabled.
•Only Meters with Maintenance Conditions – Tick this check box to limit the search to include only Equipment that have Maintenance Conditions.
•Schedule Filter
oSelect All Meters, Meters with a Reading Schedule or Meters without a Reading Schedule.
oShow Due Only – This check box is normally ticked. Meter Readings are generally entered and processed when they fall due.
Run the Search
Click the Refresh icon ![]() on the toolbar. All Meters matching the selected criteria will be displayed in the Results pane.
on the toolbar. All Meters matching the selected criteria will be displayed in the Results pane.
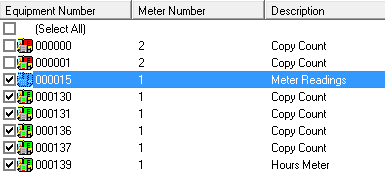
![]() If a meter has been read before, that is, the Previous Reading is greater than zero, the meter will appear green.
If a meter has been read before, that is, the Previous Reading is greater than zero, the meter will appear green.
![]() If the meter has never been read before and the Previous Reading is zero, the meter will appear red. That includes the fact that there is no Take On reading, because if there is a Take On reading, the meter will have a Previous Reading that is greater than zero and will be green.
If the meter has never been read before and the Previous Reading is zero, the meter will appear red. That includes the fact that there is no Take On reading, because if there is a Take On reading, the meter will have a Previous Reading that is greater than zero and will be green.
A tick in the check box next to the meter indicates that you wish to process the meter. If you actually enter a reading, the check box will be ticked automatically.
As with most Service Manager modules, click the column headers to sort the results in ascending or descending sequence. You can also Include, Exclude or reorder columns. To do this, select Tools » Options. You can also drag and drop header columns from one position to another.
Notice that more toolbar options become active when you select and highlight a Meter line.
![]()
Enter Meter Readings
To enter readings for a Meter, double-click the relevant Meter line. The Meter Reading window will be displayed.
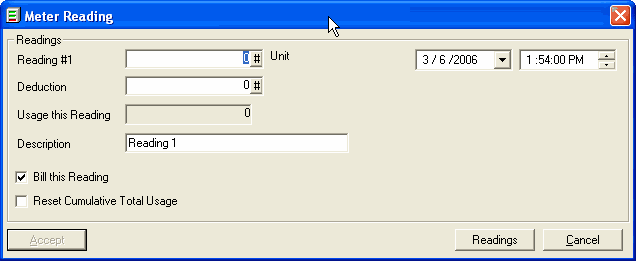
Enter the reading units, date and time, and then click [Accept].
Note:
The current date and time will be displayed by default.
Click [Readings] to show all readings for this meter.

Multiple meter readings
Multiple meter readings can be entered quite simply:
1.Sort the data as required.
2.Highlight the first record and then press Enter. The Meter Reading window will be displayed.
3.Enter the meter reading.
4.Press Tab.
5.Press Enter. The program automatically moves to the next record. Enter the meter reading for that record, and so on.
View or Modify the Meter Agreement
Highlight a Meter line in the Equipment Meter Entry window Results pane. If the Equipment is covered by a Meter Agreement, the Agreement icon ![]() on the toolbar will be active. Click the Agreement icon to display the relevant Meter Agreement Document in Document Entry.
on the toolbar will be active. Click the Agreement icon to display the relevant Meter Agreement Document in Document Entry.

Click the Agreement icon ![]() on the Document Entry toolbar to view or modify the relevant Agreement. The Agreement Setup window will be displayed.
on the Document Entry toolbar to view or modify the relevant Agreement. The Agreement Setup window will be displayed.

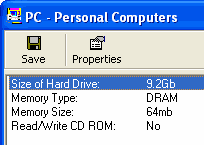
View the Equipment Meter
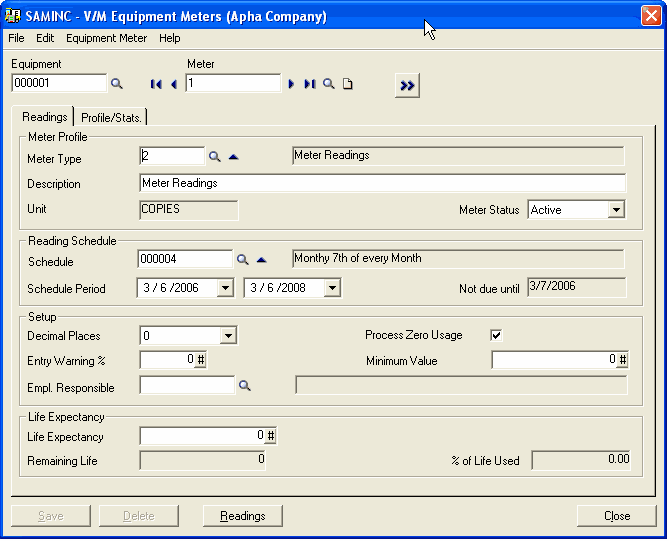
Highlight a Meter line in the Equipment Meter Entry window Results pane. Click the Meter icon ![]() on the toolbar to display the Meter Properties.
on the toolbar to display the Meter Properties.
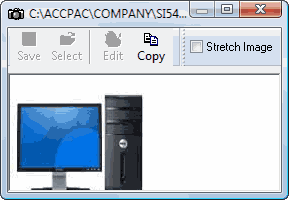
View the Equipment Graphic
Highlight a Meter line in the Equipment Meter Entry window Results pane. Click the View icon ![]() on the toolbar to display a picture of the metered Equipment.
on the toolbar to display a picture of the metered Equipment.
View Custom Fields
Highlight a Meter line in the Equipment Meter Entry window Results pane. Click the Custom Fields icon ![]() to display the Custom Fields for the Equipment Model associated with the Meter.
to display the Custom Fields for the Equipment Model associated with the Meter.
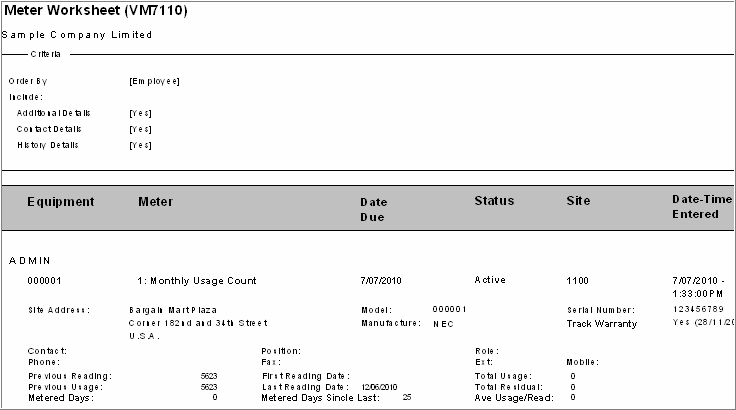
Print a Meter Worksheet
Click the Print icon ![]() to print a Meter Worksheet. The Meter Worksheet window will be displayed.
to print a Meter Worksheet. The Meter Worksheet window will be displayed.
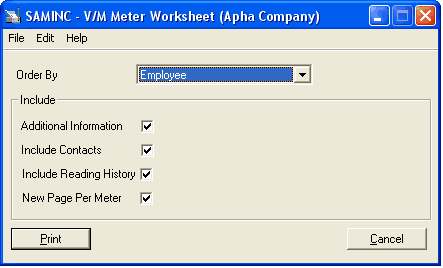
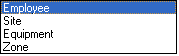
Select the report sequence in the Order By field.
Include Additional Information, Contacts, Reading History and print each meter on a separate page, as required.
Click [Print].
Sample Report
Process the Meter Readings
Once you have entered meter readings, you need to process them. Processing the Meters will recalculate the billing on all Meter Agreement Documents for each Meter.
Tick the check box to the left of each Meter to process.
Click the Process icon ![]() . A Warning message will be displayed.
. A Warning message will be displayed.
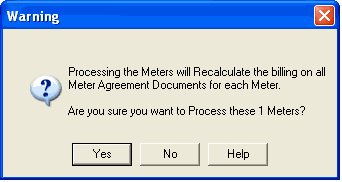
Click [Yes] to continue. A Confirmation message will be displayed.
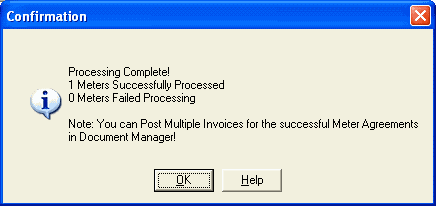
Click [OK] to continue. An additional Confirmation message may be displayed.
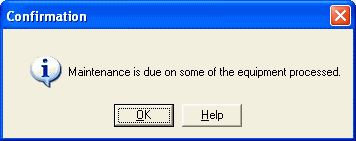
Click [OK] to continue.
Multi Post Agreement Invoices
Once the Meters have been successfully processed, proceed with Multi Post to complete the billing process.