Site Contacts

Contents
 »
»  »
» 
Overview
Contacts are Site related. Each Site can have unlimited Contacts associated with it. A Contact may be associated with multiple Sites, even across multiple A/R Customers.
Each Contact record contains information about the Contact including: name and position, role, skill level, contact telephone and fax numbers, email address, specific site location, a photo ID, and up to five events that you would like the Contact to be associated with. An example of an event might be a Newsletter, Upgrade Notice, or Birthday greeting.
This program also allows you to add Notations to the Contact and email the Contact directly using your default email program.
Estimated Time
Typically allow about two minutes setup per Contact.
Import/Export functions can speed up this process dramatically as can the Auto Create Sites (from Accounts Receivable) program. Refer to the Auto Create Sites section in the Service Manager User Guide for additional information.
Import/Export functions are available from the File menu.
Main Form

Enter or select a Customer, Site or Contact and then click Go ![]() .
.
If you select a Customer or Site, all the Sites for the Customer will be displayed. All the Contacts associated with these Sites will be shown. (A Contact may be associated with multiple Sites.)
If you select a Contact, all the Sites for each Customer where the Contact is associated, will be displayed. All the Contacts associated with these Sites will be shown. (A Contact may be associated with multiple A/R Customers.)
Example 1: Show Contacts for Customer 1100

All the Sites for Customer 1100 are shown, as are all Contacts for each Site.
Example 2: Show Contacts for Site 1105

All the Sites for Customer 1100 are shown, as are all Contacts for each Site.
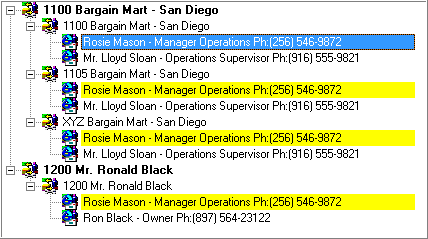
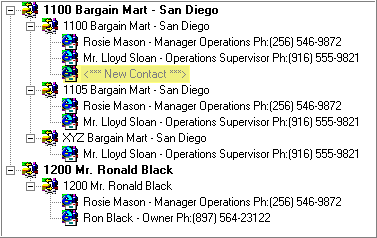
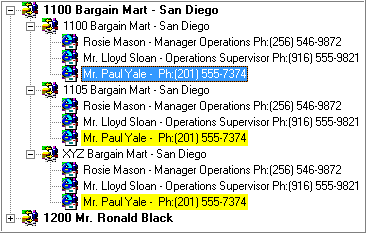
Example 3: Show Contacts for Contact "Rosie Mason"

"Rosie Mason" is associated with Site 1100 (Customer 1100) and Site 1200 (Customer 1200). All the Sites for Customer 1100 and 1200 are shown, as are all Contacts for each Site. Not that the multiple occurrences of Rosie are highlighted in yellow.
Associating Contacts with Sites
A Contact can be associated with a Site or all Sites for a Customer.
Right-click on the relevant Contact line and then select the appropriate option.

The following screenshot shows that Rosie has been associated with all sites for Customer 1100. (Rosie was already associated with Site 1200, and this association is also shown.)
Disassociating Contacts from Sites
A Contact can be disassociated from a Site or all Sites. This does not delete the Contact.
Right-click on the relevant Contact line and then select the appropriate option.

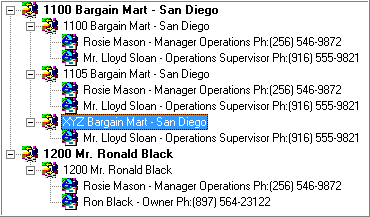
The following screenshot shows that Rosie has been disassociated from Site XYZ (only).
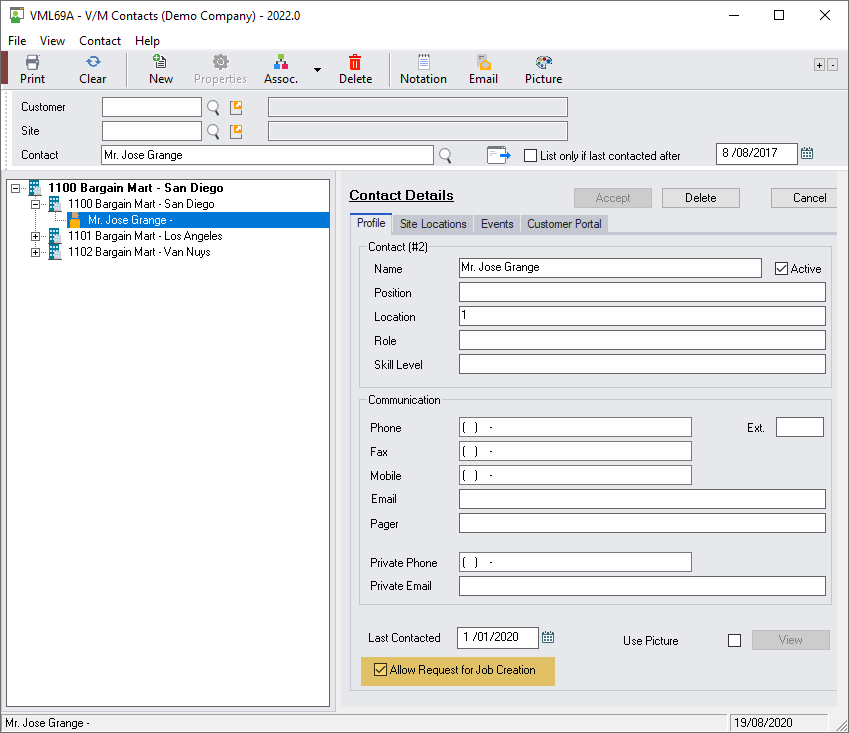
Contact Details
Contact Details are shown when you select a Contact line. Change the Contact details if required and then click [Update] to save the changes.
Profile tab
We recommend that you enter telephone and email information. Without a valid email address it will not be possible to use the email functions in Service Manager, including the Event Manager program.
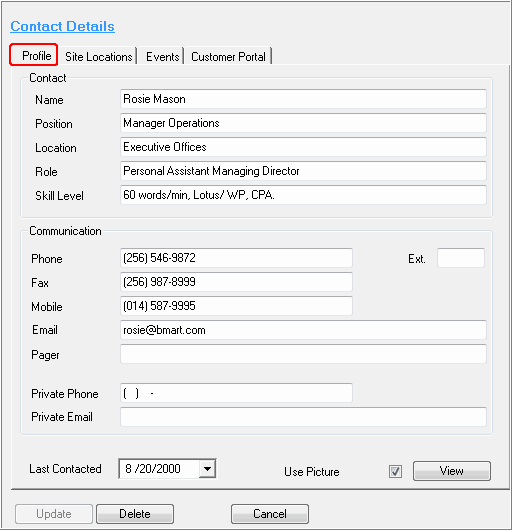
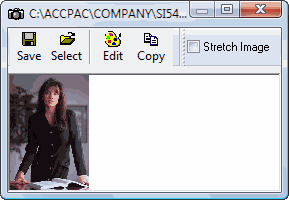
Tick the Use Picture check box and then click [View] to add a graphic to help identify the contact. The graphic can be viewed at any time.
Contact - Job Authorization
A new field has been added in Contact Setup “Allow Request for Job Creation”.
This field is set on by default during an upgrade or new install.
The field governs whether the contact is authorized to request creation of a job during the job creation process.
If this option is checked “off”, the user creating the job will not be permitted to create the job if this contact is not authorized. This can be useful in circumstances where a job is requested by a contact who is not authorized to do so as they may require a PO beforehand for example.
Once a job has been created, that contact can be applied. This feature serves simply as a warning to the user that the contact requesting the job does not have authority to request work.
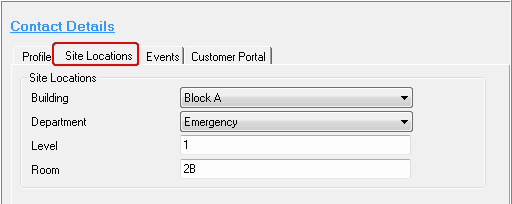
Site Locations tab
Enter the specific location of the Contact. The Site Locations tab will only be visible if locations have been set up for the Site. Refer Site Setup » Callout tab and Assigning Contacts to Locations.
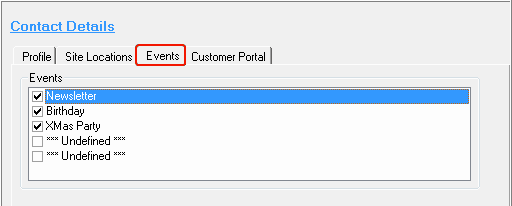
Events tab
Event descriptions are set up in V/M Setup » V/M General » Options » Desc. tab. If you change an Event description, the new description will be inherited across all Contacts in the system immediately.
Events can be used in Event Manager to email contacts based on the Events that are ticked.
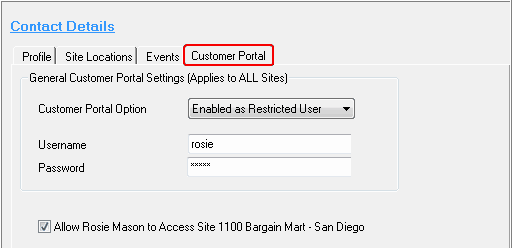
Customer Portal tab
The Customer Portal tab will only be visible if the Service Manager Customer Web Portal is installed and has been enabled for the Site. The Customer Portal Option is used to specify if this Contact is authorized to use the Customer Portal, and to what extent. Options are:
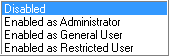
Disabled - This contact will not be able to access the Customer Web Portal.
Administrator - An Administrator can view and modify all Requests for all users for each Site to which the Administrator has been provided access. An Administrator can also view all Jobs that have been created by or are available to the Customer Web Portal for each Site to which the Administrator has been provided access.
General User - General users can view and modify their own Requests. They can also view all Jobs created from these Requests.
Restricted User - Restricted users can only view their own Requests. They cannot view any Job information. Restricted users cannot edit any details.
If enabled, a Username and Password must be specified and is required to log on to the Customer Portal.
Creating a New Site Contact
Highlight the Site to add the new Contact to, and then click the New icon on the toolbar.
The Contact Details section will be blank. Enter the details of the new Contact and then click [Add].
Deleting a Site Contact
Select the Contact to delete. Click [Delete] in the Contact Details section.
A confirmation message will be displayed. Click [Yes] to delete the Contact.
Warning
A deleted Contact is removed from all Sites and cannot be reinstated.
Locating and Merging Duplicate Contacts
A utility is available that allows you to locate and merge duplicate Contacts. The search is performed on records with exactly the same Contact Name.
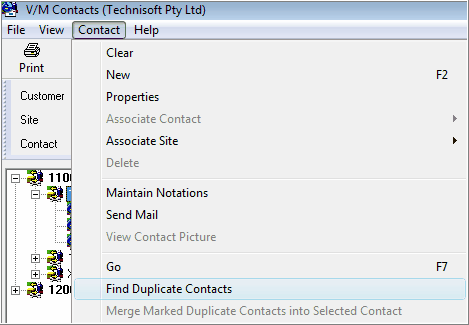
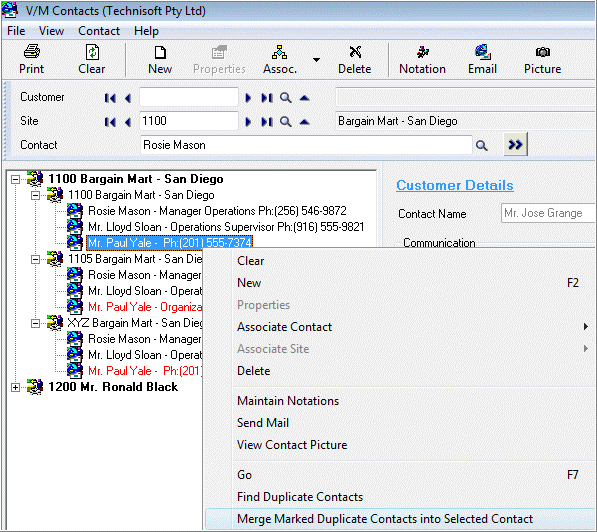
Select Find Duplicate Contacts from the Contact menu.
A Confirmation message showing the number of duplicate contacts found, will be displayed. This utility only finds one set of duplicates at a time so you may have to run it more than once in a Site group. Duplicate contacts will be highlighted in red.
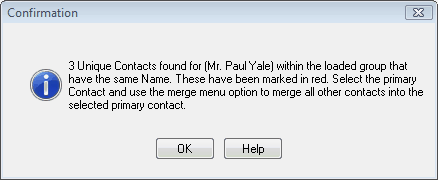
Click [OK] to continue.
Right-click on the primary Contact and then select Merge Marked Duplicate Contacts into Selected Contact to merge all other duplicates into the selected primary Contact.
A Warning message will be displayed.
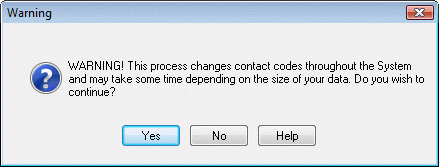
Click [Yes] to continue. You will then find all Contacts are now merged into the primary Contact record.
Other Site Contact Functions
Click the Print icon on the toolbar to print the Contact details.
Click the Properties icon on the toolbar to display and edit properties for the selected Customer or Site.
Click the Notation icon on the toolbar to add Notations to the Contact record. Notations can be unlimited. Notations can be read by others at any time by selecting the Notation icon.
Click the Email icon on the toolbar to email a Contact at any time.
Click the Picture icon on the toolbar to display a picture of the Contact.