Site Profile

Contents
 »
»  »
» 
Overview
The Site Profile setup is where Customer Sites are created or modified. Site data is geographical in nature, whereas Customer data relates to billing information. Often a one to one relationship exists between a Customer and a Site record, but it is possible to create many Sites with the same Customer or Bill To, for example, where a Head Office to many Site relationship exists.
Service Manager is Site driven as opposed to Customer driven.
Documents are maintained by Site. The Site Setup program allows you to specify default settings to be used when entering Documents for a Site.
A Company may use its own Equipment on Jobs or rent out its Equipment. In this case we recommend that you first create an Internal Site and then create Internal Equipment records for that Site. Equipment created for an Internal Site will automatically be marked as Internal. Internal Equipment may be assigned to a Job and scheduled with time entries as you can for Employees and Subcontractors.
Estimated Time
Typically allow about five minutes setup per Site.
Import/Export functions can speed up this process dramatically as can the Auto Create Sites (from Accounts Receivable) program. Refer to the Auto Create Sites section in the Service Manager User Guide for additional information.
Import/Export functions are available from the File menu.
Profile tab
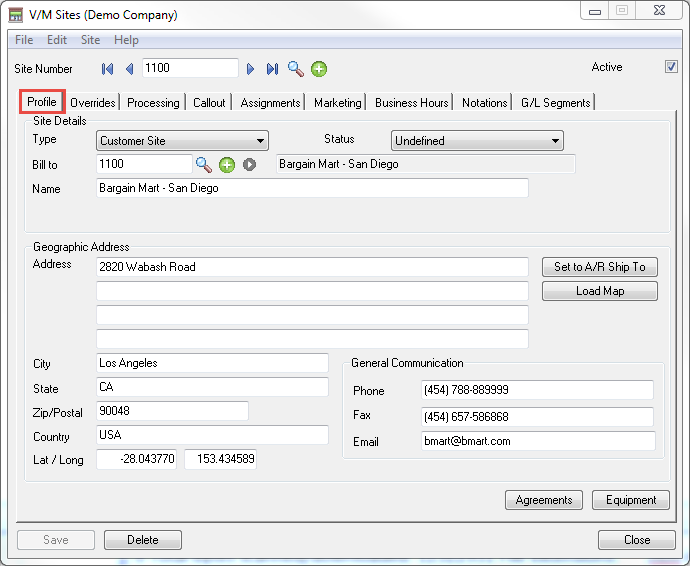
Enter a Site Number or click New ![]() to set the Site Number to the next available number. The Active check box is ticked by default. You can clear this at any time to deactivate the Site and prevent Documents being created for this site.
to set the Site Number to the next available number. The Active check box is ticked by default. You can clear this at any time to deactivate the Site and prevent Documents being created for this site.
Click the Profile tab.
Type
Customer Site: A Customer Site.
Vendor Site: Used for billing Manufacturers or Vendors for work performed under a Warranty Agreement.
Internal Site: Used for Internal Equipment.
If you change a Site from Customer Site or Vendor Site to Internal Site, the following message will be displayed:
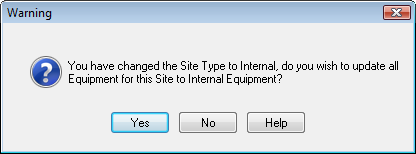
Click [Yes] to change all Equipment for the Site to Internal Equipment.
If you change a Site from Internal Site to Customer Site, the following message will be displayed:
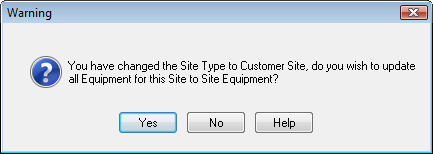
Click [Yes] to change all Equipment for the Site to Site Equipment.
Status
Site Status values are set up in Company Options » Description tab. There are nine user definable values. "Undefined" means that a Site Status has not been set. Do not confuse this with "*** Undefined ***" which reflects user defined Site Status values that have not yet been configured.
Site Statuses can be used to segment and report on Sites by the different statuses selected. For example if you set up a loyalty tree to define Site Statuses, you may create "Suspect", "Prospect", "Customer", etc. Setting the Status to "Prospect" can be handy when creating Quotations, for example, where the Customer has not dealt with you before and details are not on record. If the Customer accepts the Quotation, it is merely a matter of changing the Site Status to "Customer" to reclassify the Customer. Details do not have to be re-entered again saving a great deal of time.
Next, associate the Site with a Bill To account in Accounts Receivable for Billing purposes. There can be many Sites with the same Bill To in Accounts Receivable. For example, if work is performed for a bank which may have many branches located at different geographic locations, it is possible to send all the accounts to the same Bill To customer, typically, a head office.
Click [Set to A/R Ship To] to load the address details from the A/R Ship To Location records for the Bill To Customer or enter the address information. This option is also available in the Quick Create, Site Profile tab. Refer to the Job Header » Profile tab section in the Service Manager User Guide for additional information.
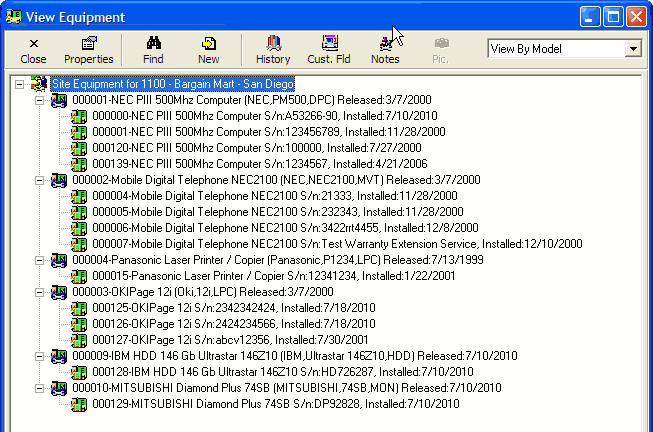
Click [Agreements] to view Agreements for the Site.
Click [Equipment] to view all Equipment associated with the Site. The View Equipment window will be displayed.
Site Setup – Default Visibility Setting in Customer Portal
A new field has been added to Site setup “Default Documents to Publish in Customer Portal”.
If this field is checked on, all documents (Jobs, Sales, Quotes, and Historic Jobs), created will be visible to customer contacts when they login to the Customer Portal.
This field is set “off” by default during an upgrade or new system setup.
Select VM Sites, in Site Setup. Select the Processing tab and check the option “Default Documents to Publish in Customer Portal”, on or off as required.
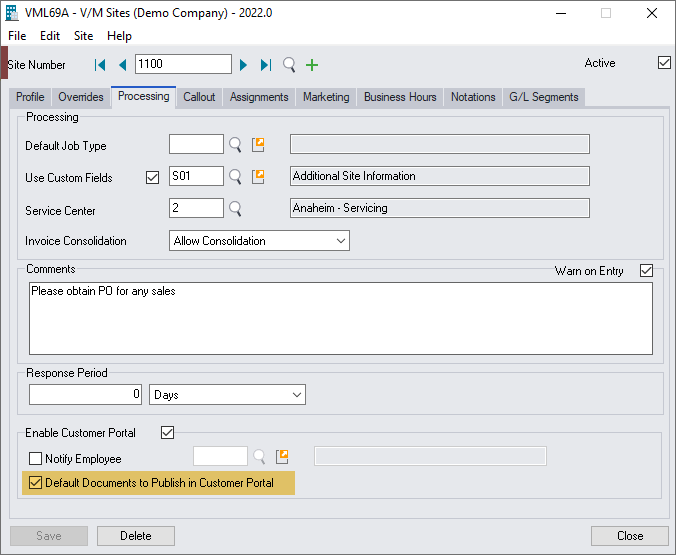
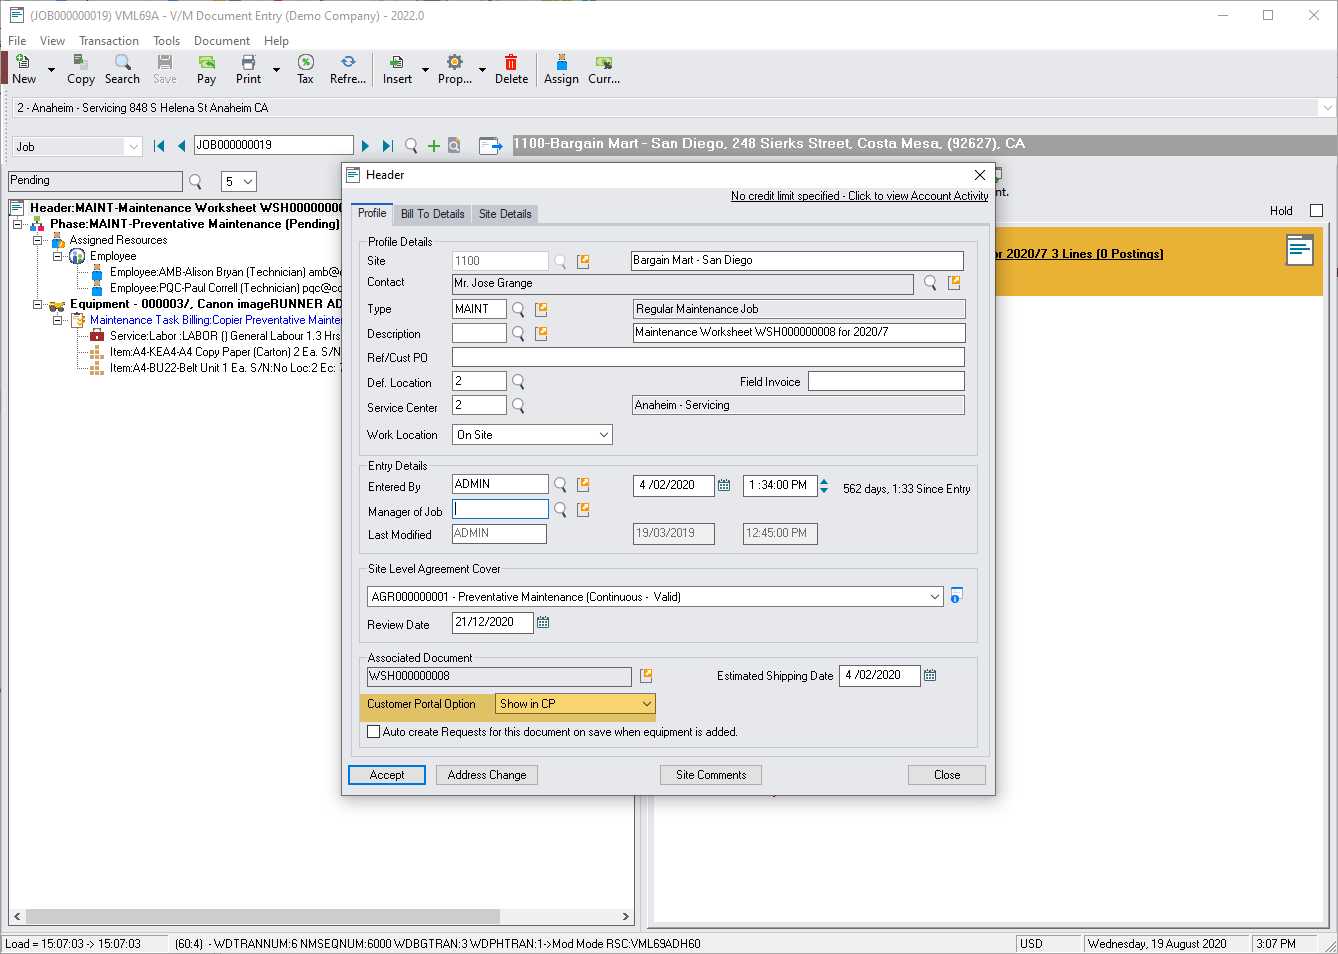
This is a default setting only, and can be managed individually in order to publish the document in Customer Portal (CP) or to hide the document from the Customer Portal.
This option once set, can also be adjusted manually in the “Header” of the document if required.
Select the Header of the Job, Sale Order, Quote, or Historic Job, select the Processing tab, select Customer Portal Option to set the status as required.
Click the Overrides tab.
Overrides tab
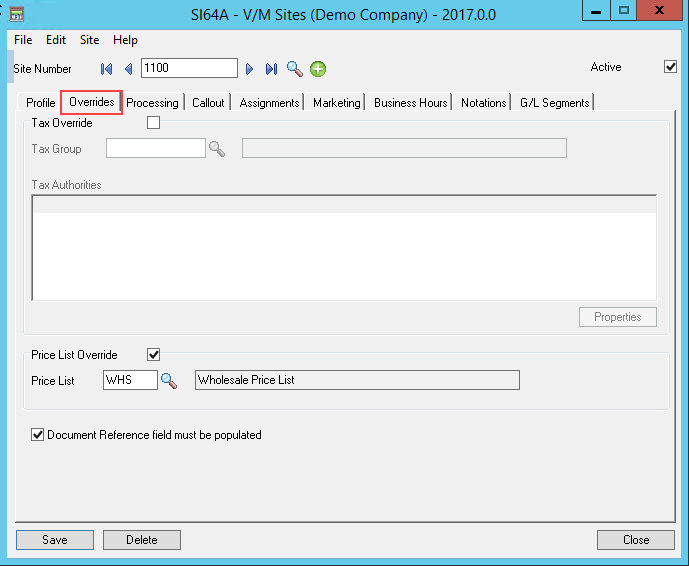
Tick Tax Override to override the Customer Tax Authority and or Class Types as specified in Accounts Receivable. When a Job is started and Services or Items are added, the Site Tax Overrides will be set in the absence of individual Service or Item Tax settings.
Enter a Tax Group Code, and the press Tab. Click [Properties] to edit the Tax Class for that Tax Authority.
Tick the Price List Override check box to enable a Price List Code for that Customer. When a Job is created for that Customer, the Price List specified will default when Items or Services are added.
Tick the Document Reference field must be populated check box to set a mandatory requirement for the Document Reference field to be populated when this site is in use.
Click the Processing tab.
Processing tab
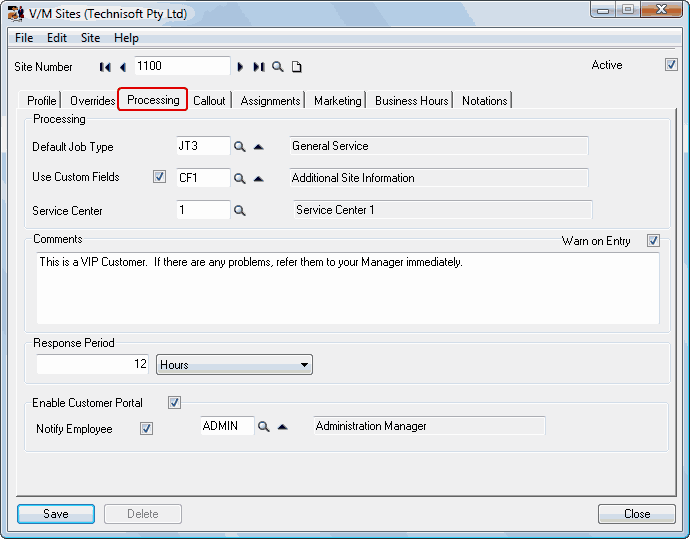
Enter a Default Job Type if you need to specify a particular Job Type whenever this Site is used, otherwise leave this blank (recommended).
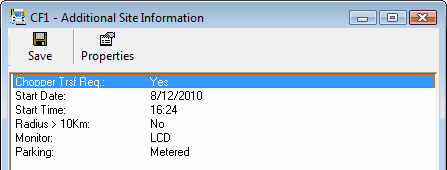
Tick the Custom Fields check box and then choose a Custom Field template to use for this Site. Click the drill-to arrow ![]() to display details of the currently selected Custom Field.
to display details of the currently selected Custom Field.
Set the Invoice Consolidation default.
•“Never Consolidate”, will not allow an invoice to present the “Consolidate This Invoice” option when posting an invoice for a customer. The option is simply hidden on the Post form.
•“Allow Consolidation” presents the “Consolidate This Invoice” option on the Post form but the user must specify whether to consolidate or not
•“Default to Consolidated”, will check the “Consolidate This Invoice” switch on the Post form automatically.
If you are using the Service Manager Service Center Add-On, you may tie a Site to a particular Service Center. If an Employee has Finders restricted to a particular Service Center, when the Employee uses the Site Finder, only Sites for that Service Center and Sites with no Service Center will be shown in the Finder. e.g., an Employee is restricted to Service Center 2; Site 1100 is tied to Service Center 1. Site 1100 will not show in the Site Finder for this Employee. If the Employee types 1100 in a Site filed, an error will be displayed. Refer to the Employee Setup » Processing tab » Default Service Center and Restrict Finders to this Service Center ONLY fields for additional information.
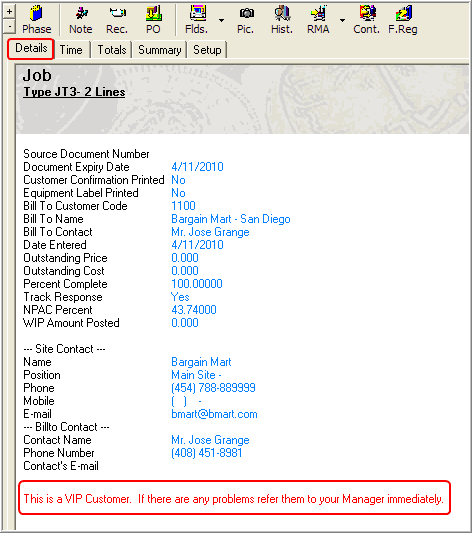
Enter a Site comment in the Comments area. Tick the Warn on Entry check box to have this comment pop up automatically whenever and wherever the Site code is entered in Service Manager. This can be useful for advising users of special information when dealing with a Site. The Comments will be displayed in Document Entry on the Details tab when the Document Header node is selected. If the Warn on Entry check box is ticked, the Comments will be displayed in red, otherwise they will be displayed in black.
Tick the Enable Customer Portal check box to allow staff at this Site (who must be set up as Site Contacts), to use the Service Manager Customer Web Portal.
If you want a specific Employee to be notified by email when a Request is logged, tick the Notify Employee check box and specify the Employee to notify.
Click the Callout tab.
Callout tab
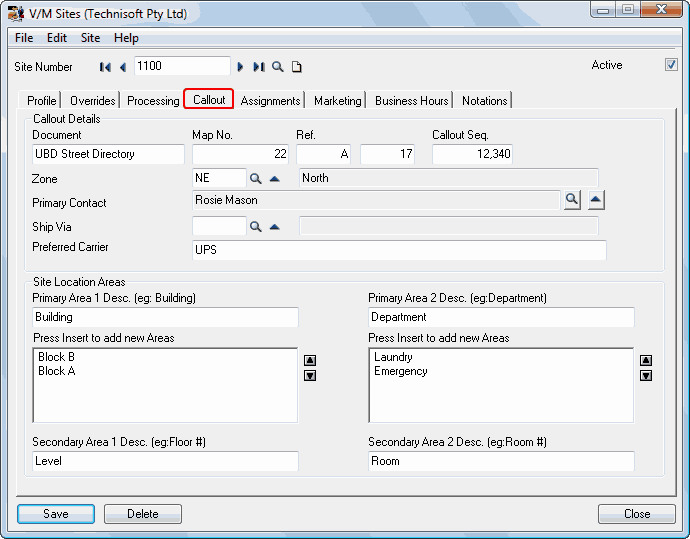
Enter a description for a reference Document used to identify a map reference.
Enter Map Reference details and a Callout Sequence.
The Callout Sequence can be used to order Jobs to increase efficiency of scheduling by optimizing routes.
Enter or select a Zone.
Select the Primary Contact for the Site. Click the drill-to arrow ![]() to browse and maintain Site Contacts.
to browse and maintain Site Contacts.
Enter or select Ship Via and Preferred Carrier information if known.
Enter Site Location Areas if required. This will allow Contact Locations and Equipment Locations to be specified to four levels. e.g., Block A, Emergency, Level 2, Room 3. Refer Setting up Site Locations.
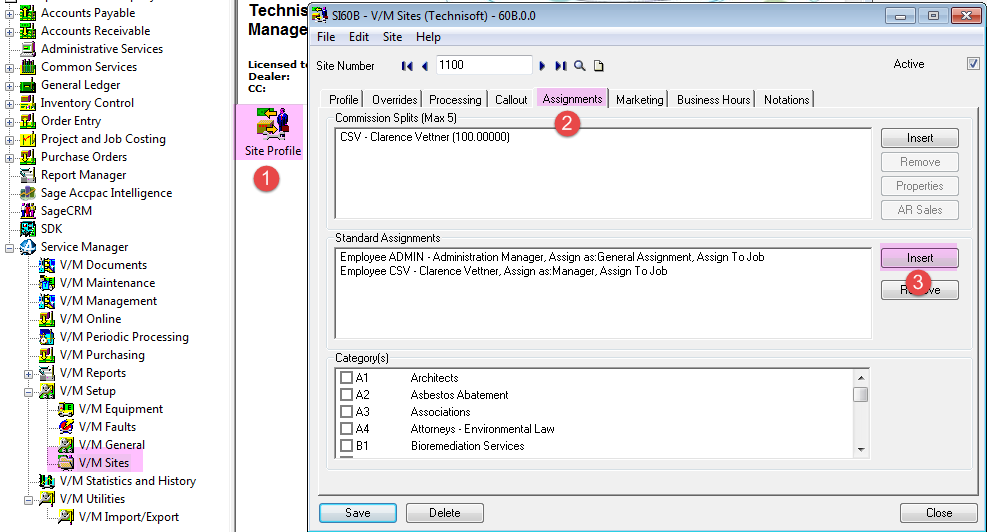
Click the Assignments tab.
Assignments tab
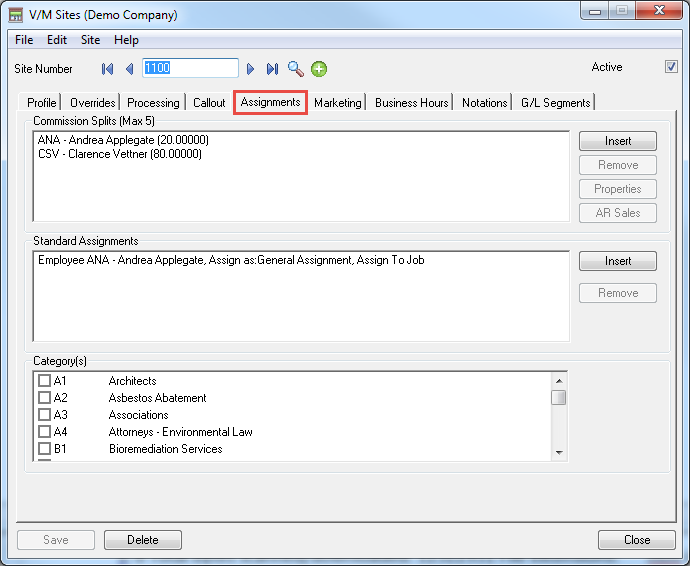
Commission Splits
Click [Insert] to add an Employee for Commission purposes. The Commission Splits must total 100%. The maximum number of commissionable employees is five.
The Commission Splits are defaulted into the Phase in the Document.
Refer to the Employee Commissions section in the Service Manager User Guide for additional information about the commission tracking process in Service Manager.
Standard Assignments
Click [Insert] to add a Standard Assignment.
Note:
A Standard Assignment should be a person who normally works at that Site.
Determine if the assigned person is going to be an employee or a contractor.
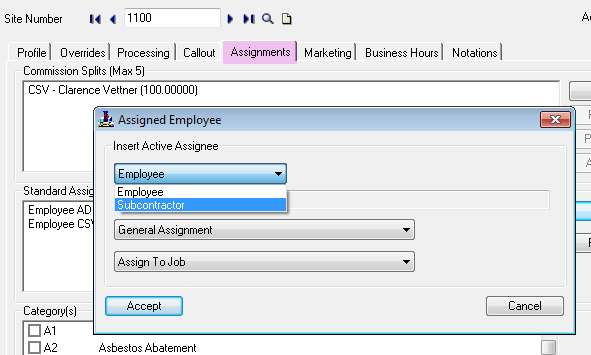
Use the finder to choose the employee or contractor.
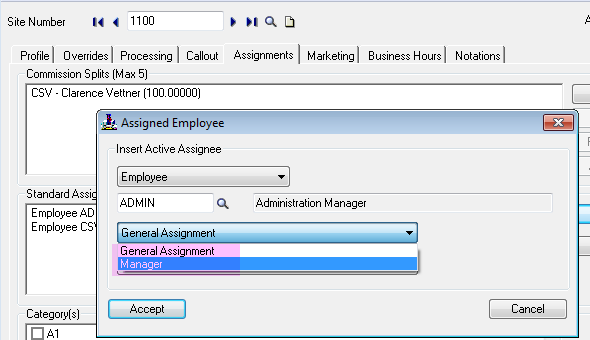
Next choose whether they will be a General Assignment or a Manager of the site.
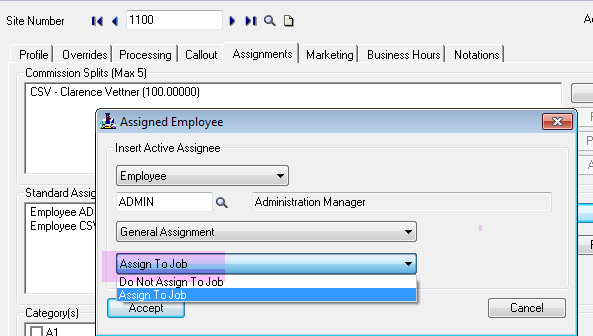
Choose whether to auto assign them to a new job.
If set to Do Not Assign To Job they will still be listed as an assignment but will not be auto assigned when creating a new job.
Click the Marketing tab.
Marketing tab
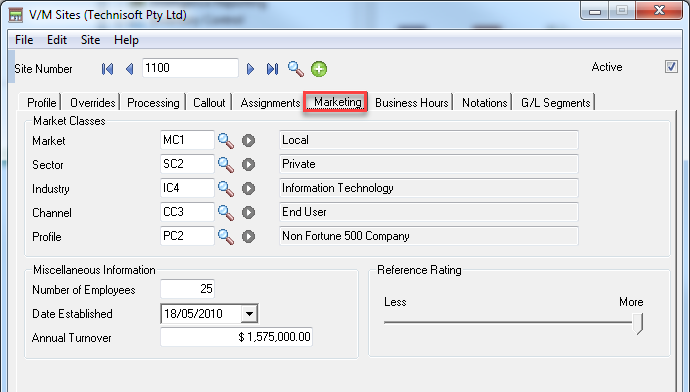
Market Classes are set up in Class Types. These will be used for reporting and financial distribution statistics. It is highly recommended that these Class Types be set up immediately as financial distribution statistics will only calculate from the time these are set. Slide the Reference Rating bar to the right to indicate what type of reference site the Site is. The Site Listing can be used to identify all sorts of Market Class that have a reference rating of 10, for example. Refer to the Setup Reports » Site Listing section in the Service Manager User Guide for additional information.
Enter Miscellaneous Information as applicable. Additional marketing information could be stored in Site Custom Fields if required.
Click the Business Hours tab.
Business Hours tab

Set the Site's operational hours. Once you enter Monday's times you can click [Sync] to set all the other days to Monday's times. Tick the Operate Weekends check box to enable weekend trading hours and complete these as applicable as well.
Click the Notations tab.
Notations tab

Click [Insert] to enter a Site Notation.
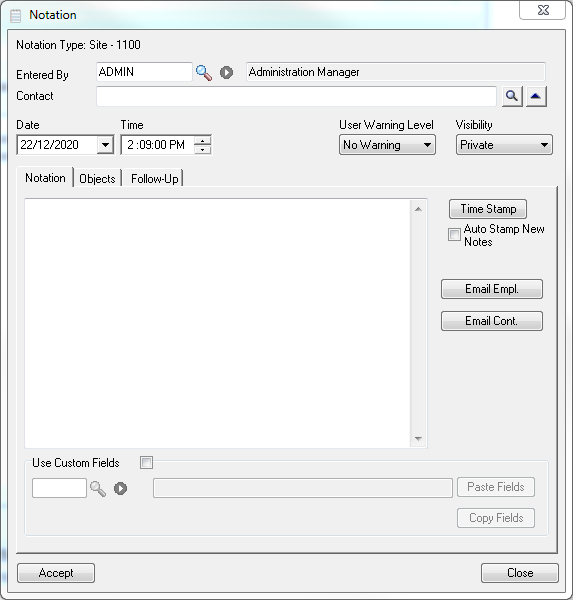
Refer to the Notations section in the Service Manager User Guide for additional information.
Click [Accept] to save the Notation. Click [Close] to return to the Sites window.
G/L Segments Tab
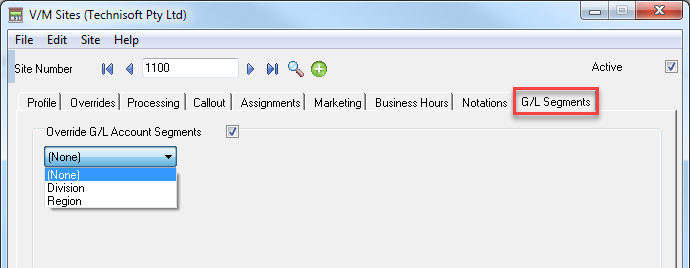
Tick the Override G/L Account Segments check box and then select Division or Region to override these G/L Segments.
Note:
•Refer to the Day End Processing of G/L Segment Overrides section in the Service Manager User Guide for information about how Day End processes G/L Segment Overrides and what happens if a G/L segment account does not exist.
Click [Add] to add the Site or [Save] to update an existing Site record.
When adding a Site, a Warning message will be displayed.
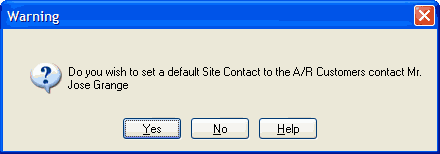
Click [Yes] to set the default Site Contact (normally SITE) to the A/R Customer Contact.
Key Points
The Auto Create Sites program allows you to quickly initialize a new Service Manager database by copying Accounts Receivable Customer information to Site and Contact records in Service Manager. This is an automated process and is on a one to one basis record for record.
There are several default settings and filters that can be specified when creating new Sites.
This function cannot be used to create a multi Site to one Bill To relationship.