Inventory Items

Contents
Items are attached to Billing Groups and allow you to bill Items directly from Sage 300 Inventory.
Note: Items have a Sellable flag. You cannot ship or use a non sellable item, i.e., where the Sellable check box for the Item is cleared.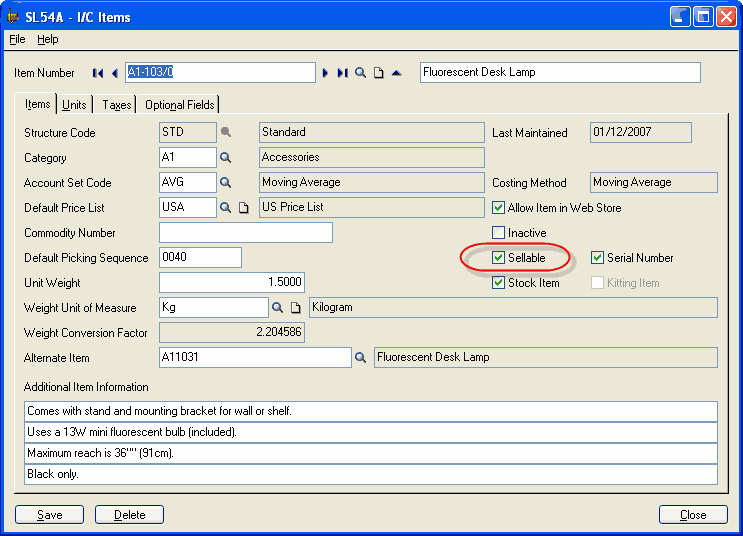
To add an Inventory Item to a Billing Group, click the Insert Item Line ![]() fast icon.
fast icon.
To view or change Item properties, double-click the Item line or right-click the Item line and then select Properties. The Item window will be displayed.
Related Topics
Job Phase Functions » Set Supply
Job Phase Functions » Hold Lines
Job Phase Functions » Hide Lines
Services » Refresh Pricing to Price List
Item Line Properties
Item No.
Enter the Inventory Item No. or select it using the Finder![]() or navigational arrows.
or navigational arrows.
It is also possible to enter a Manufacturer or Customer Item No. that will locate an internal Inventory Control Item No. Refer Using Manufacturer and Customer Item Numbers.
Employee
Associate the Item line with an Employee for statistical purposes. This is optional.
Agreement
Refer Services » Agreement.
Location
The physical Location of the Item. Locations are sourced from Inventory Control Locations.
Stock Levels
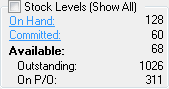
Stock Levels, e.g., Quantity on Hand, are shown for the current Location (default Location associated with the Site). To find Stock Levels at an alternate Location, click in the Location field and select the alternate Location using the Finder![]() . The Location Quantities Finder window will be displayed. This will display a breakdown of quantities available at each Location.
. The Location Quantities Finder window will be displayed. This will display a breakdown of quantities available at each Location.

Tick the Stock Levels (Show All) check box to show stock levels at all Locations combined.
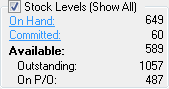
Click the On Hand link to show On Hand values at all Locations. The Location Quantities window will be displayed.

Click the Committed link to show the Documents on which the Item has been Committed for the current Location. The Item Location Commitments window will be displayed.

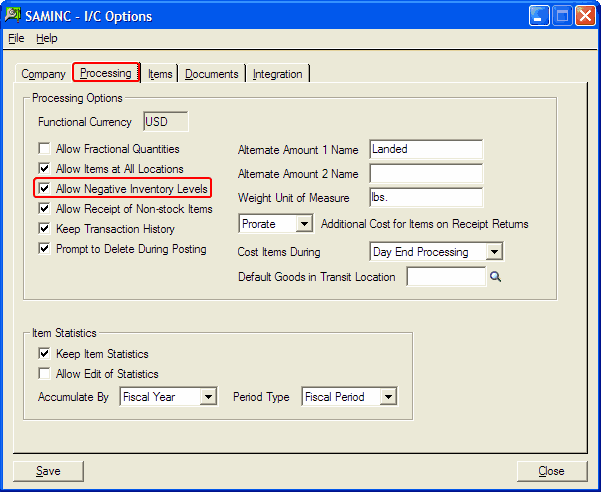
Note: Tick the Allow Negative Inventory Levels check box in Inventory Control » IC Setup » Options » Processing tab to allow negative Quantity on Hand Inventory Levels.
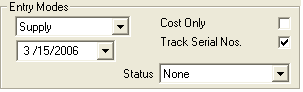
Item Status
Service Manager provides a reporting flag named Status.
The drop-down box lists the various options available.
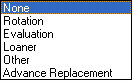
For example, you are in a computer repair business and the computer you are servicing under warranty has a hard drive failure. A replacement part is installed into the customer's machine. You can flag the item as Rotation. At the end of the month you would be able to do an audit report on items that have been flagged for Rotation.
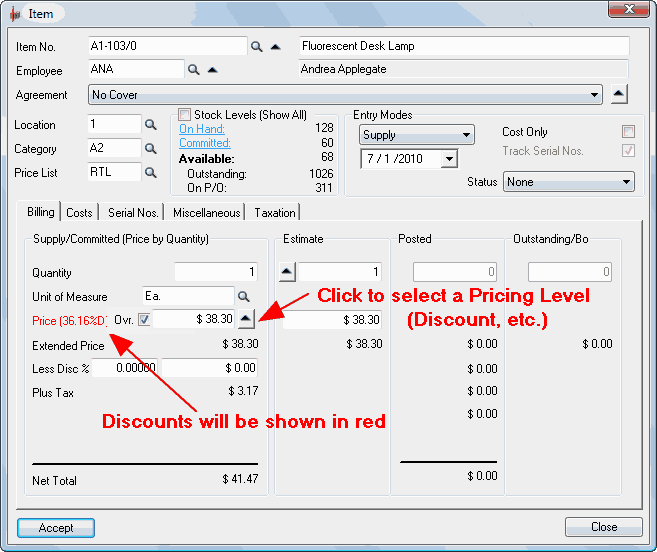
Price Overrides
If the Item has a manual price override, the Ovr. check box will be ticked. Clear the Ovr. check box to cancel the manual price override and revert to the system generated price.
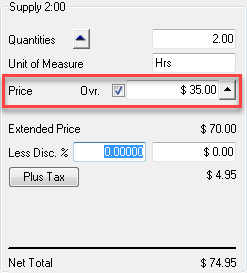
Discounts can be applied and shown as a net discounted value (base price reduction) in the price field or as a direct discount in the document's discount field if the checkbox to Apply Base Discount to Document Discount has been enabled from V/M General > Options.
With the checkbox enabled, if a Customer has a percentage or volume price discount set based on Customer Type, the Gross base unit price is displayed in the Price field, and the discount amount is displayed in the Discount field, rather than the Net unit price less discount being displayed in the Price field.
Price Checking
When using Item Price Checking, Service Manager computes the minimum and maximum allowed Item Price. Note that the upper limit is ignored if the maximum (Less than) % value set in Item Price Checking >=100%.
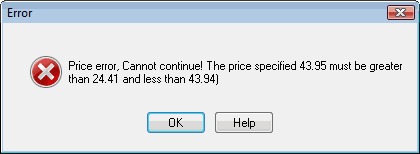
Note: Refer to the Sage 300 Inventory Control documentation for more information on Item Price Checking.
Non-Stock Item Cost Clearing Account
The default non-stock clearing account is set from the account specified in the Item’s Account Set in I/C Setup, however, this can be specified and overridden for Non-Stock items on the Item form in Document Entry.
When supplying Purchase Orders or Receipts to the Document, the PO detail lines stated Non-Stock Clearing Account specified in the Purchase Order will be considered and loaded into the document lines field if applicable.
If the Item line was added to the Document through a Purchase Order then this account will be read only and display the clearing account nominated in the Purchase Order.
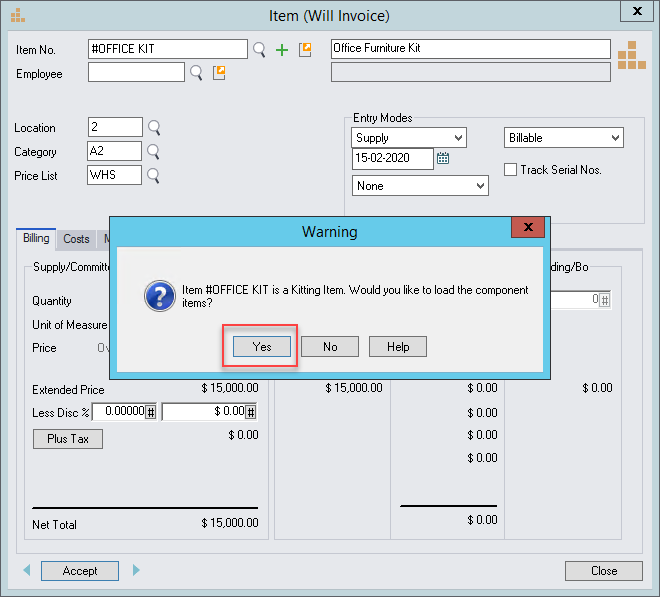
Kitting Items
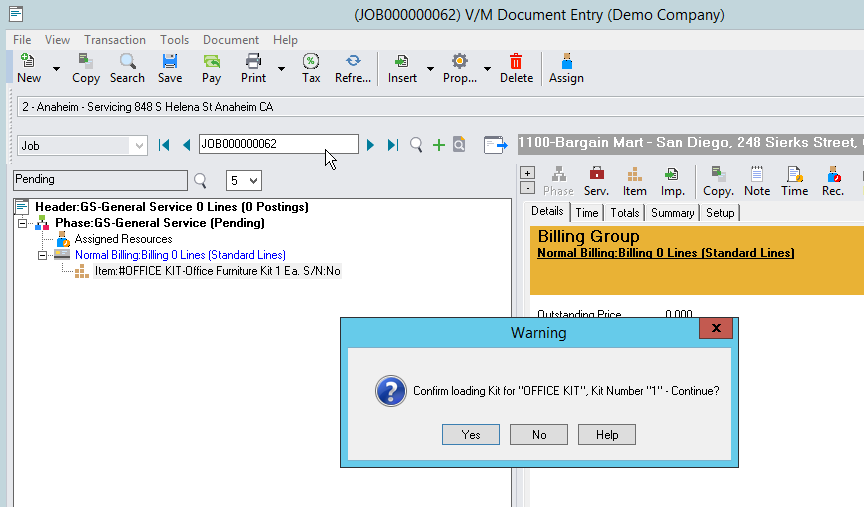
When an IC Kitting Item is inserted into a Template, Quote or Job, it is possible to load the components for that Kitting Item.
When entering the Kitting Item a question will pop asking if you wish to load the Component Items.
If you say no only the Kitting Master is loaded.
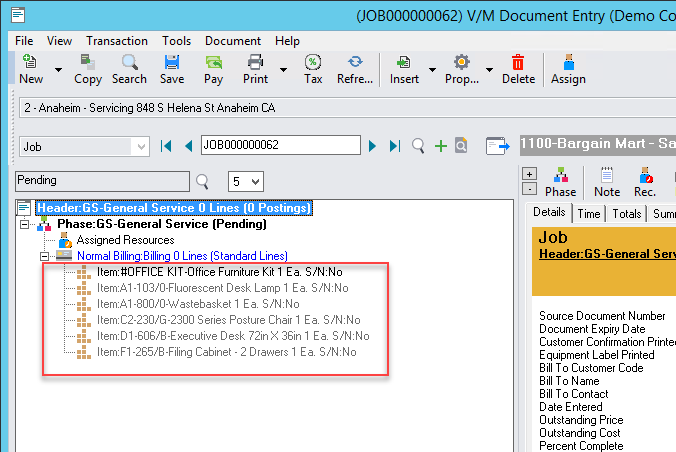
If you say yes the Kitting Items load to the job.
If there is more than one kit available for the Kitting Item a finder is presented so the user can select the relevant kit.
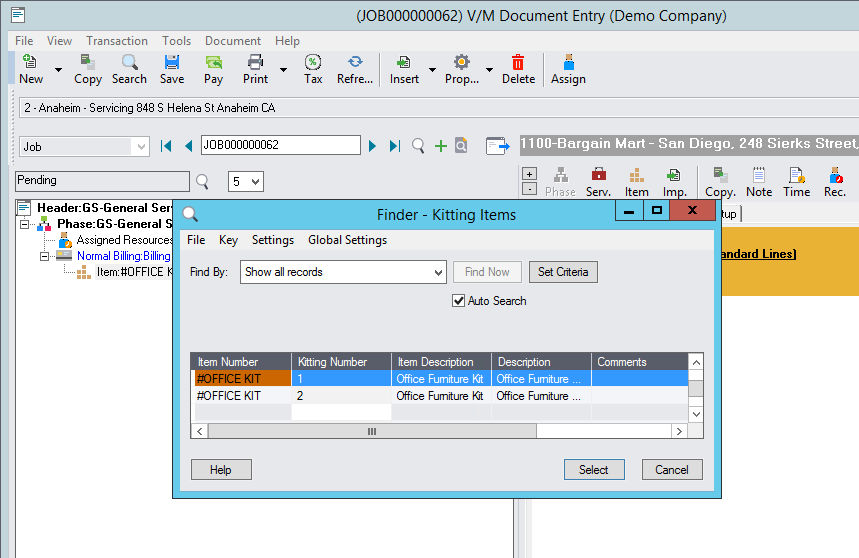
The Master Billable item is added to the Job. Components are loaded to the Job but greyed out and set to Cost Only.
The invoice specification would have to be modified in Crystal if the kitting items need to be shown on the invoice rather than the Master Kitting Item as they are set to Cost Only.
Components are marked as hidden by default so they do not appear on the printed posting forms. The can be unhidden by selecting the right click option to “Unhide”.
When posting, both the invoice and cost only tabs will have entries, therefore, both will need to be posted.
Note that if a Kitting Item is added to a Quote and left as a Master item only (no individual items added), when the Quote is copies to a Job it will be copied the same way. i.e. it will not ask if you wish to load the Component Items. If you require the components to load then delete the Master Kitting line and re insert it.
Serial Nos. tab
Background information
Tracking of Serialized Inventory can be achieved at the point of Purchase Order receipt via Sage 300 Serialized Inventory or at point of sale using the standard Service Manager serialization options.
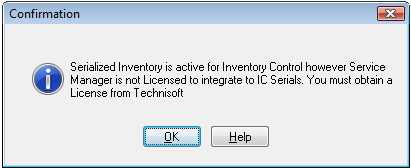
In Document Entry, to track Serial Numbers for an Item, the Sage 300 Serialized Inventory and Lot Tracking module must be licensed (SN/LT is now installed as part of Inventory Control) and the Service Manager Serialized Inventory Add-On must be licensed. If SN/LT is licensed, but the Service Manager Serialized Inventory Add-On is not licensed (there is no Service Manager Serialization entry in the VM license), you will not be able to enter serials and therefore cannot post invoices for those Items.
The following warning is displayed if SN is licensed, but the Service Manager Serialized Inventory Add-On is not licensed.
Note: From Sage 300 5.6, the Sage 300 Serialized Inventory (SN) and Lot Tracking (LT) modules are integrated into the standard Sage 300 Inventory Control module. SN and LT are available as soon as the appropriate SN/LT license is installed (SN56A.LIC). If SN/LT is not licensed, Serial Numbers will not be available in OE/IC. In Service Manager, the logic with SN numbers is now more rigid. Previously, you were able to turn off the Track Serial Nos. flag of a serialized Item. This is not permitted now.
Tracking Item Serial Numbers in Document Entry
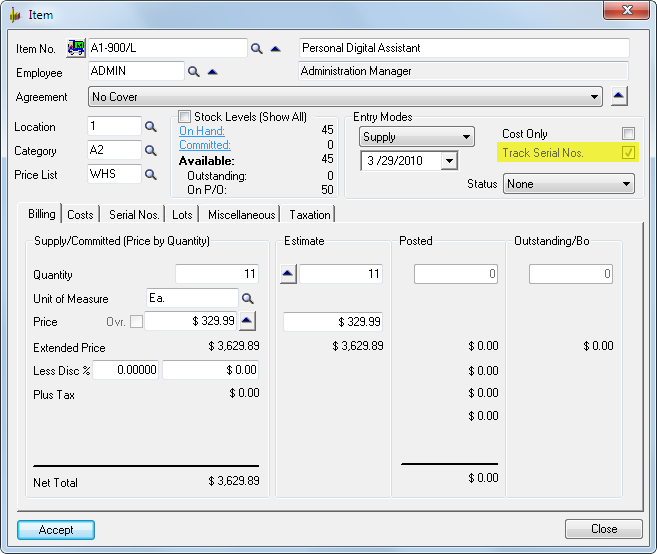
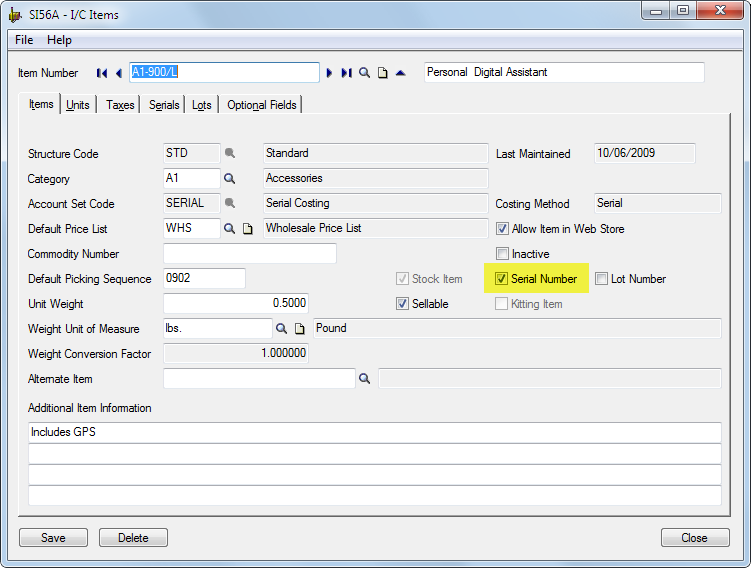
The Serial Nos. tab is shown on the Item if the Track Serial Nos. flag on the Item is ticked. If this flag is ticked by default, it means that the Item is serialized in Inventory Control.
Selecting Serial Numbers for Serial tracked Items
If the Item is serialized in Inventory Control, you must select Serial Numbers from the Sage 300 Serialized Inventory tables. You cannot enter Serial Numbers manually.
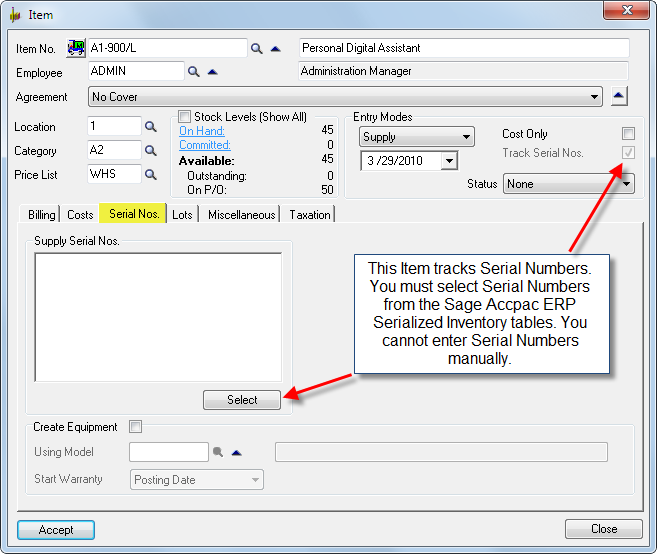
To select the Serial Numbers required, click [Select]. The Pick Serial Number(s) window will be displayed.
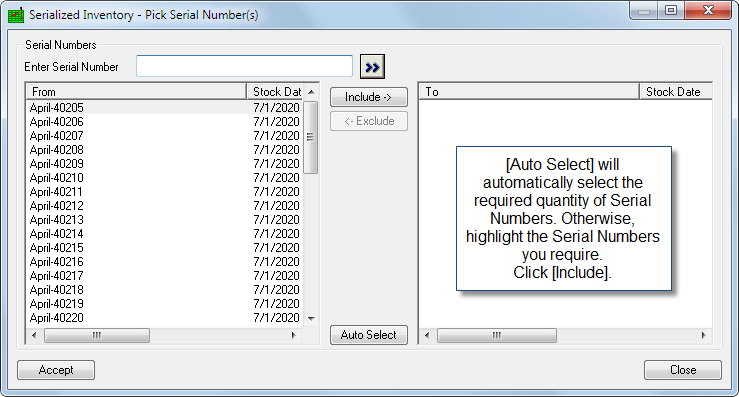
Click [Auto Select] to automatically select the required quantity of Serial Numbers. Otherwise, highlight the Serial Numbers you require.
Click [Include].
Click [Accept] to return to the Item form.
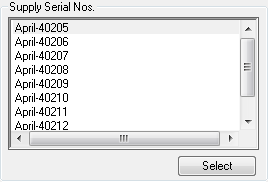
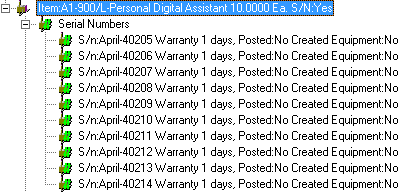
After accepting the Item, the Serial Numbers will show in the Document tree.
Selecting Serial Numbers for non Serial tracked Items
If the Item is not serialized in Inventory Control or the Sage 300 Serialized Inventory (SN) module is not licensed, tick the Track Serial Nos. check box to track Serial Numbers. If the Track Serial Nos. check box is not ticked, the Serial Nos. tab will not be shown and you will not be able to enter Serial Numbers for the Item.
The standard Service Manager serialization feature allows you to scan a Serial Number or enter it manually at the point of sale prior to invoicing.
As seen in the example below, the Serial Nos. tab is visible and allows you to insert a Serial Number. The Serial Nos. tab will only be visible if the Track Serial Nos. check box is ticked.
Click [Insert] and type or scan the Item bar code to enter the Serial Number. Click [Auto] to auto increment the Serial Number from the first Serial Number entered. The number of Serial Numbers supplied must match the Billing Quantity. Serial Numbers will remain in Service Manager only and will not be reflected in core Sage 300 modules.
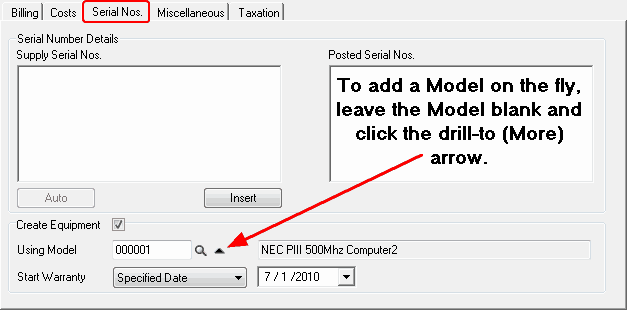
Tick the Create Equipment check box to create Equipment from the Items. The Equipment will not be created immediately. It will be created when the line is Posted.
Note: To add a Model on the fly, leave the Using Model field blank and click the drill-to arrow ![]() . The Item Code will be passed over to the Model and the Model Code of the newly-created Model will populate the Using Model field.
. The Item Code will be passed over to the Model and the Model Code of the newly-created Model will populate the Using Model field.
Warranty can be set to start from the Posting Date, Line Date or a Specified Date.
![]()
Click [Accept] once you have entered the Serial Number and the system will return to the Job screen.
Changing a Serial Number
To change a Serial Number, in the Document tree, double-click the Serial Number to change. The Change Serial Number window will be displayed. Select the required Serial Number.
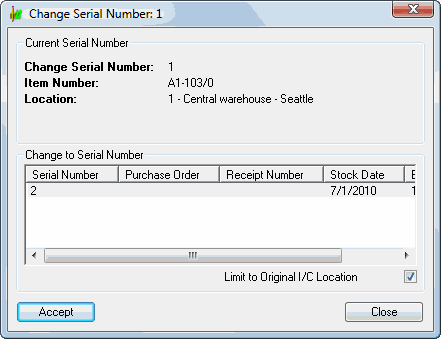
Note: The system will not allow you to edit or delete a Serial Number sourced from SN.
Lots tab
The Service Manager Serialized Inventory Add-On also enables Items to be lot tracked.
For this to occur, the Sage 300 Serialized Inventory and Lot Tracking module must be licensed (SN/LT is now installed as part of Inventory Control) and the Service Manager Serialized Inventory Add-On must be licensed.
Note that an Item may be serial tracked and/or lot tracked. There is however, no relationship between the two. The functionality is entirely independent.
Tracking Item Lots in Document Entry
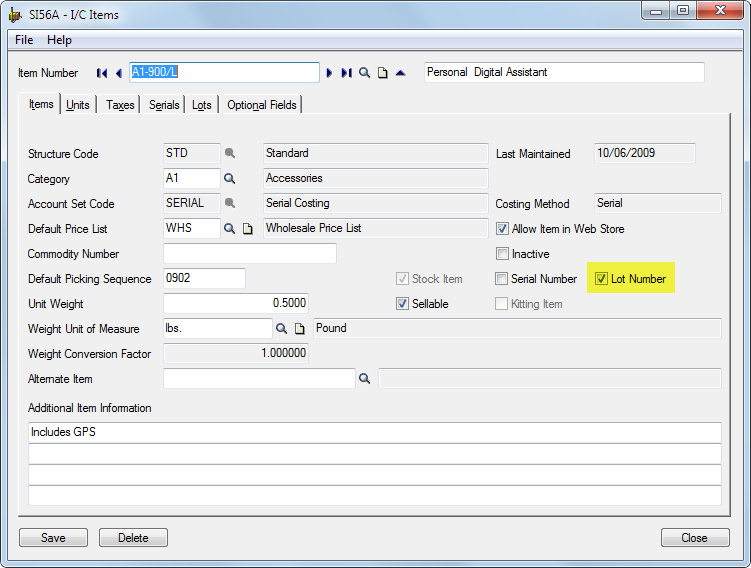
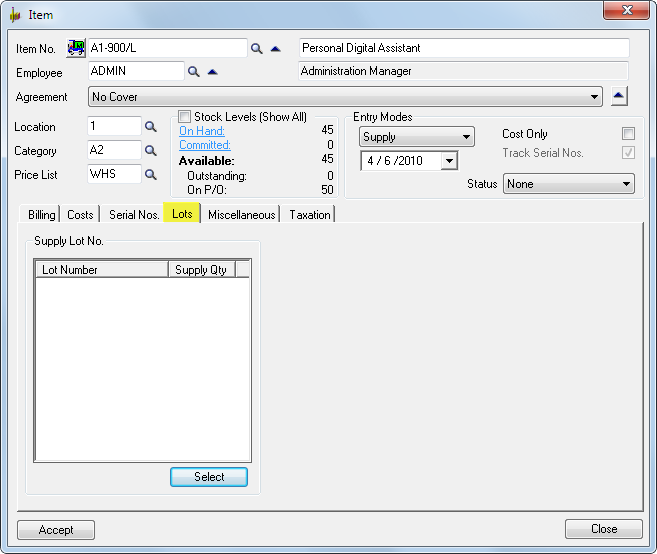
The Lots tab is shown on the Item if the Item is lot tracked in Inventory Control.
Selecting Lot Numbers for Lot tracked Items
To select the Lots required, click [Select]. The Assign Lot Number(s) window will be displayed.
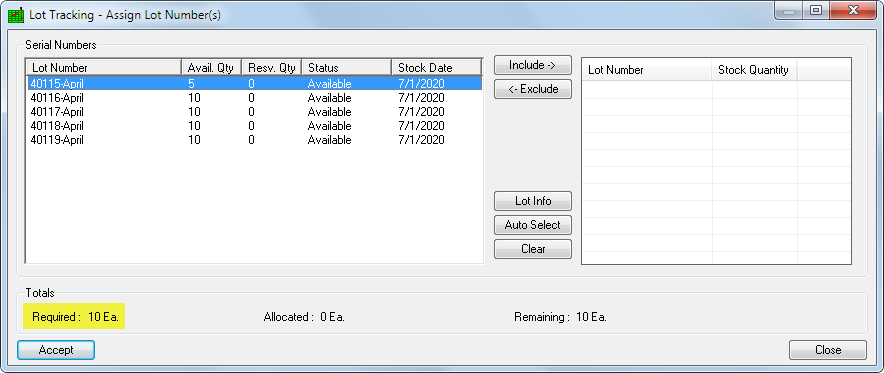
Note: A Lot may have a Unit of Measure such as dozen. In this case, the required quantity will be, say, 0.83 dozen, for 10 Items.
Auto Selecting from Lots
Click [Auto Select] to automatically select the required quantity from the Lots shown, starting with the first Lot listed.
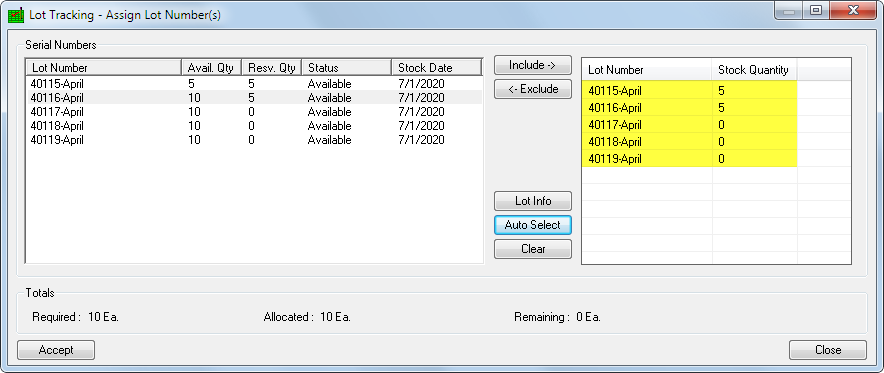
Click a Stock Quantity value to change the Lot allocation.
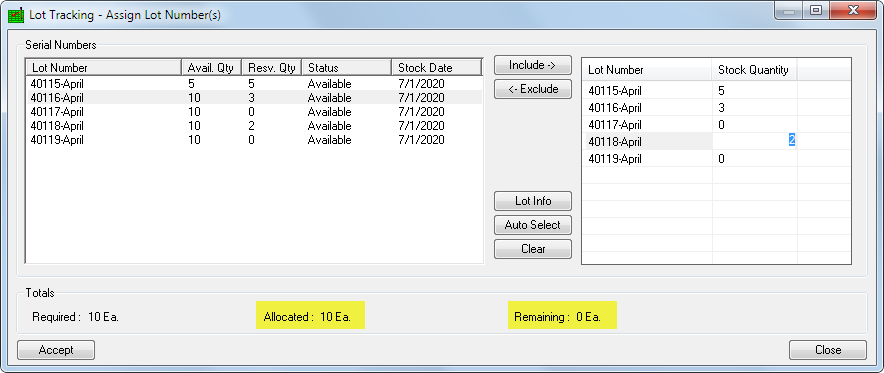
Note the Allocated and Remaining values. The Allocated value must equal the Billing Quantity.
Click [Accept] to return to the Item form.

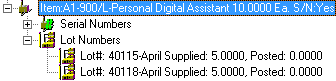
After accepting the Item, the Lot Numbers will show in the Document tree.
Manually Selecting from Lots
Highlight the Lots you require.
Click [Include].

Change the Stock Quantities if required.
Click [Accept] to return to the Item form.
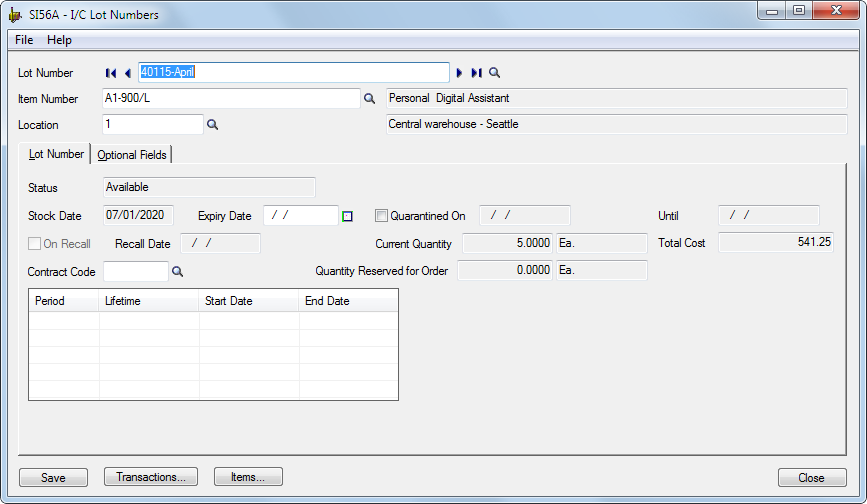
Lot information
Click [Lot Info] to display the Lot in IC.
Hold Lines
You can place an Item line or lines On Hold in the event of part invoicing that may be required on a particular Job.
To hold an Item line, right-click on the line, select Hold Lines and then select Hold Selected Line and its Children.
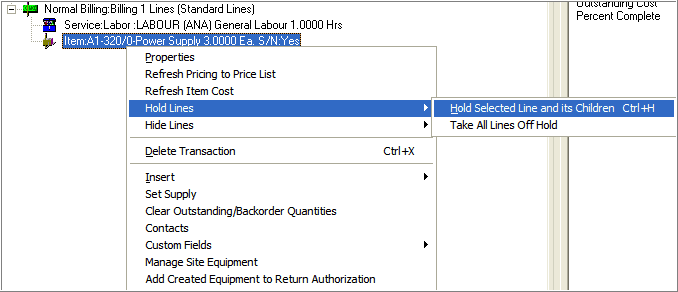
A yellow cross will be placed over the line icon.

To remove the hold, select Hold Lines and then select Take All Lines Off Hold.
When you create the invoice for the Phase or Billing Group, the line On Hold will not be included in the invoice and will not be posted.
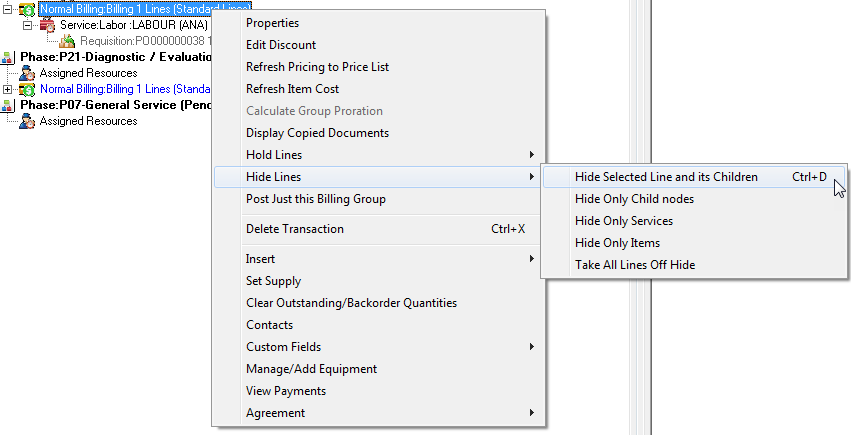
Hide Lines
An invoice will not display hidden lines. The hidden lines will, however, be included in the total amount of the invoice.
This is a very useful tool for jobs requiring many items, and where it is not required to display each and every item and its description on the invoice, but rather a total figure signifying a group of parts included in the total.
To hide an Item line, right-click on the line, select Hide Lines and then select Hide Selected Line and its Children.
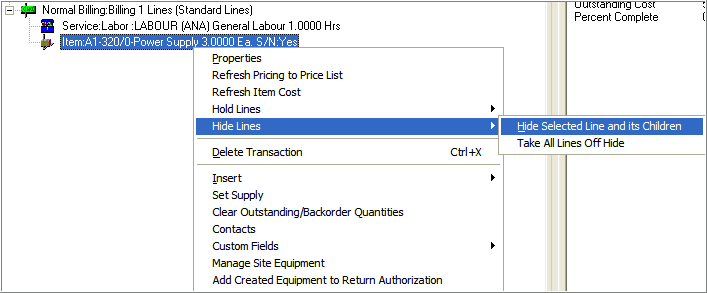
To unhide the line, select Hide Lines and then select Take All Lines Off Hide.
Hide Detail Lines at Phase or Billing Group Level
Similarly, you can hide and unhide all details in a Phase or Billing Group.