Services

Contents
Services are attached to Billing Groups and allow you to bill non-inventory type details such as Labor, Freight or Subcontractors. Services can be specified as Time Tracking services, Cost Only Services, Quantity based Services and can be set to allow Commission tracking or allow Agreement Cover.
To add a Service to a Billing Group, click the Insert Service Line ![]() fast icon.
fast icon.
To view or change Service properties, double-click the Service line or right-click the Service line and then select Properties. The Service window will be displayed.
Related Topics
Job Phase Functions » Edit Budget
Job Phase Functions » Hold Lines
Job Phase Functions » Hide Lines
Job Phase Functions » Set Supply
Billing tab
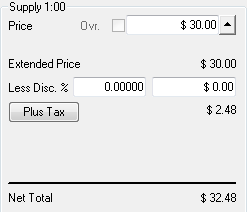
The Billing tab is used to enter the amount to bill or invoice your customer for the Service.
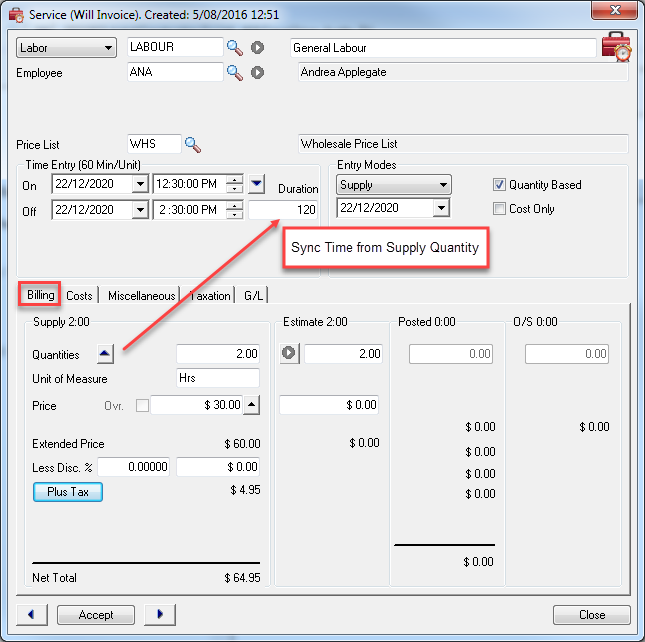
Supply and Estimate figures can be entered or modified.
Click the View/Edit Original Estimate Values ![]() icon to the left of the Estimate Quantity to change the Original Estimates. The Maintain Original Estimates window will be displayed.
icon to the left of the Estimate Quantity to change the Original Estimates. The Maintain Original Estimates window will be displayed.
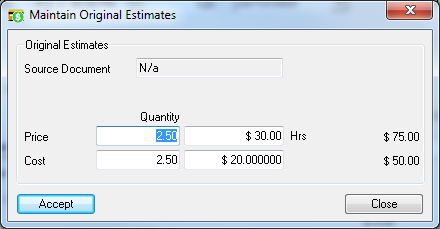
Refer Job Phase Functions » Edit Budget for additional information about maintaining Current and Original Budget values.
Click the Sync Time From Supply Quantity ![]() icon to the right of the Supply Unit Price to synchronize the Time Entry Duration from the Supply Quantity. Note that changing the Duration also adjusts the Off date and time.
icon to the right of the Supply Unit Price to synchronize the Time Entry Duration from the Supply Quantity. Note that changing the Duration also adjusts the Off date and time.
Click the View Pricing Structure ![]() icon to display the available Pricing Levels for the current Service Type. The Service Pricing Levels window will be displayed.
icon to display the available Pricing Levels for the current Service Type. The Service Pricing Levels window will be displayed.
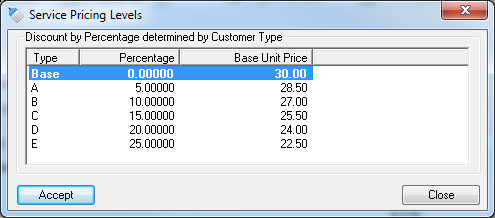
Change the Pricing Level if required and then click [Accept].
Refer Service Setup » Service Rates Discounts tab for additional information about Customer Discounts / Pricing Levels.
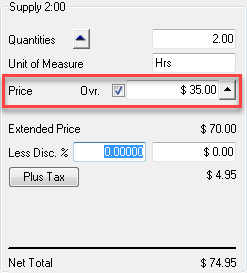
If the Service has a manual price override, the Ovr. check box will be ticked. Clear the Ovr. check box to cancel the manual price override and revert to the system generated price.
Discounts can be applied and shown as a net discounted value (base price reduction) in the price field or as a direct discount in the document's discount field if the checkbox to Apply Base Discount to Document Discount has been enabled from V/M General > Options.
With the checkbox enabled, if a Customer has a percentage or volume price discount set based on Customer Type, the Gross base unit price is displayed in the Price field, and the discount amount is displayed in the Discount field, rather than the Net unit price less discount being displayed in the Price field.
The Posted figures show the amount already invoiced.
The Outstanding figures show the amount still to be invoiced.
Employee
Associate the Service line with an Employee for revenue/cost and statistical purposes. This is optional.
For a Labor Service:
•the Labor Rates for the Service/Price List/Employee will be defaulted from the Service Setup
•the Employee must be Active.
Agreement
There are a few things to be aware of when selecting the Agreement that covers a Service or Item:
•Select No Cover if the Service or Item is not covered by an Agreement.
•When you create a Service or Item, only Valid Agreements will show in the drop-down list.
•When you modify a Service or Item, all Agreements for the Site will show in the drop-down list.
•If you place the cursor over the Agreement then the Agreement State will show in a pop-up tooltip.

The Agreement State will be one of:
0 - Valid Cover
1 - General Invalid Cover
2 - Agreement is Inactive
3 - Standard Services are not covered by Plan
4 - Labor Services are not covered by Plan
5 - Subcontractor Services are not covered by Plan
6 - Items are not covered by Plan
7 - Date outside Agreement cover period
8 - Time outside business hours
9 - Equipment Warranty is not current.
•If you select an Invalid Agreement, the text Invalid Agreement will be displayed in red to the left of the Agreement drop-down list. You may want to select an Invalid Agreement when, for example, you need to retroactively apply a Service against an expired Agreement.
![]()
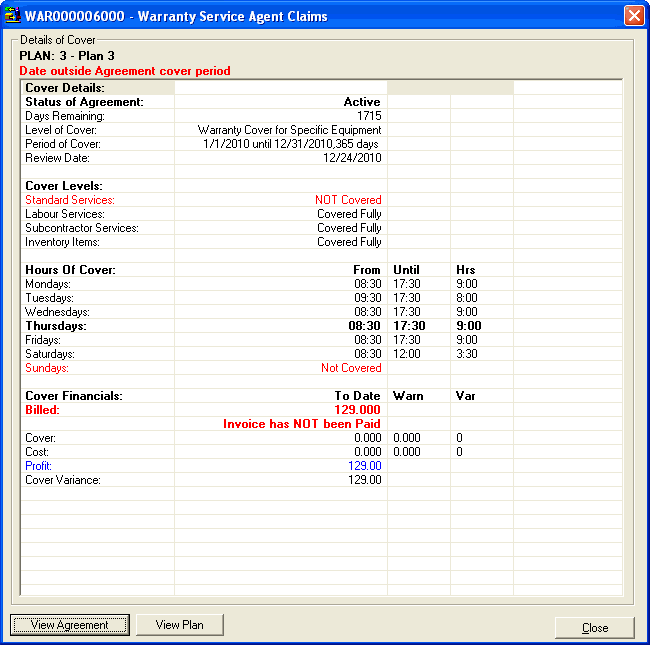
•To View an Agreement Summary for the selected Agreement, click the drill-to arrow ![]() . The Agreement Summary shows details of the cover provided by the Agreement and shows Agreement profitability.
. The Agreement Summary shows details of the cover provided by the Agreement and shows Agreement profitability.
Note :If you click the drill-to arrow ![]() without changing the Agreement, all Agreements for the Site will be displayed at the top of the Agreement Summary window. You can view a summary for any Agreement in the list.
without changing the Agreement, all Agreements for the Site will be displayed at the top of the Agreement Summary window. You can view a summary for any Agreement in the list.
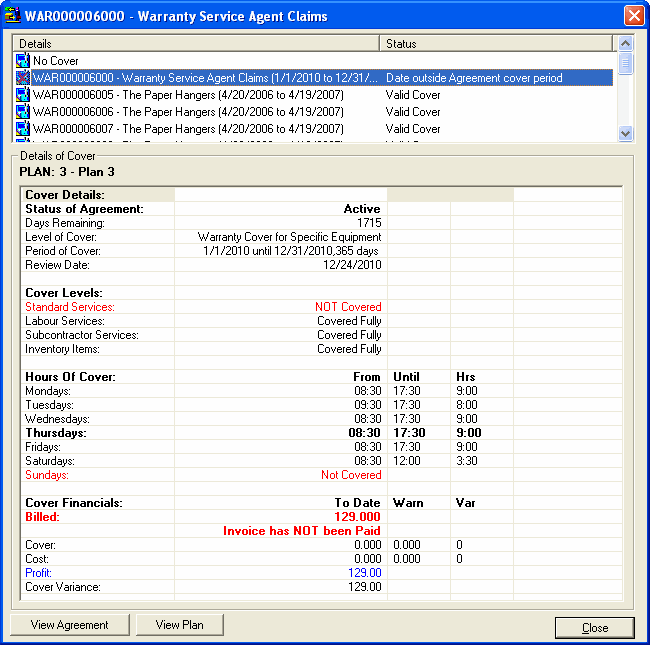
Invalid Agreements will have a red cross through the Agreement icon - ![]() .
.
Highlight the Agreement that you want to display the Agreement Summary for.
Click [View Agreement] to view details of the Agreement. The Agreement will be shown in the Agreement Setup window.
Click [View Plan] to view details of the associated Agreement Plan. The Agreement Plans window will be displayed.
Click [Close] to return to the Service / Item window.
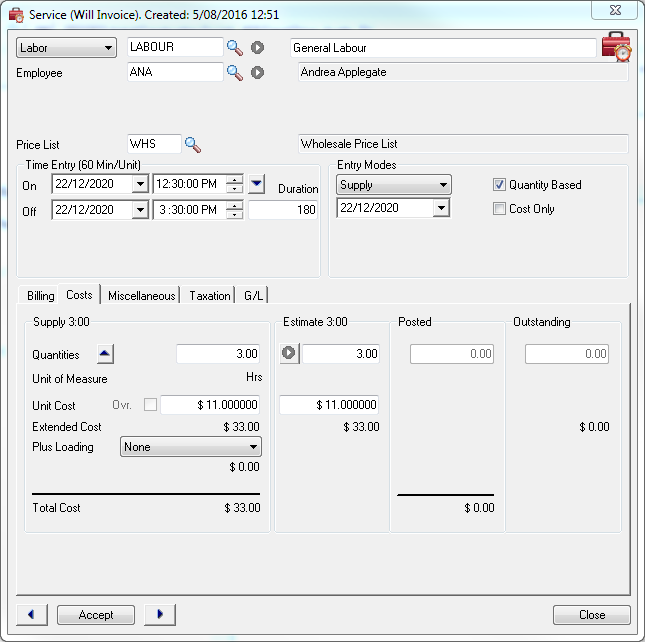
Costs tab
The Costs tab is used to enter the amount that it cost to provide the Service.
Supply and Estimate figures can be entered or modified.
The Posted figures show the amount already costed against the Job.
The Outstanding figures show the amount still to be costed against the Job.
You may have physically used three (3) hours of labor and bill only two (2) hours. This may be the case where a trainee took three (3) hours to complete a task and it was quoted and billed as two (2) hour.
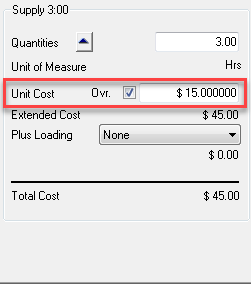
If the Service allows manual cost override, the Unit Cost can be modified and the Ovr. check box will be ticked. Clear the Ovr. check box to cancel the manual price override and revert to the system generated price.
Miscellaneous tab
The main feature of the Miscellaneous tab is to control the allocation of Commission.
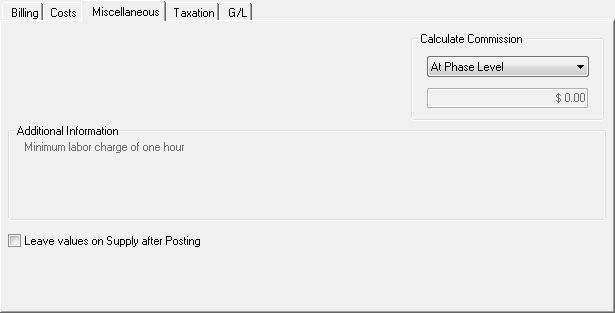

The default is At Phase Level. Other options are Not Commissionable and At Line Level. If you select At Line Level, the employee will be awarded the Commission.
Taxation tab
The Taxation tab allows you to modify the applicable Tax Classes.
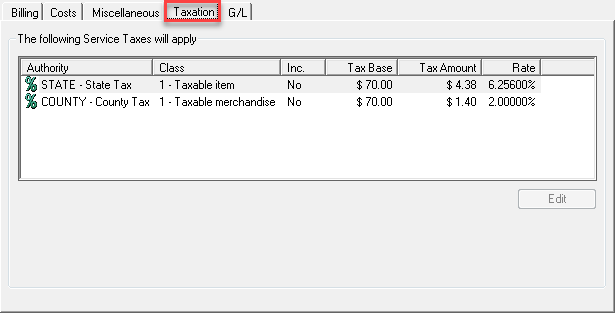
Double-click the item to modify or highlight the item and then click [Edit].
The Tax Authority Setup window will be displayed and allow you to modify the Tax Class.
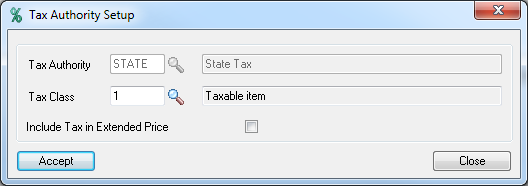
Click [Accept].
Note: If the Tax Class is exempt, the Tax Base will be set to zero.
G/L tab
The G/L tab displays the default G/L Accounts for the Service. Any account not grayed out can be changed.
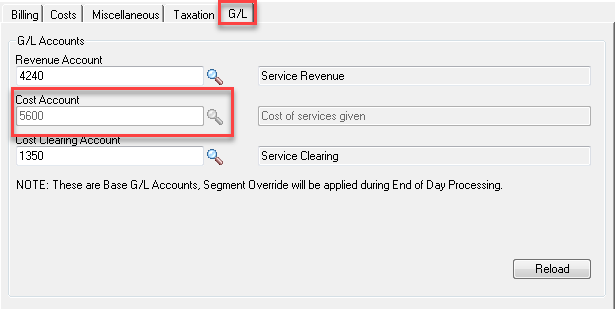
The G/L tab will only be displayed if the User Specified check box is ticked for any of the G/L Accounts in the Integration tab of the Service record. If the User Specified check box is cleared for a particular G/L Account, that account will be grayed out and cannot be changed in the Service line.
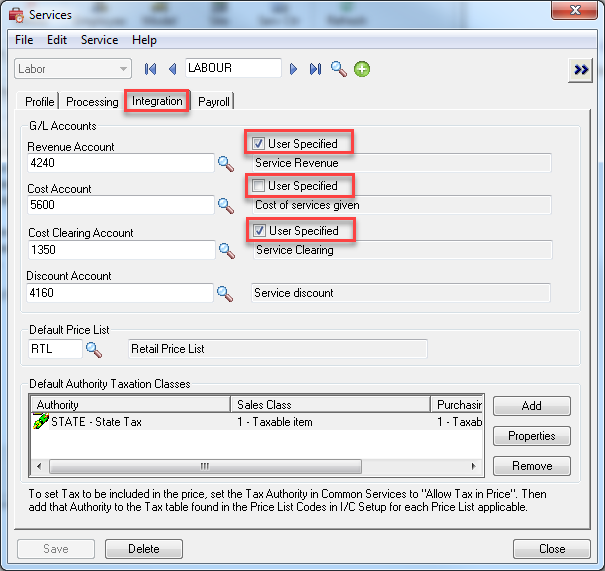
We recommend this as an area not to be tampered with after the initial Service Manager installation has been completed and the company operational.
Invalid G/L Accounts
If a Service line on a Job has an invalid G/L Account (e.g., your accountant deleted the account), when you open the Service line, an Error message will be displayed.
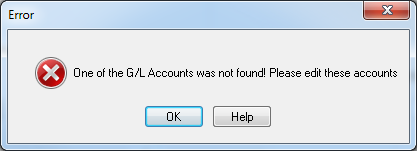
Click [OK] to continue.

Enter a valid account and then click [Accept].
Time Entry
Enter the actual time that the Employee spent on the Job in the Time Entry section.
Note: Time Entry only applies to a Labor Service.
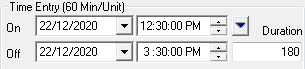
Enter the Duration in minutes for the time spent on the Job for the selected Employee. Note that the units specified in the Duration field are in minutes. If you specify a Duration of 180, the system will automatically calculate and bill a quantity of one (3).
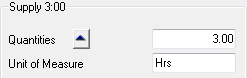
If you enter 120 minutes, the system will calculate the min/unit rate and place it in the Billing Quantity field. Therefore billing will be calculated at two (2) units.
If you go into Service Setup and adjust this min/unit rate to 15, and apply a duration of 120, the system will calculate a quantity of eight and place it in the Billing Quantity field. This is useful for billing quarter hour units for instance.
Related Topics
Auto Insert Time Entries
To automatically insert a default time entry when an Employee is assigned to a Job, tick the Automatically Insert a Time Entry on Employee Assignment to a Job check box in the Company Options » Time tab. The Estimated Start Date/Time of the time entry can be linked to the Estimated Start Date/Time for the Phase, and the Time Entry Duration can either be specified manually or can be set to the Phase Duration.
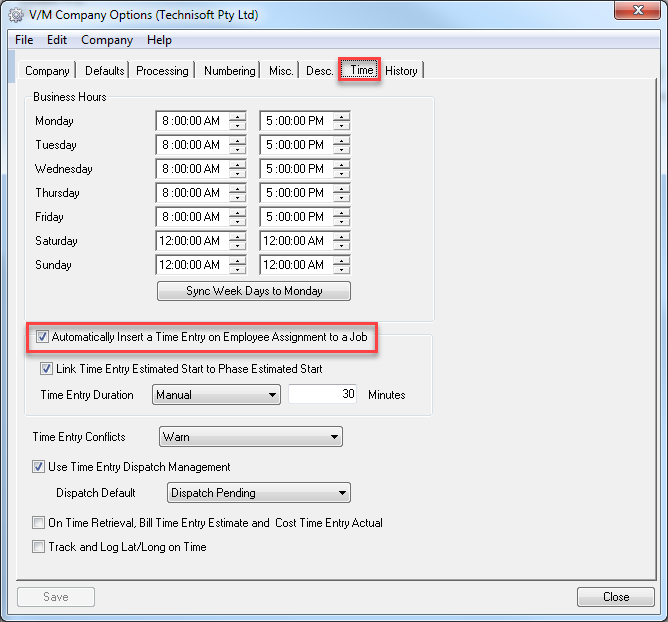
If you use this function we recommend that you set the Company Options » Processing tab » Time Entry Conflicts field to Warn or Ignore as this will allow duplicate (conflicting) time entries to be inserted.
Selecting Manual will place the entry at the current date and time and allow you to specify a default duration. Selecting Phase, will use the Phase with the earliest start time, and place the beginning point of the time entry at that point with the duration being the duration of that phase.
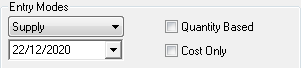
Entry Modes
It is possible to specify different Entry Modes. The options are listed by selecting the drop-down list.
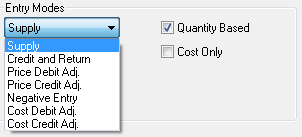
Credit and Return
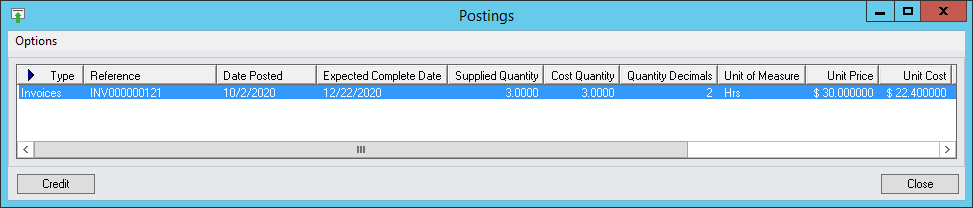
Selecting Credit and Return will display the following screen.

If the Service has not been posted then the Time Entry section is hidden and the Supply and Estimate Quantities and Totals are negative.
If the Service has been posted then the View Postings Popup will be launched so that the Credit can be applied directly to the relevant posted Invoice.
Debit Adjustment
Used for price adjustments where the posted quantity is to be changed.
Credit Adjustment
Used for price adjustments where the posted quantity is to be changed.
Selecting Price Credit Adjustment will open the A/R Invoice Entry window where the adjustment can be applied directly to the required Document. The posted quantity will not be changed.
Negative Entry
This option will only be available if the Service has been set up to allow negative entry.
Refer Entering Negative Service Values.
Quantity Based
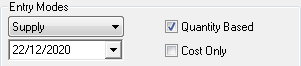
The default is ticked.
If you clear the Quantity Based check box, the Supply section displays a Unit Price, but no Quantities. This would be used where a fixed price has been quoted or a contractor is being used.
Cost Only
When a situation arises requiring costs to be absorbed into a Job, this option is used to create a posting document with Costs Only and no Revenue associated with it. Day End Processing will post all the transactions as required.
Tick the Cost Only check box to process this Service as Cost Only.
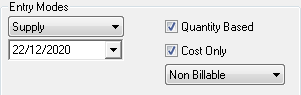
Notice that the Billing tab is hidden because there is no Billing associated with a Cost Only Service.
![]()
Hold Lines
The Hold Lines option can be used from Document level to line level to prevent lines from being processed.
To hold a Service line, right-click on the line, select Hold Lines and then select Hold Selected Line and its Children.
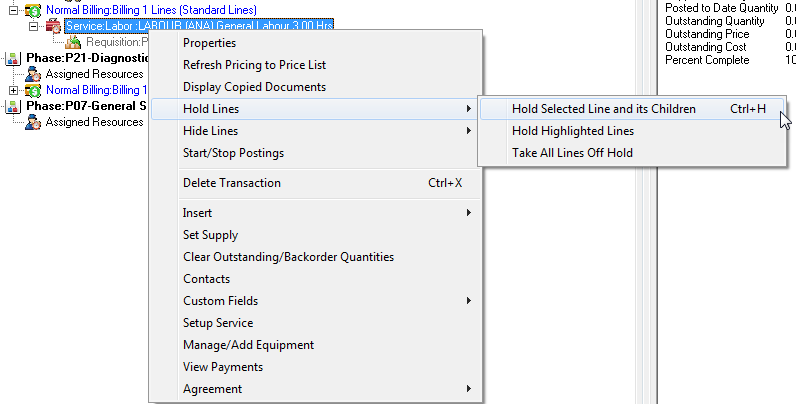
A Red stop symbol will be placed over the line icon.
![]()
To remove the hold, select Hold Lines and then select Take All Lines Off Hold.
When you create the invoice for the Phase or Billing Group, the line On Hold will not be included in the invoice and will not be posted.
Hide Lines
An invoice will not display hidden lines. The hidden lines will, however, be included in the total amount of the invoice.
This is a very useful tool for jobs requiring many items, and where it is not required to display each and every item and its description on the invoice, but rather a total figure signifying a group of parts included in the total.
To hide a Service line, right-click on the line, select Hide Lines and then select Hide Selected Line and its Children.
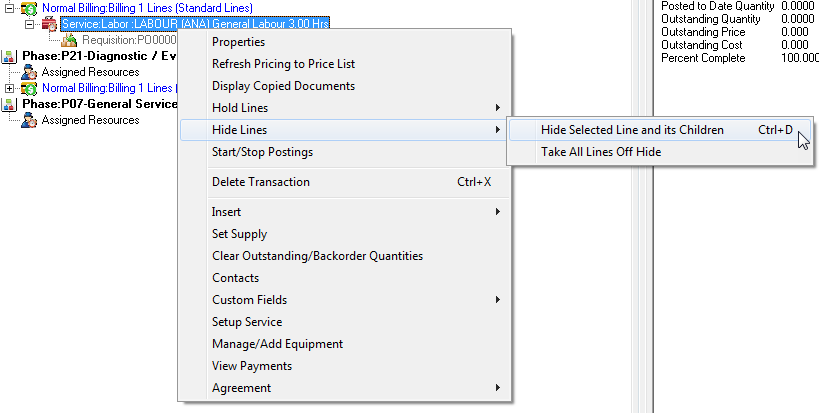
To unhide the line, select Hide Lines and then select Take All Lines Off Hide.
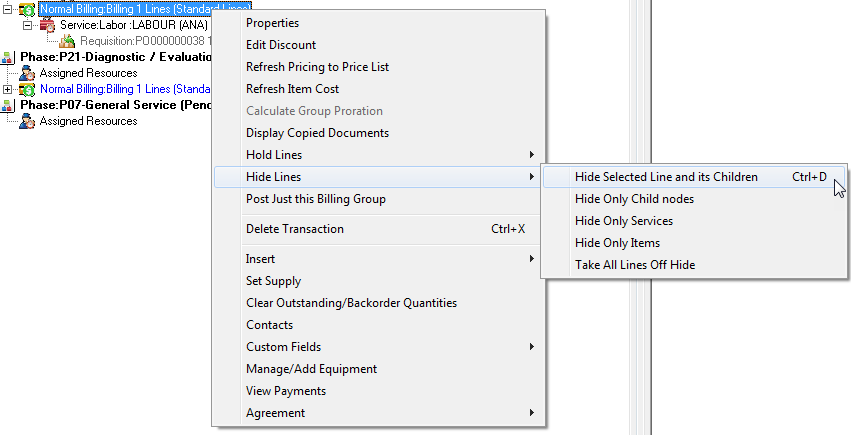
Hide Detail Lines at Phase or Billing Group Level
Similarly, you can hide and unhide all details in a Phase or Billing Group.
Start/Stop Billing
Start/Stop Billing allows you to delay the start of a Service or Item billing line in a Document and/or set limit criteria to stop the line from posting. This process is available for normal billing lines or Cost Only lines and when tied to recurring postings, allows you to state that a line is to start posting on a specific cycle and stop after a specific cycle. The function is available from the right-click menu found on Service and Item lines. The line is effectively held until the condition is met to activate the line. After posting, the condition is tested to determine if the limit has been met and therefore hold the line again. Available options governing the process are the Document posting count, the line posting count, a number of days after the line date, and a specified date.
Start/Stop Billing is particularly useful for billing one-off lines on Agreements or setting up milestone billing points based on dates.
To set Start/Stop Billing options for a Service or Item line, right-click the line and select Start/Stop Postings.
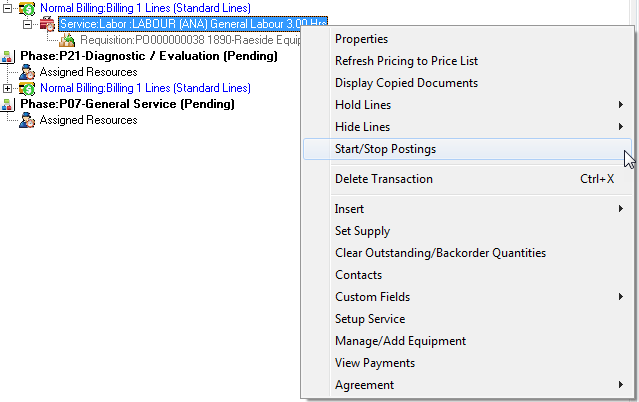
The Start/Stop Posting window will be displayed.
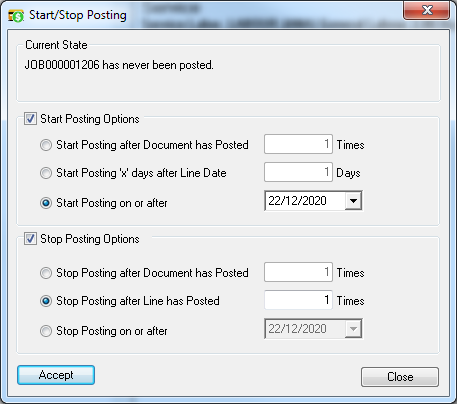
In the example above, the Job has never been posted. It will only post on or after December 22, 2010, and will only post once.
Note that the line will be placed on Hold until July 10, 2010.
![]()
Note also that you cannot remove the Hold by clearing the Hold check box. The Hold is controlled by Start/Stop Billing.
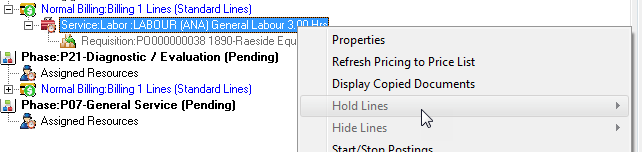
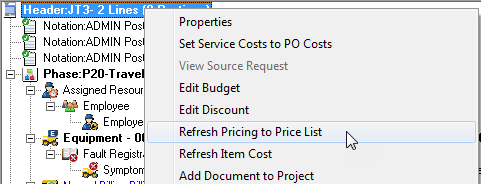
Refresh Pricing to Price List
Select this option to reload the standard pricing for both Item and Service lines, as applicable. This can be very useful where a price rise may have been recently implemented and a Quote or Job needs to reflect the new pricing.
Right-click either the Job Header, Phase, Billing Group or detail line and select Refresh Pricing to Price List.
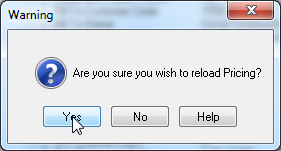
Warning message will be displayed.
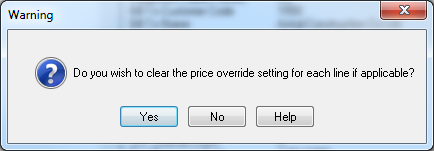
Tax, if any, will be recalculated automatically after the price has been adjusted on each line. There is no need to refresh the Document to recalculate the tax.
Click [Yes] to continue.