Maintenance Calendar Setup

Contents
 »
» 
Maintenance Calendars represent time periods allocated to the maintenance process. A maintenance calendar would typically cover a one-year fiscal or calendar period and consist of 52 x weekly or 12 x monthly periods.
What should I set up as calendar periods?
Calendar periods define "processing points". For example, "I want to process all Maintenance Tasks that are due next week." In that case, you would need to set up a weekly calendar. With a weekly calendar, statistics would be available for each week in the calendar showing estimated and actual (when available) profitability and resource commitment.
If meter reads are taken regularly and those reads may result in the creation of a maintenance Job, then we recommend that the calendar be created and processed on a weekly basis. This ensures that it is no longer than a week before the resultant Job is processed. If maintenance is purely schedule based, then it would likely be sufficient to set up a monthly calendar and create and process all maintenance for the month.
Maintenance Calendar periods can be based on a Fiscal Calendar or custom-defined. If you create a Maintenance Calendar based on a Fiscal Calendar, then the number of periods created will be based on the number of Fiscal Periods in the Fiscal Calendar. For example, if there are 12 x Fiscal Periods in the Fiscal Calendar - one for each month - then 12 x Calendar periods will be created. To custom-define Maintenance Calendar periods, you need to specify the start and end dates of the Calendar and then create weekly, biweekly, monthly, bimonthly, quarterly or half-yearly periods within the Calendar period.
The Maintenance Calendar program has several uses:
•to set up Maintenance Calendars
•to post Maintenance Tasks due in the next unposted (unprocessed) Maintenance Period to Worksheets
•to display statistics, revenue, costs and profitability by Maintenance Period and in total for the entire Maintenance Calendar period. Graphs are available showing: Estimated and Actual Duration by month or period, Estimated and Actual Utilization by month or period, Predicted and Actual Task Counts by month or period, Estimated and Posted Revenue by month or period, Predicted and Actual Site Count by month or period, Predicted and Actual Equipment Count by month or period.
This topic however concentrates solely on how to set up Maintenance Calendars.
Related Topics
Posting Due Maintenance Tasks to Worksheets
Tracking the Processing Status of Maintenance Periods
Viewing Maintenance Period Statistics and Totals
Refreshing Maintenance Loading Tables, Statistics, Totals and Status values
Creating a Maintenance Calendar
Click the Maintenance Calendar desktop icon.
The Maintenance Calendar window will be displayed.

Type a new Calendar Code and then click Go ![]() .
.

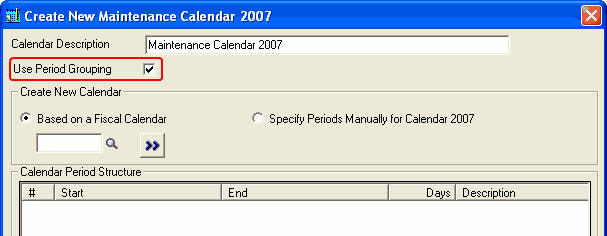
The Create New Maintenance Calendar window will be displayed.

Change the Calendar Description if required.
If you want to assign periods to a Period Group, tick the Use Period Grouping check box. Refer Setting up Maintenance Class Types and Assigning Period Groups to Periods.
Maintenance Calendar periods can be based on a Fiscal Calendar defined in Common Services/Fiscal Year or created manually by choosing a period frequency for a given date range.
Basing a Maintenance Calendar on a Fiscal Calendar
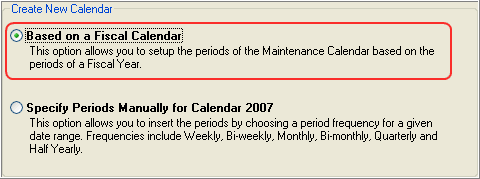
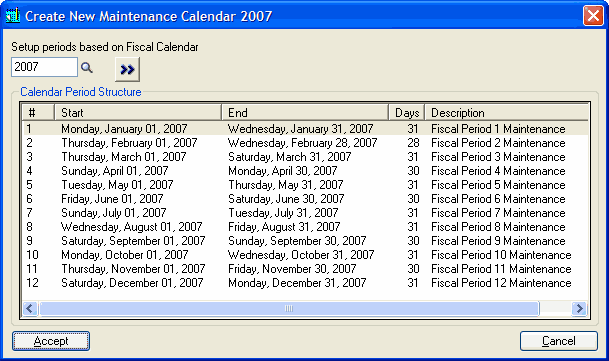
To base Maintenance Calendar periods on a Fiscal Calendar, select Based on a Fiscal Calendar.
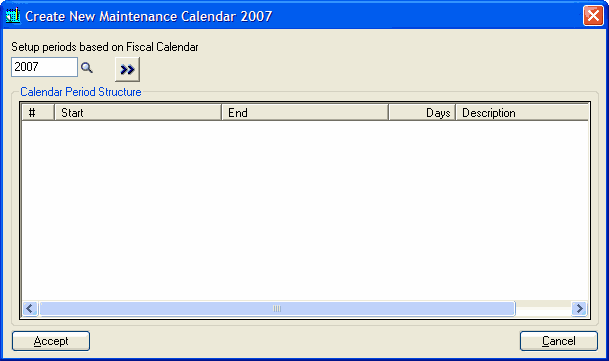
Click [Next]. The Fiscal Calendar window will be displayed.
Click the Finder![]() icon to list the available Fiscal Calendars.
icon to list the available Fiscal Calendars.
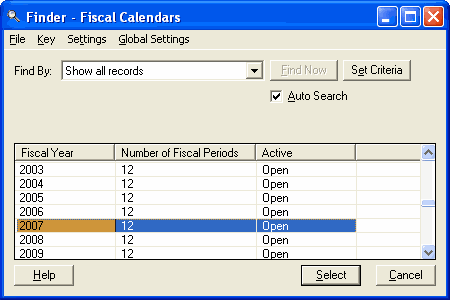
Double-click the Fiscal Year required, for example, 2007.
The Fiscal Year selected will show in the Fiscal Calendar field.
Click Go ![]() to continue. A preview of the Maintenance Calendar periods that will be created is shown in the Period Preview.
to continue. A preview of the Maintenance Calendar periods that will be created is shown in the Period Preview.
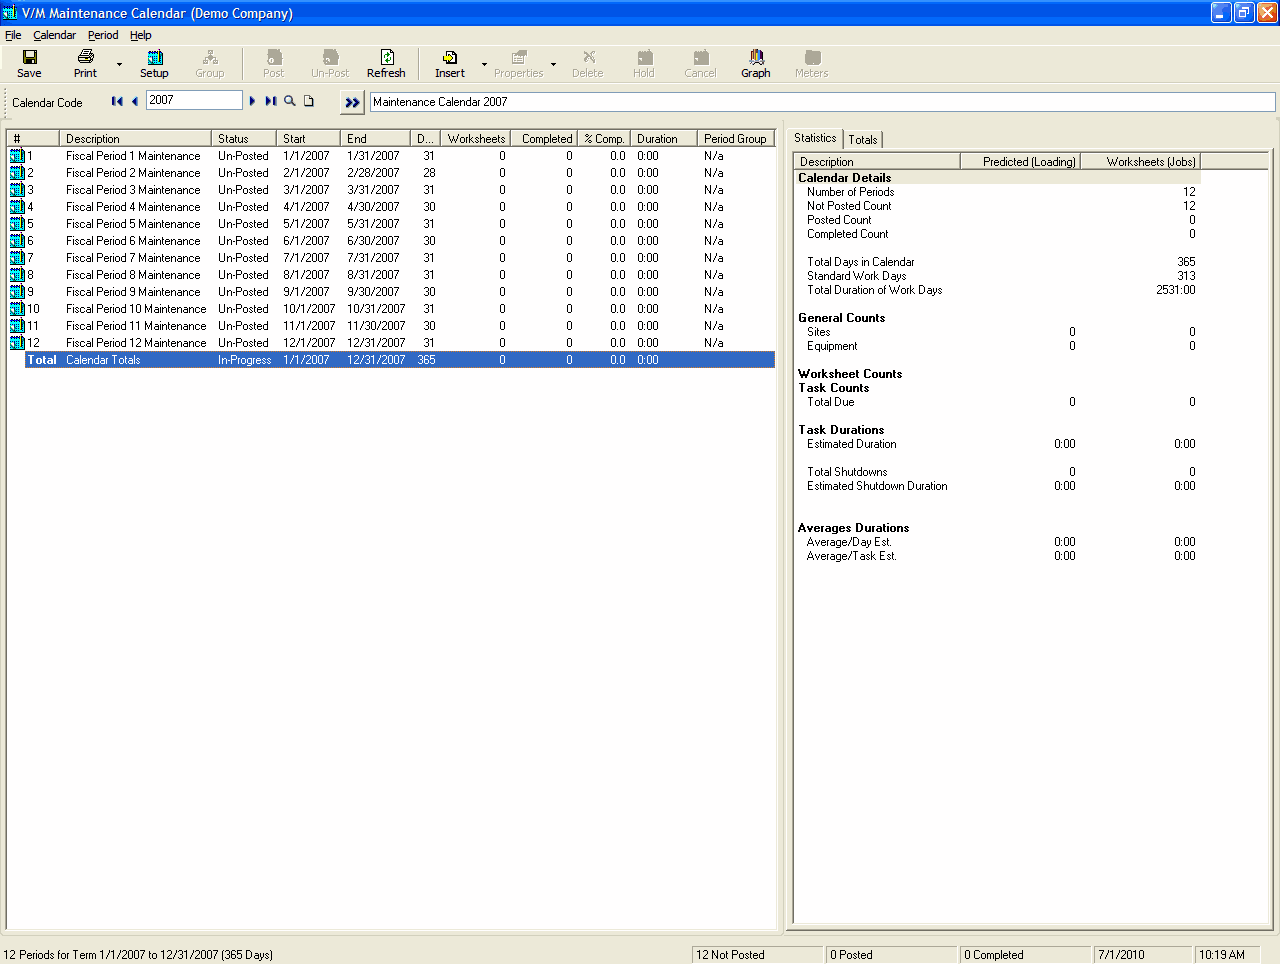
If, for example, there are 12 x Fiscal Periods in the Fiscal Calendar - one for each month - then 12 x calendar periods will be created.
To delete a period, highlight it and then press Delete.
Note:
Periods must be contiguous, i.e., all periods within the Maintenance Calendar must be covered. If you delete a period, the next or previous period will adjust its Start/End dates to cater for the deleted period when the periods are actually created.
Periods can be added and modified after the Maintenance Calendar has been created.
Click [Accept] to continue.
Creating Periods in a Maintenance Calendar Manually
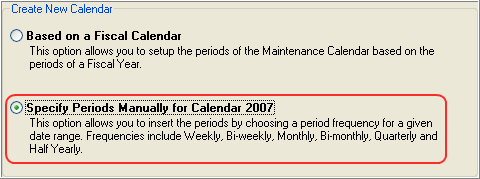
To create periods in a Maintenance Calendar manually, select Specify Periods Manually for Calendar.
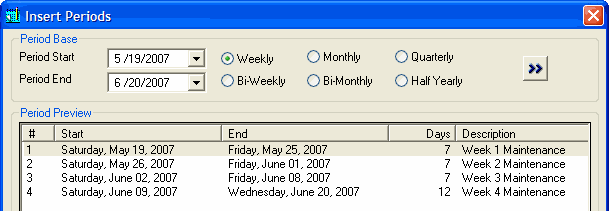
Click [Next]. The Insert Periods window will be displayed.
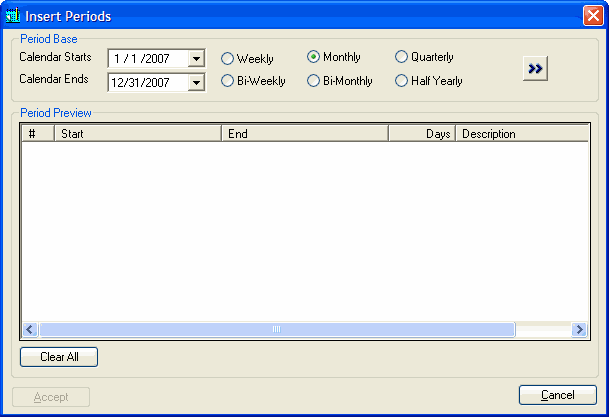
Select the Start and End dates of the Maintenance Calendar. The Start date will default to the day after the end date of the most recent calendar. The End date will be based on the total period of the most recent calendar. If this is the first Maintenance Calendar then the Start date will default to January 1 of the current year and the End date will default to December 31 of the current year.
Note:
Maintenance Calendar Periods cannot overlap.
You can create weekly, biweekly, monthly, bimonthly, quarterly or half-yearly periods. The Start date of the first period created will be the Start date of the Maintenance Calendar; the End date of the last period created will be the End date of the Maintenance Calendar.
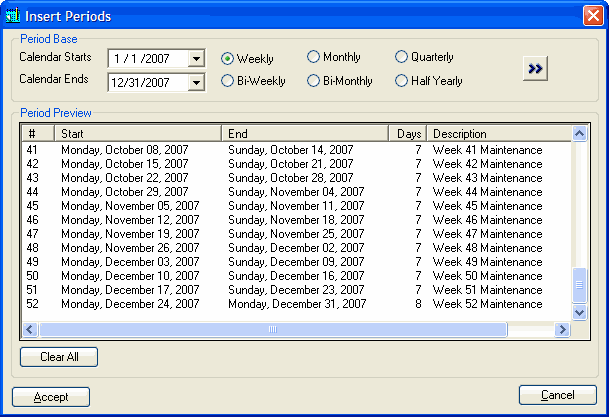
Select the required Period Base and then click Go ![]() . A preview of the Maintenance Calendar periods that will be created is shown in the Period Preview.
. A preview of the Maintenance Calendar periods that will be created is shown in the Period Preview.
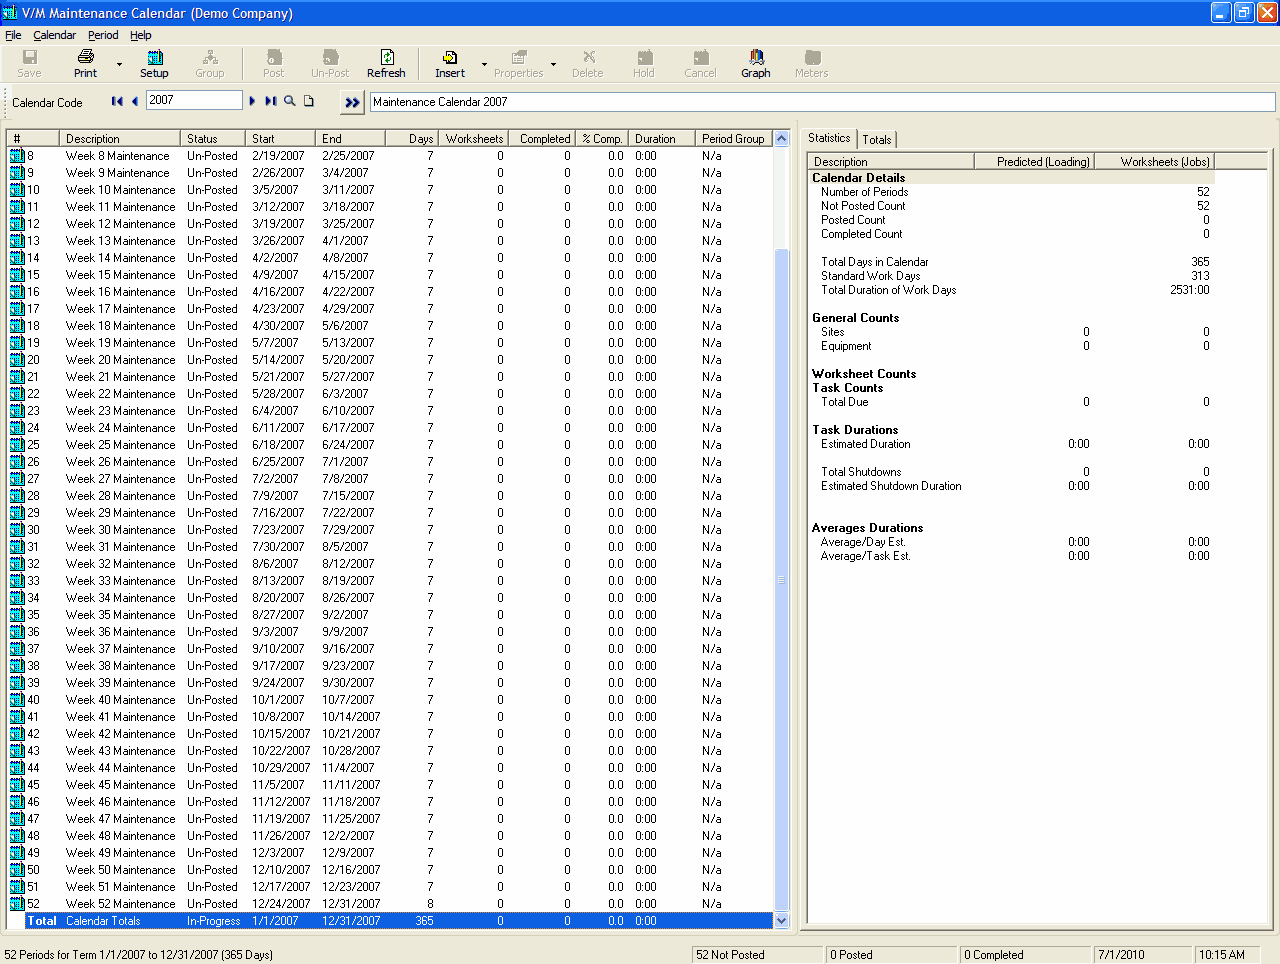
The example below shows Weekly periods that will be created for Calendar Year 2007, i.e., Jan 1, 2007 - Dec 31, 2007.
Note:
If you create Weekly periods for a calendar year, the 52nd period will have eight days (or nine for a leap year).
To delete a period, highlight it and then press Delete.
Note:
Periods must be contiguous, i.e., all periods within the Maintenance Calendar must be covered. If you delete a period, the next or previous period will adjust its Start/End dates to cater for the deleted period when the periods are actually created.
Periods can be added and modified after the Maintenance Calendar has been created.
Click [Accept] to continue.
After you click [Accept], the periods will be shown in the Maintenance Calendar. Examples are shown below.
Click ![]() to save the Maintenance Calendar.
to save the Maintenance Calendar.
Modifying Maintenance Periods
Maintenance Periods can be deleted, inserted and changed. These functions can be selected using the right-click menu, the menu bar or the toolbar. The right-click menu functions are mentioned below.
Multiple periods can be selected using standard Windows Shift- and Ctrl-click functionality.
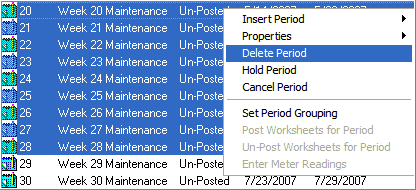
Deleting a Period
Highlight the period(s) to delete.
Right-click on the selected period(s) and then select Delete Period. Alternatively, press Delete.
A Warning message will be displayed.
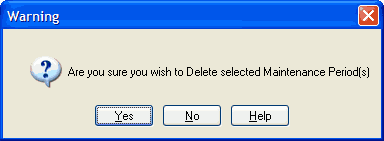
Click [Yes] to continue.
Inserting a Single Period
To insert a single period, right-click on any period and then select Insert Period » Insert Single Period.
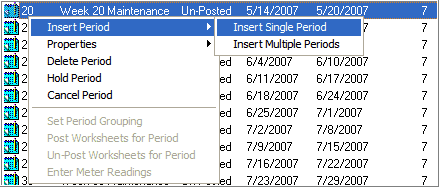
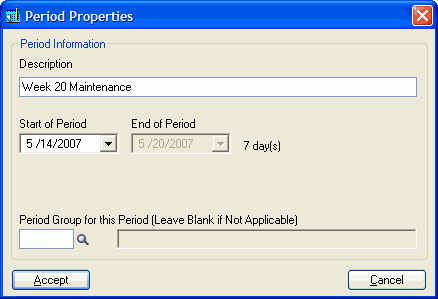
The Insert New Period window will be displayed.
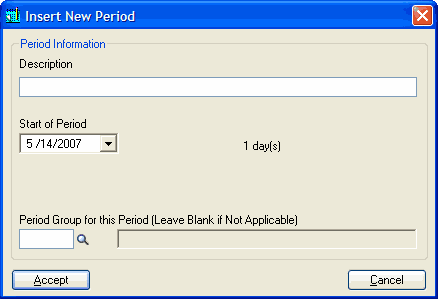
Enter a Description for the new period.
The Start of Period will default to the Start date of the selected period. Change this as required.
Select a Period Group if required.
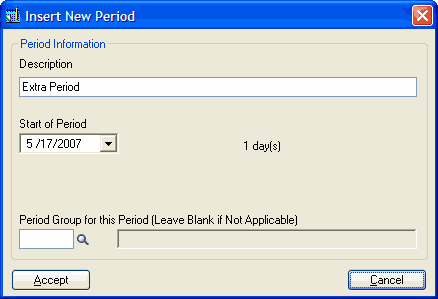
Click [Accept] to continue.
Note that periods are contiguous. They cannot overlap. The new period will split the period in which the Start of Period date of the new period falls.
![]()
Inserting Multiple Periods
To insert multiple periods, right-click on any period and then select Insert Period » Insert Multiple Periods.
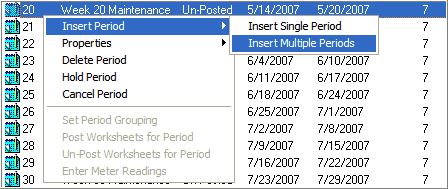
The Insert Periods window will be displayed as in Creating Periods in a Maintenance Calendar Manually.
The following example shows a preview of four periods that will be inserted.
The periods will be inserted one at a time as if you were inserting single periods. Existing periods will be split as required.
Modifying a Period
Highlight the period to modify.
Right-click on the selected period and then select Properties » Period Properties. Alternatively, double-click the period.

The Period Properties window will be displayed.
Change the period properties as required.
Click [Accept] to continue.
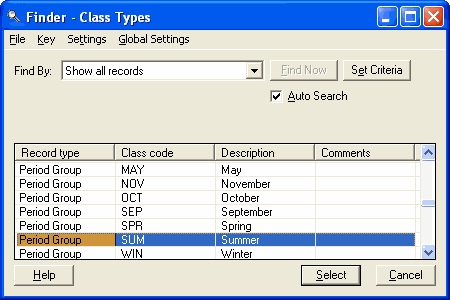
Assigning Period Groups to Periods
Period Groups can be used to include or exclude certain maintenance processes from normal scheduling.
If you want to assign a Period Group to a period, you must first tick the Use Period Grouping check box in the Create New Maintenance Calendar window when creating the Maintenance Calendar.
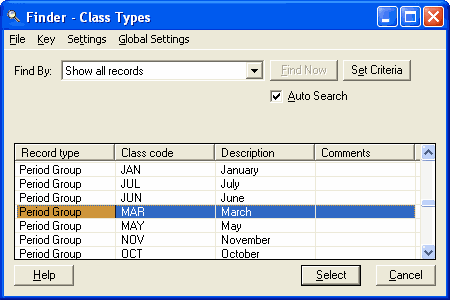
To assign a Period Group to a period, double-click a period, e.g., Item #3 below.

The Period Properties window will be displayed.
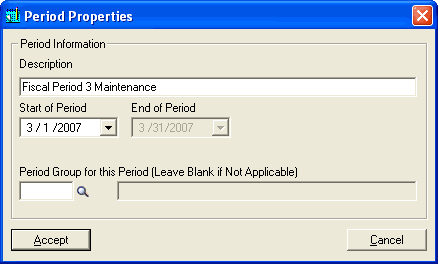
Use the Finder![]() to select a Period Group for this Period, e.g., March.
to select a Period Group for this Period, e.g., March.
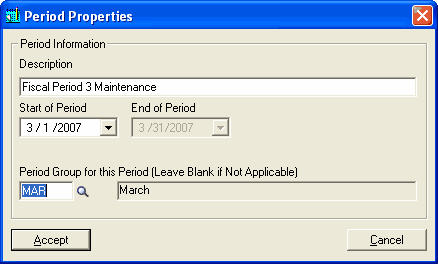
Click [Accept].
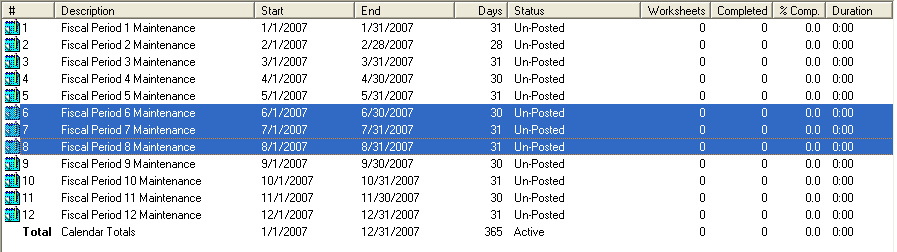
It is also possible to assign a Period Group to multiple periods.
Highlight the period, e.g., Items #6-8 below.
Click ![]() . The Maintenance Period Grouping window is displayed.
. The Maintenance Period Grouping window is displayed.
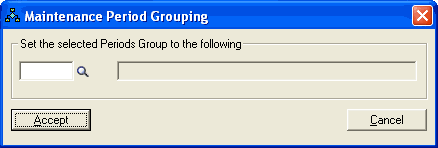
Use the Finder![]() to select a Period Group for this Period, e.g., Summer.
to select a Period Group for this Period, e.g., Summer.
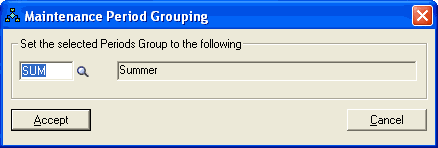
Click [Accept].