Notations

Contents
Notations are general comments, instructions, or notes that can be applied throughout Service Manager.
You can attach unlimited objects to Notations. These can be pointers to files on your system such as word processing documents, spreadsheets, CAD files, HTML files, etc. Notations can contain email and Web URLs as well as Follow-Ups. Notation Follow-Ups are managed using the Monitor program.
Related Topics
Creating a Notation
In Document Entry, click the Insert Notation for Current Line ![]() fast icon. The Notation window will be displayed.
fast icon. The Notation window will be displayed.
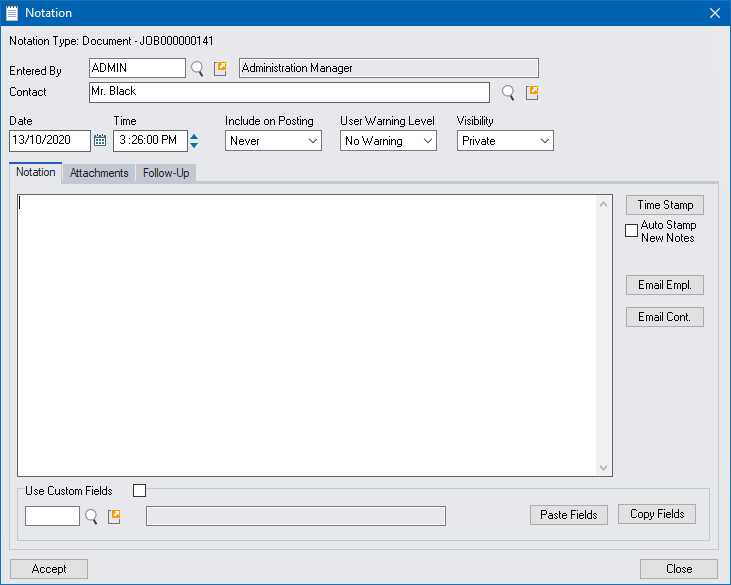
Change the following fields as required:
Entered By – the Employee adding the notation
Contact - the Contact name for reference
Date/Time – audit time stamp
Include on Posting
Will the Notation be shown on the Posting? - Never, Next Only or Always.
![]()
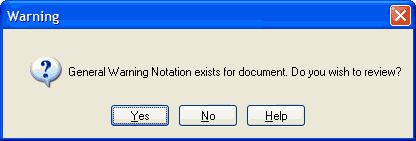
It is possible to set a Warning Level for Document and Time Notations. When you load a Document with either General Warning or Critical Warning Notations, you will be notified and the Notation will be displayed.
![]()
General Warning
Critical Warning
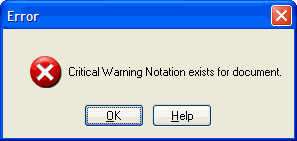
Critical Notation Popup for Equipment and Models is controlled by Document Entry Options > General > Show all Critical Document Notations setting
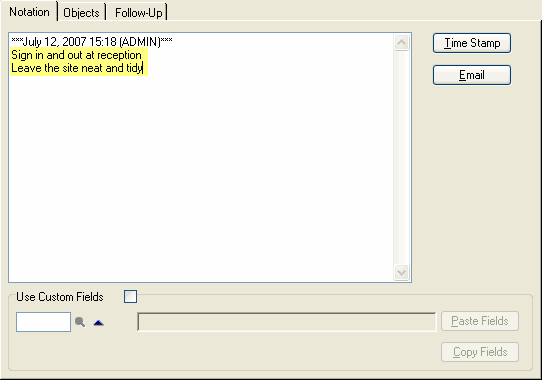
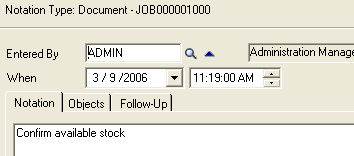
Notation tab
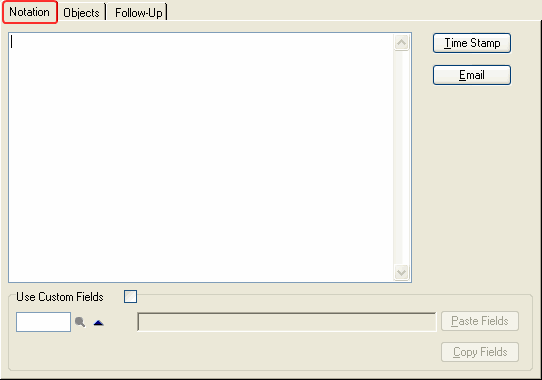
Time Stamp the Notation
Click [Time Stamp] to add a Date, Time, Logged on User entry to the Notation.

Add Notation text
Type the Notation in the Notation area.
Email the Entered By Employee or Contact
Click [Email Empl.] to send an email message to the Entered By employee.
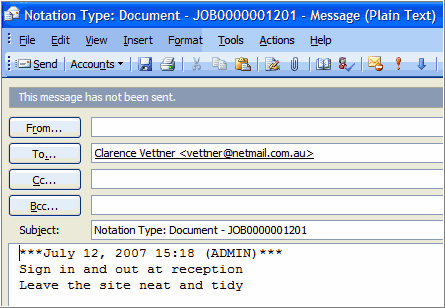
Click [Email Cont.] to send an email message to the Notation Contact.
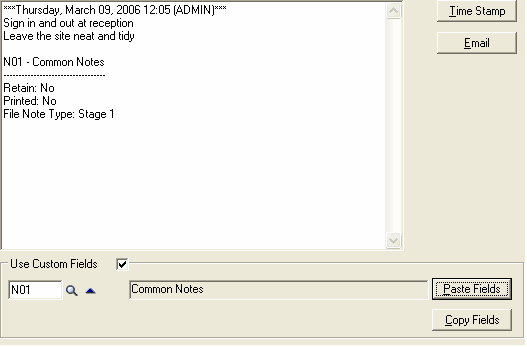
Add Custom Field data to the Notation
Tick the Custom Fields check box. Type or select the required Custom Field. Click [Copy Fields] to copy the Custom Field data and [Paste Fields] to paste it into the Notation.
Attachments tab
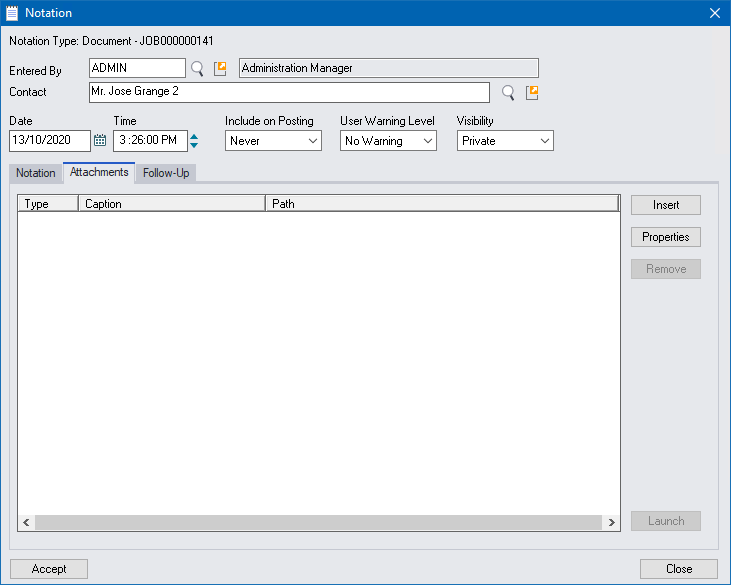
Insert
Note: From version 2021 all existing Attachment (Object) file paths currently in use need to be updated to use UNC paths. This is a requirement for all systems in order to support Service Manager Web Screens and existing Technisoft Portal products. Refer to Notation Class Type Setup to configure the File Paths and the V/M Utilities Program to convert existing paths to the new path.
The Notation Attachment window opens.
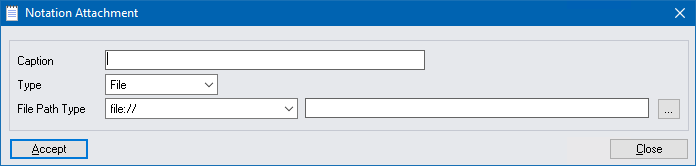
Caption - Enter a caption to meaningfully describe the attachment for Field Portal users. If no caption is entered then the description in the field will display the file name.
Select the Notation Type:
•File - File examples may be: a picture of a damaged item, picture of water leak onto equipment, a list of Serial Numbers in an Excel file, or even a fault description the client sent through email.
Select the File Path Type from the dropdown which have been setup from the Notation Class Types. The dropdown for File Path Type will show all Paths available to the User where Upload access is enabled. Click the browse button to open the folder from the File Path location specified and select the file to insert.
•URL - This may provide, for example, reference material relating to a fault with a piece of equipment. This can be very useful when complex or tricky problems arise.
Select the HTTP Type prefix then the URL. .
•Email - This may be, for example, a client or vendor contact email address that may or may not be a Site Contact.
Type the email address following the "mailto:" prefix that is displayed by default. Click the browse button to raise the Employee finder where an Employee's email address can be selected.
Launch the Attachment
Select the Attachment and then click [Launch] to launch the Attachment, i.e., open the file, create a new email message, display the Web page, etc.
Follow-Up tab
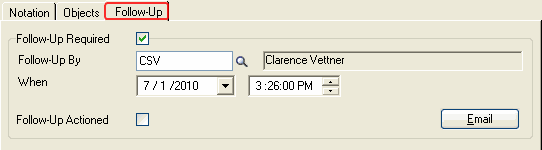
The Notation Follow-Up, when due (or overdue), will be displayed as an action item in the Monitor program. If you tick the Follow-Up Actioned check box, the Follow-Up Notation will be ignored by the Monitor program.
Click [Accept] to insert the Notation into the document tree.
Displaying the First Line of the Notation Description on the Notation Node in the Document Tree
The First Line field allows the first line of a notation description to be displayed in the document tree node for that notation. This will assist in locating a particular notation in the document tree.
To add this feature, open Document Entry, select Tools » Options and select Document Notations in the drop-down list.
Click First Line, and drag it to the Document Tree Text as shown.
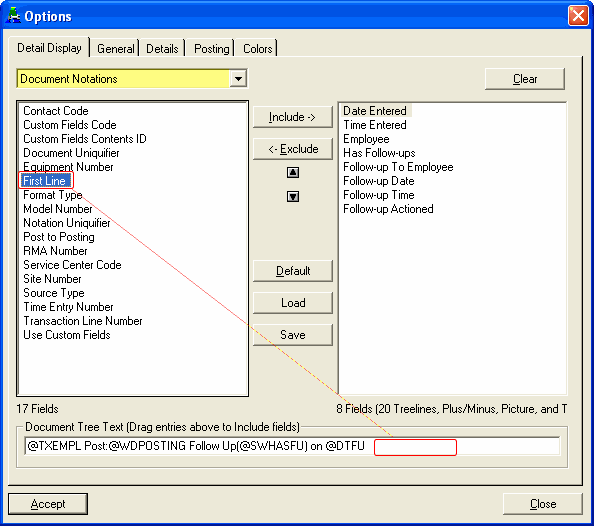

Click [Accept].
Example
![]()
Edit Notation on Existing Posted Document
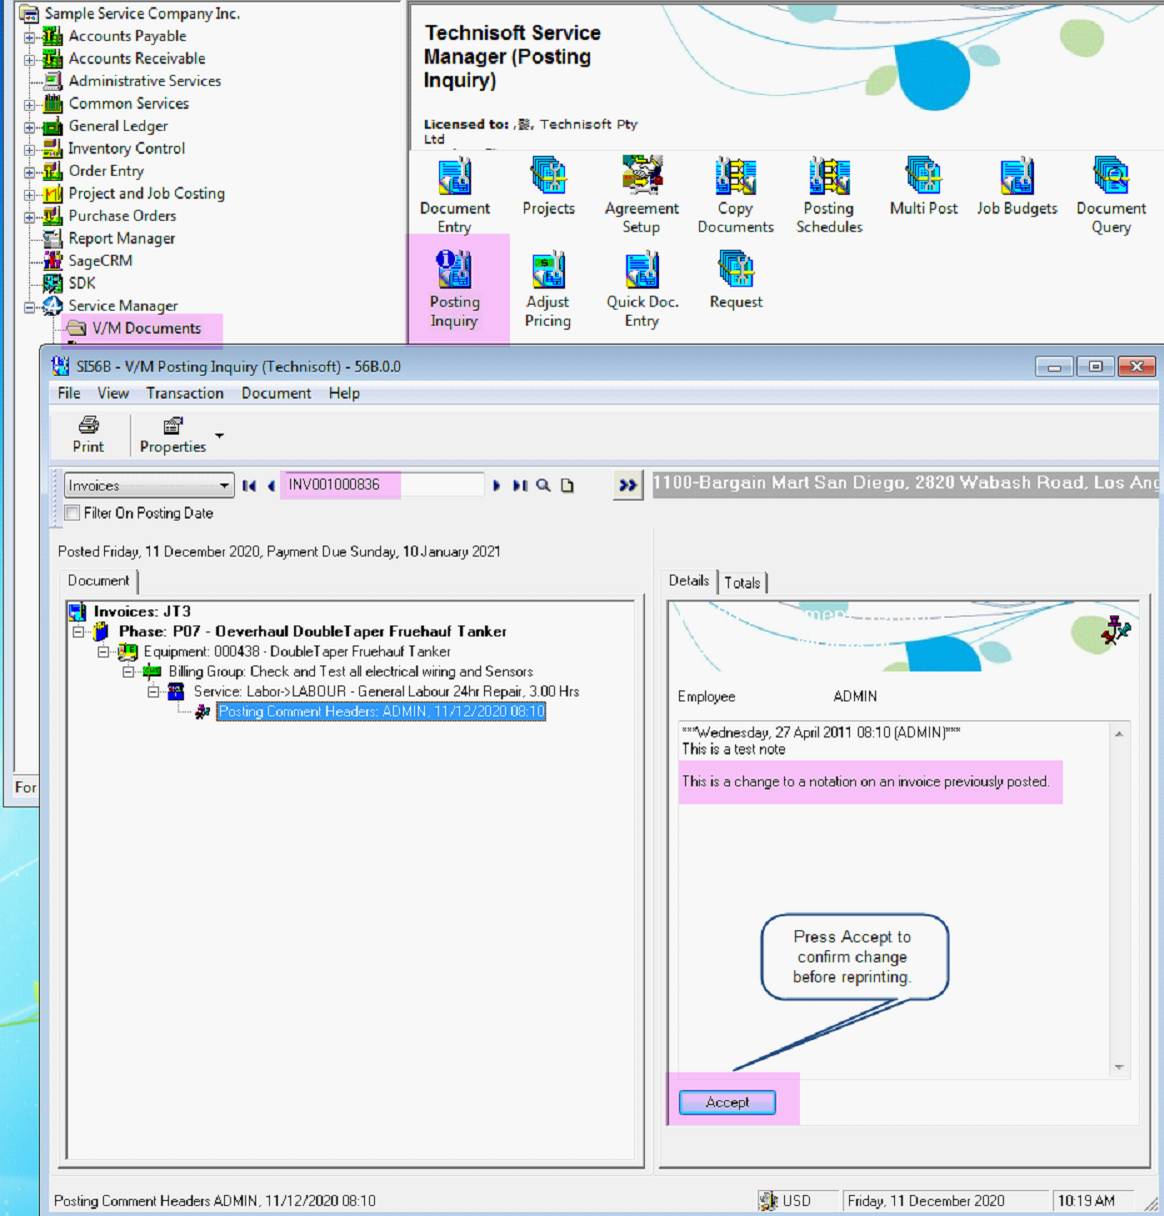
It is now possible to edit a notation on an existing Invoice, Credit Note, or Cost Only Document after posting so it can be reprinted with the adjusted notes.
To edit a notation on previously posted Document open the Posted Document select the Notation, make the change and press the “Accept” button to recognize the change.
Note: It is not possible to create new notations only to edit existing notations.
There are several ways to find a previously posted document:
Go to the Sage Accpac Desktop, select Service Manager, V/M Documents, Posting Inquiry.
Select the Invoice, Credit Note or Cost Only entry as applicable. Locate the notation to be edited. Make the change and press “Accept” to write the change. Select Print to reprint the document.