Document Entry Options

Contents
 »
»  » Tools menu » Options
Overview
The Document Entry Options are used to set processing options across Document Entry.
Select Tools » Options.
Detail Display tab
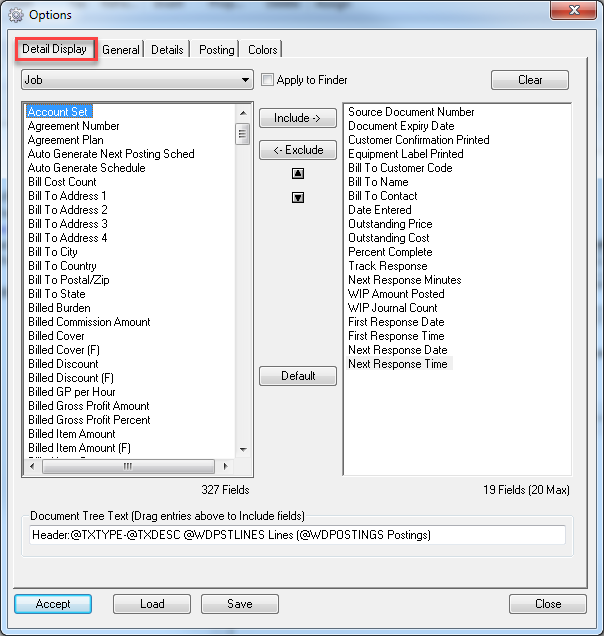
Select a line item, e.g., Job, from the drop-down list. Specify the fields that are to show in Document Entry for the line item. The fields in the left pane are excluded. The fields in the right pane are included. To include a field, select the field in the excluded field list in the left pane and then click [Include] or drag it to the included field list in the right pane. Conversely, to exclude a field, select the field in the included field list in the right pane and then click [Exclude] or drag it to the excluded field list.
Tip: You can double-click fields to include or exclude them.
To change the order of an included field, select the field and then click ![]() or
or ![]() as required.
as required.
Tick the Apply to Finder check box to apply the Included field list options to the Finder.
Click [Clear] to move all the fields to the excluded field list.
Click [Default] to set the Detail Display options to system default values.
Drag (included or excluded) fields to Document Tree Text to add the field value to the line item text.
Click [Accept] when finished.
Optional:
Click [Save] to save all the Detail Display options to a file. If you save the Detail Display options to a file, they can then be loaded and used by multiple users.
Click [Load] to load the Detail Display options from a file.
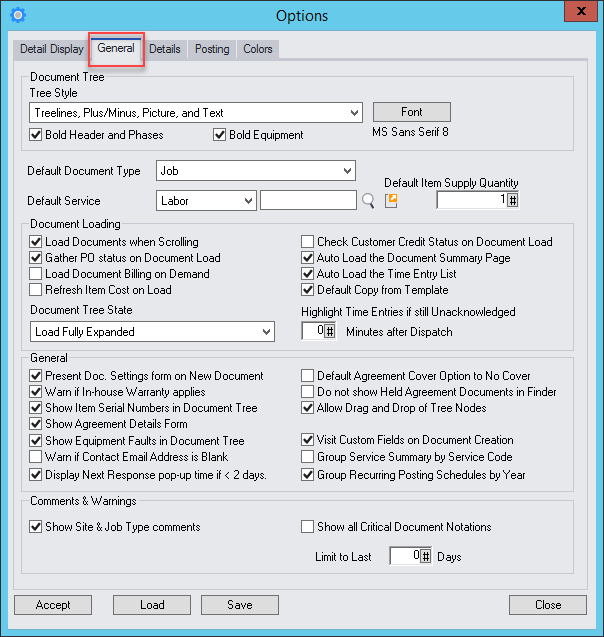
General tab
Document Tree |
|
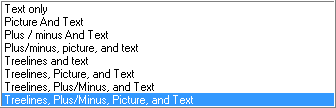
Tree Style |
Defines the format and structure of the document tree.
|
Bold Headers and Phases |
Tick this check box to bold Header and Phase lines in the tree. |
Bold Equipment |
Tick this check box to bold Equipment lines in the tree. |
The default Document Type that is displayed when the Document Entry window first opens. |
|
Default Service (Type)
(Default Service Code) |
Default Service Type can be set to Standard, Labor or Contractor. This should be selected in the initial installation when the company database is created. Type or select the default Service Code in the field to the right of Default Service Type. Click the using the Finder |
Default Item Supply Quantity |
The default Supply Quantity when adding Items to billing lines. Related Topic |
Document Loading |
|
Load Documents When Scrolling |
If this check box is ticked, when you scroll through the Document database, each Document will be loaded as you scroll to it. This has the potential to slow or delay the scrolling process. If this check box is cleared, you will need to click Go |
Automatically Gather PO Status on Document Load |
If this check box is ticked, whenever a Job or Sales Order is loaded, the status of Requisitions, Purchase Orders and/or Receipts will automatically be updated or refreshed in the Document. Note: This option is useful, but remember that if Load Documents When Scrolling is also ticked, then the Purchase Order status will be refreshed every time you scroll to a Job or Sales Order. That may slow things down even more. |
A series of major enhancements have been made to the Document Entry Save and Load logic to significantly improve the performance of these operations. On Demand loading will load the Document only to the Billing Group level and therefore does not need to load the Service and Item nodes. When you expand a Billing group, the Services and Items will be loaded on demand. You can load the entire Job at any time by clicking the Expand Tree |
|
Refresh Item Cost on Load |
If this checkbox is ticked then the cost of the Item will be updated to the most current cost until the Document is Posted. Un-checking this option will maintain the item's cost. |
If this check box is ticked, the information on the Document Summary tab will be loaded automatically. If this check box is cleared, you will need to click Go |
|
With this disabled it is possible to notice an improvement in the Document’s performance especially for Documents with many Time Entries |
|
|
|
Default Copy from Template |
When this check box is ticked the Copy Function will open the V/M Create New Documents window with the Create From Existing "Template" selected |
Highlight Time Entries if still Unacknowledged Minutes after Dispatch |
Time Entries appear with Red Text if their "Dispatched to Assignee" Dispatch Status has not been acknowledged within the time frame specified by this option. Refer Creating Time Entries |
General |
|
Present Doc. Settings form on New Document |
|
Warn if In-house Warranty applies |
Display a pop-up message if In-house Warranty applies. |
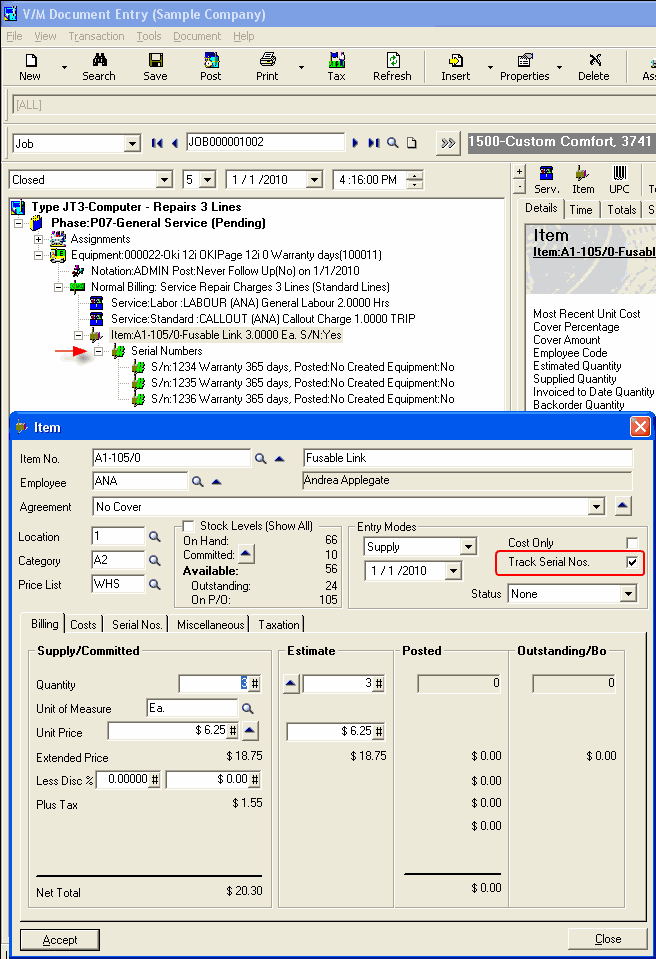
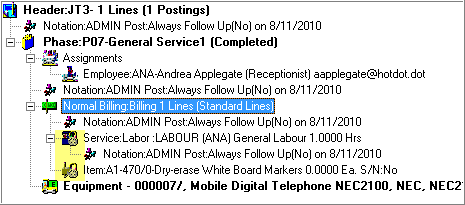
Show Item Serial Numbers in Document Tree |
Tick this check box to show Item Serial Numbers in a Serial Numbers node under the Item node in the Document tree. Note: The Track Serial Nos. check box must be ticked for the Item.
|
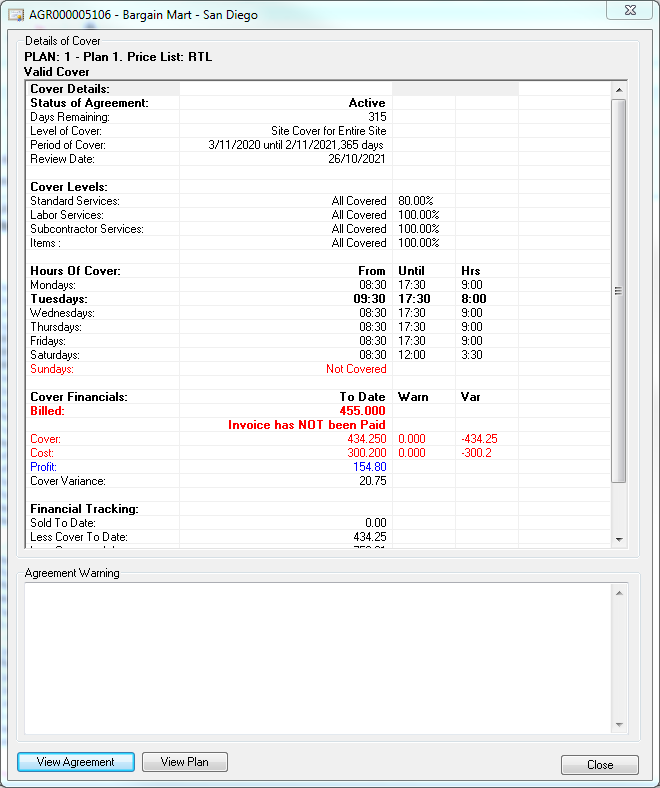
If you tick this check box, when you enter a Job for a Site that is covered by an Agreement, the Agreement pop-up window will be displayed showing all details of the cover provided by the Agreement. If there are multiple Agreements for the Site then the system will determine the most appropriate Agreement to be displayed. If you clear this check box, the Agreement pop-up window will not appear. Open a new Job in Document Entry, enter a client Site that is covered by an Agreement and the Agreement pop-up window will be displayed.
Click [View Agreement] to view details of the Agreement. The Agreement will be shown in the Agreement Setup window. Click [View Plan] to view details of the associated Agreement Plan. The Agreement Plans window will be displayed. |
|
Tick this check box to show Fault Registrations in the Document Tree. Clear this check box if you do not want to show Fault Registrations in the Document Tree. |
|
Tick this check box to display a warning message if the contact associated with the document has a blank email address. |
|
Display Next Response pop-up time if < 2 days. |
Tick this check box to have a popup notification if a response is due within 2 days. |
Default Agreement Cover Option to No Cover |
Tick this check box to default Billing line Agreement cover to No Cover. |
Do not show Held Agreement Documents in Finder |
Self-explanatory. |
Tick this check box to allow tree nodes to be moved using a drag and drop mouse action. If you clear this check box, drag and drop functionality will be disabled. |
|
Visit Custom Fields on Document Creation |
If you tick this check box, the Custom Fields associated with the document will be displayed during document creation and can be modified if required. Refer Custom Field Setup. |
Tick this check box to show services in the Summary tab grouped by Service Code. Clear this check box to show services in the Summary tab grouped by Employee. |
|
Group Recurring Posting Schedules by Year |
Self-explanatory. |
Comments & Warnings |
|
Show Site & Job Type comments |
Tick this check box to display the comments in a pop up |
Show all Critical Document Notations |
Tick this check box to have Equipment and Model Critical Notations pop up |
Click [Accept].
Details tab
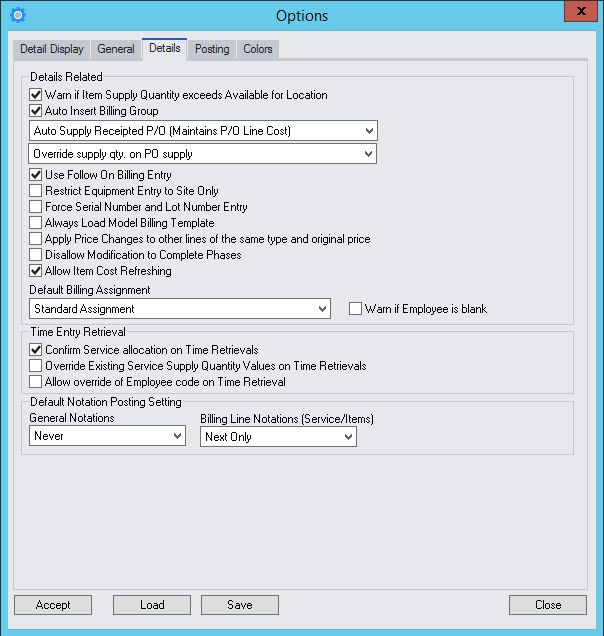
Details Related |
|
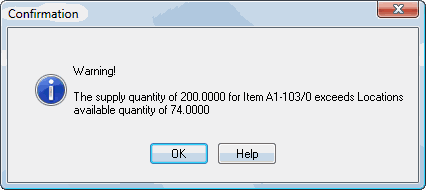
Warn if Item Supply Quantity exceeds Quantity Available for Location |
If you tick this check box, if the Item Supply Quantity is greater than the Available Quantity for the selected Location, a Warning message will be displayed.
|
Auto Insert Billing Group |
If you tick this check box, when you insert a Billing Group, the Billing Group will automatically be inserted into the Document. The Billing Group window will not be displayed. |
Automatically Supply Receipted P/O (Maintains P/O Line Cost) |
|
If you tick this check box, when adding a Service or Item detail line and Accepting that line, instead of adding it to the tree requiring you to select the Service or Line icon again to add the next detail line, the Service or Item window is presented again so you can immediately add the next Service or Item. This can speed up data entry a great deal. To complete an entry, press Esc or close the window. |
|
Override Supply Qty. on PO Supply |
If this option is selected from the dropdown the PO Retrieve process automatically overrides the Supply Quantity in the Job when the PO is supplied. |
Restrict Equipment Entry to Site Only |
Site Equipment from another Site can be added to any Job in Service Manager even though the Equipment Finders If you tick this check box, Equipment from another Site will be prevented from being loaded into the Site. |
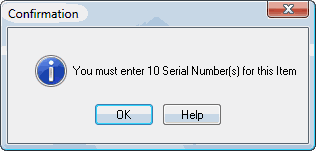
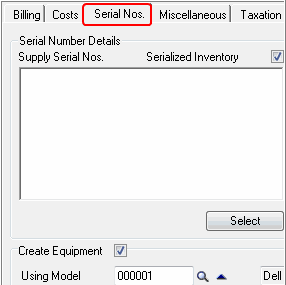
Force Serial Number Entry |
If this check box is ticked, you will be forced to enter a Serial Number for each Item being added to the Document. Note: If a Supply Quantity of 10, for example, is entered for an Item, you will need to enter 10 Serial Numbers for that Item.
The Serial Numbers are entered on the Item Serial Nos. tab. Refer Inventory Items » Serial Nos. tab. If this check box is cleared, a Warning message will be displayed prompting you to enter the relevant Serial Numbers.
|
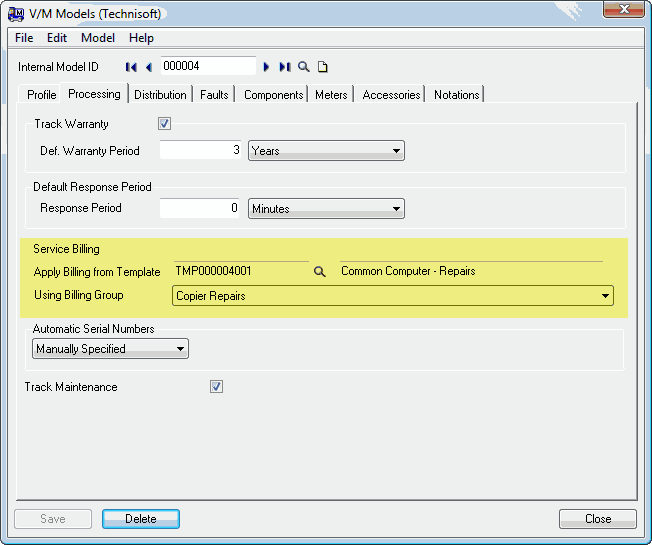
A Billing Group from a Billing Template can be attached to a Model. When inserting Equipment into a Document, if the Equipment Model has a Billing Group attached: •if this check box is ticked, the Billing Group attached to the Model will be auto loaded under the Equipment node being inserted. •if this check box is cleared, you will be prompted to load the Billing Group. If you click [Yes], the Billing Group will be inserted under the Equipment node. If the Model does not have a Billing Template attached, only the Equipment node will be inserted.
|
|
Apply Price Changes to other lines of the same type and original price |
Self-explanatory. |
If this check box is ticked and the Phase has a Completed status, the system treats the Service and Item lines in the Phase in a similar fashion to Protected Billing. The Service and Items lines will have a padlock placed over the icon.
There will be no [Accept] button on the Service or Item forms, i.e., the Service and Item lines will not be able to be modified. |
|
Allow Item Cost Refreshing |
Tick this check box to allow the item cost to be refreshed when an item is loaded/reloaded. |
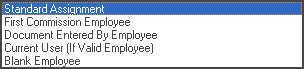
Default Billing Assignment |
A warning message can be displayed if Employee is blank by selecting the check box next to the dropdown menu. |
Time Entry Retrieval |
|
Tick this check box to display the Confirm Time Actual Retrieval window when dragging a time entry to the Document tree. |
|
Override Existing Service Values on Time Retrievals |
Tick this check box to override existing Supply values on retrieval by default. |
Allow override of Employee code on Time Retrieval |
Tick this check box to let the Employee Code be changed during Time Retrieval. |
Default Notation Posting Setting |
|
General Notations |
|
Billing Line Notations (Services/Items) |
|

Click [Accept].
Posting tab
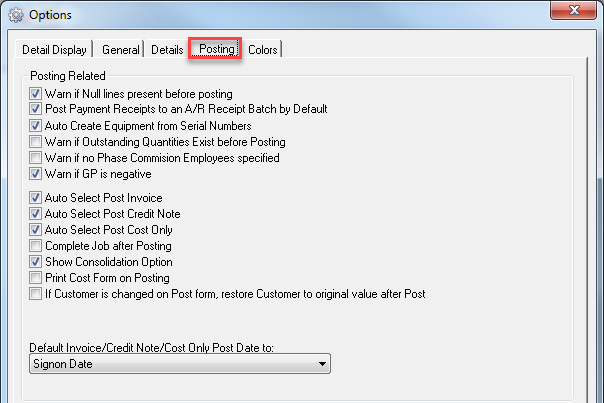
Posting Related |
|
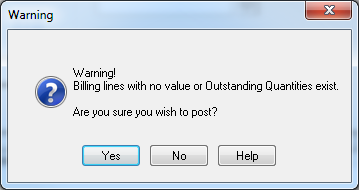
Warn if Null lines present before posting |
If you tick this check box, Service Manager will display a Warning message if any of the Billing lines being posted have zero Value.
|
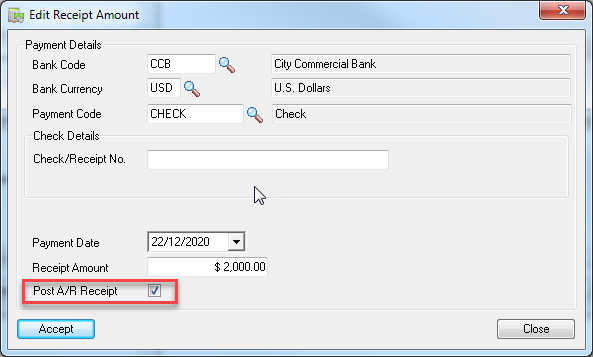
Post Receipts to A/R Receipts by Default |
If this check box is ticked the Payment Post A/R Receipt check box in the Edit Receipt Amount window will be on as default.
|
If this check box is ticked, the Auto Create Equipment program will load at the conclusion of the posting process. This will load all Serialized Inventory items into the list view which can then be posted to create Equipment in Service Manager. |
|
Warn if Outstanding Quantities Exist before Posting |
If you tick this check box, Service Manager will display a Warning message if any of the Billing lines being posted have Outstanding Quantities.
|
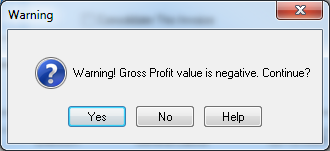
Warn if GP is Negative |
If this Check Box is ticked, Service Manager will display a Warning message during Posting if the Gross Profit amount is negative, indicating a loss on the Job.
|
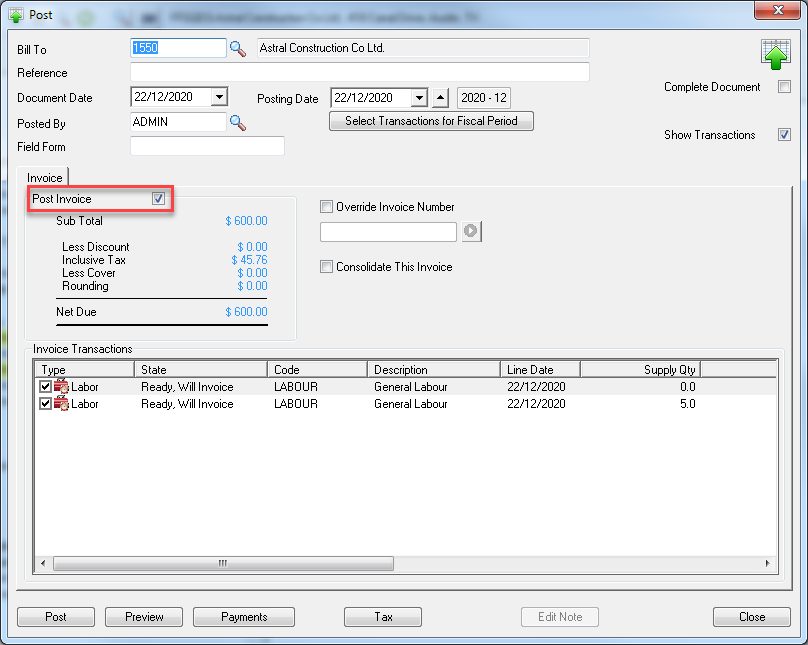
Auto Select Post Invoice |
Ticks the Post Invoice check box on the Post window by default.
Clear this check box to avoid accidental posting of Invoices. |
Auto Select Post Credit Note |
Similar to Auto Select Post Invoice, but for Credit Notes. |
Auto Select Post Cost Only |
Similar to Auto Select Post Invoice, but for Cost Only Entries. |
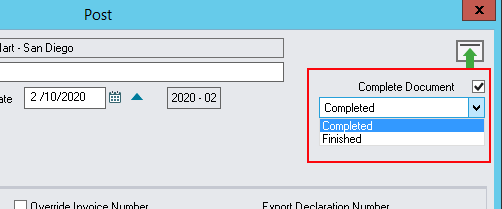
Changes the Document Status to a Status with a Completed State after Posting. All statuses with a Completed state are available from the dropdown selection during posting. Select which Status to change the Document to once Posting has occurred.
Refer to V/M General > Options > Completion Tab for completion validation settings |
|
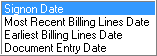
Default Invoice/Credit Note/Cost Only Post Date to |
|
Click [Accept].
Colors tab
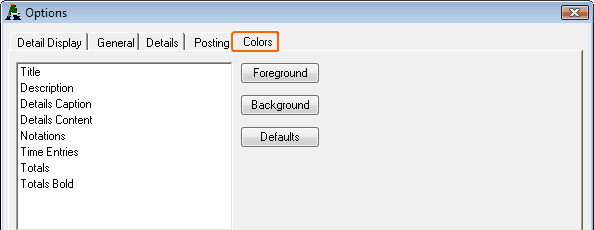
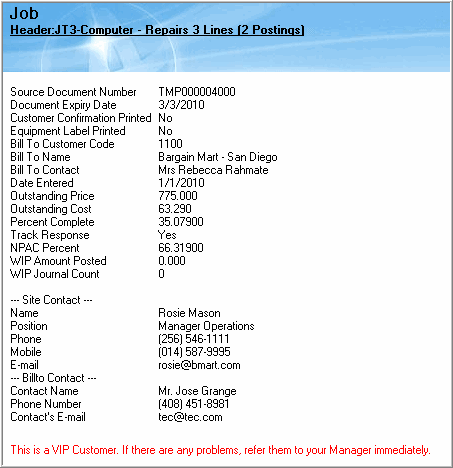
Select an item, e.g., Title. These items relate to the Document Entry Details pane, shown below.
Click [Foreground] to change the foreground color of the selected item.
Click [Background] to change the background color of the selected item.
Click [Default] to set the colors to system default values.