Creating Time Entries

Contents
Time Entries can be created in a number of ways and either manually or automatically:
•Create a time entry automatically when Assigning Resources to a Job
•Create a time entry manually using the Assigned Resources Find Insert button
•Create a time entry manually using the Time fast icon. This method is explained below.
In an existing Job. click the Insert a Time Entry for Current Phase ![]() fast icon. The Time Entry window will be displayed.
fast icon. The Time Entry window will be displayed.
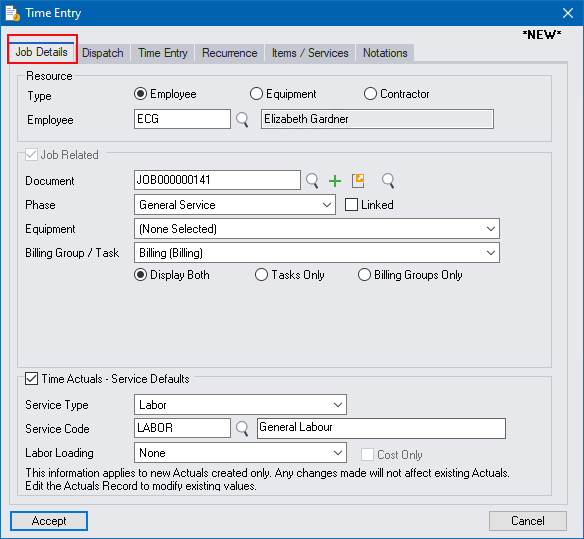
Job Details tab
The first screen displays Resource details and document defaults, such as Service Type and Service Code. These details are passed on from the Job.
Select the required Resource.
Note: The Resource Type cannot be changed once the record is saved. Only the Resource itself can be modified.
Employee
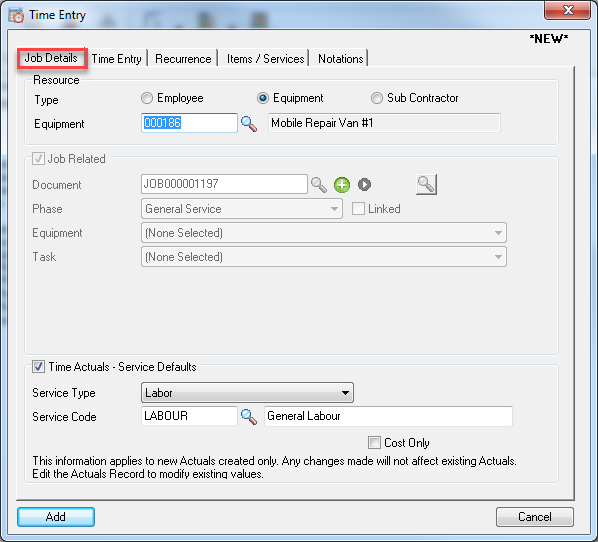
Internal Equipment
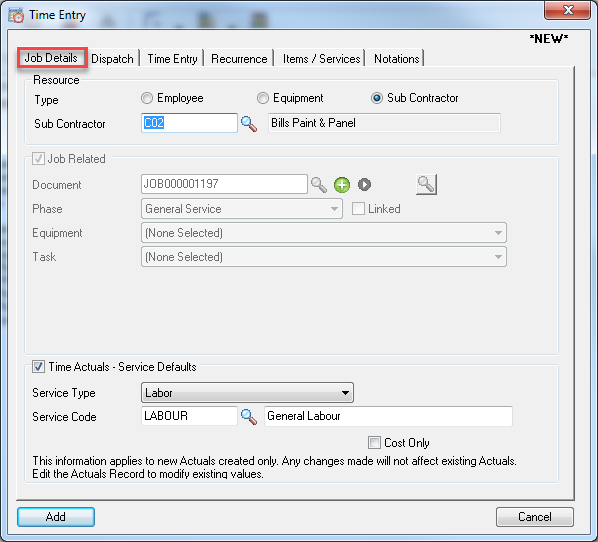
Subcontractors
Dispatch Tab
When a new appointment is assigned to an employee, whether from inside a job in Document Entry, Time Entry, Time Manager, Advanced Scheduling or Field Portal, a dispatch notification can be issued to the employee and the employee can acknowledge the dispatch.
That is especially useful when used in conjunction with Field Portal the mobile software for Service Manager.
An employee can accept or reject a dispatch notification from the field.
If the appointment is rejected, because the employee is unavailable, the dispatch coordinator can then reschedule the appointment to another employee.
If an appointment is canceled by the dispatch coordinator a notification is also sent to the employee advising them of the cancellation.
The purpose of Dispatch management is to confirm that the employee has received and acknowledged the dispatch notification.
It is not recommended that Dispatch be used for all appointments as it only adds unnecessary additional work load but it certainly can be if required.
We therefore recommend using Dispatch for exceptions, such as urgent jobs, rescheduling a person who is sick, verifying someone is in the area and so forth.
Dispatch Statuses
Not Required
Default
Dispatch Pending
This status is used to manage all jobs prior to dispatching them to a field tech.
The field tech. will not see appointments set to Dispatch Pending in their Dispatch Jobs list on their mobile device but those jobs will still be in the field techs daily job list.
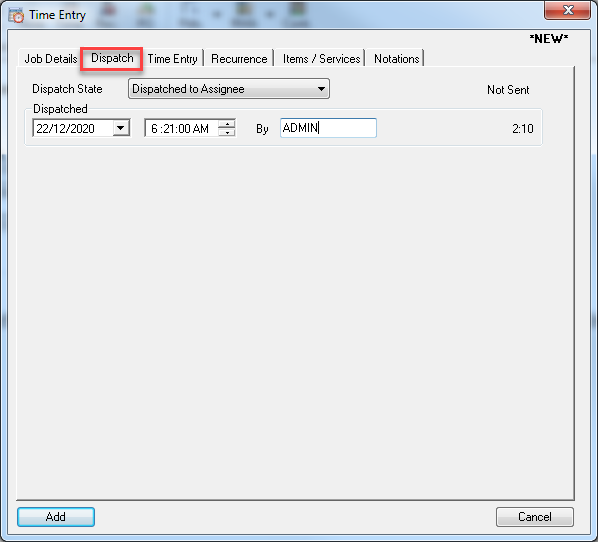
Dispatched to Assignee
Set this status to send a notification to the employee in the field using Field Portal.
As per the Field Portal Home screen (shown above) the employee will see this job as an exception in the Dispatched Jobs list on their mobile device.
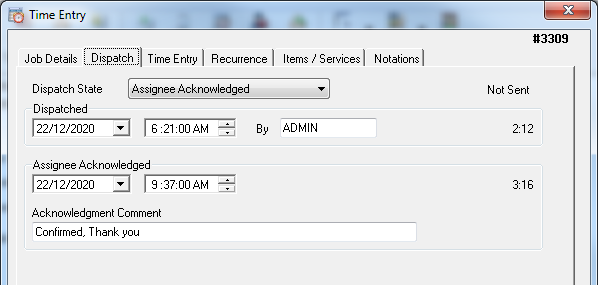
Assignee Acknowledged
The field employee should set this status to acknowledge the dispatched Time Entry.
Reject/Reschedule
The field employee generally uses this status to reject the dispatch.
The dispatch coordinator will then see the rejection on the dispatch board and can choose to reschedule the dispatch to someone else.
Rescheduled
This status can be used by the field tech to notify the dispatch coordinator that they have rescheduled a job, or alternatively the dispatch coordinator can notify the field tech that the job has been rescheduled.
Dispatch Canceled
This status is used to cancel an appointment and would normally be issued by the dispatch coordinator to the field tech.
It is possible for a customer to cancel a job whilst the field tech is on site so the Field tech may use this status as well on occasion.
Generally the field tech would send an acknowledgment of the cancellation by setting the dispatch status to the Cancel Acknowledged status.
Cancel Acknowledged
Used to acknowledge a canceled dispatch.
Dispatch Acknowledgments
The Dispatch date/time and acknowledgment comment are stored in the Time Entry for audit purposes.
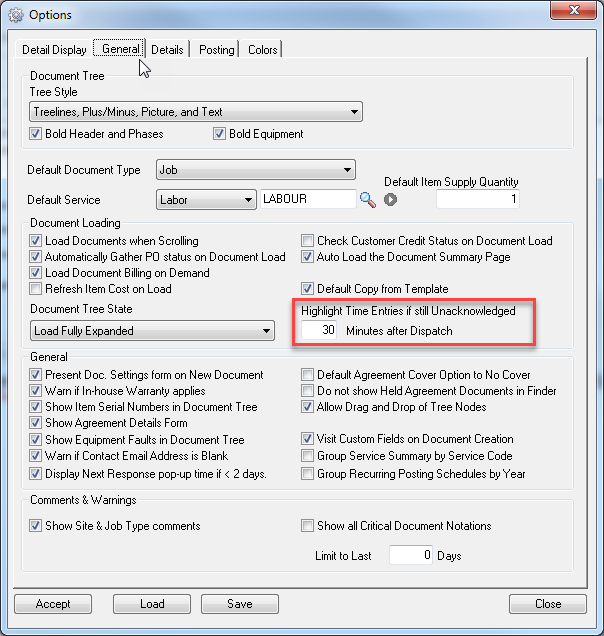
A Time Entry which has been set with the dispatch status of Dispatched to Assignee will appear in the Time Entry list with red text if the Document Entry General Option to "Highlight Time Entries if Unacknowledged (Mins) minutes after Dispatch" is set.
![]()
Time Entry tab
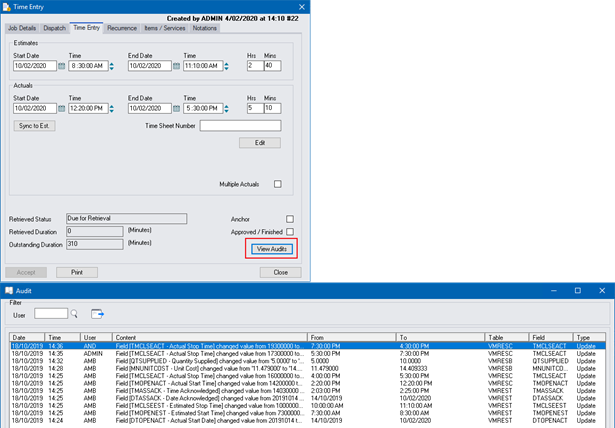
In this example, the time estimate for this Resource (Employee "DES") was two (2) hours and the actual time spent was one (1) hour and 30 minutes.
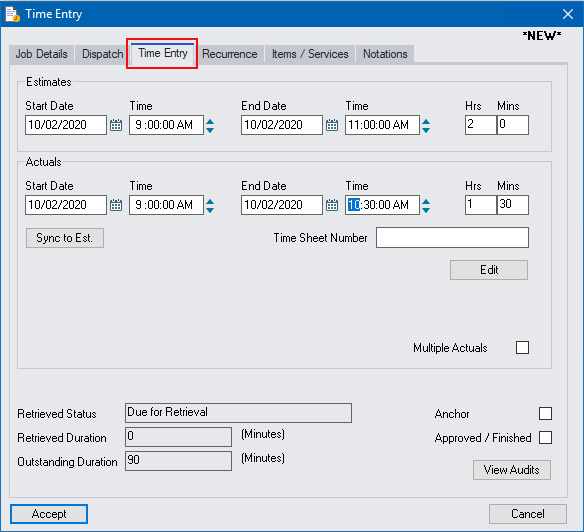
When you enter the Actuals and then press Tab, the Actual Properties window will be displayed.
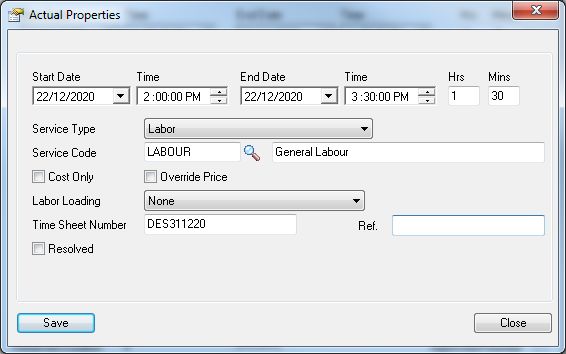
Confirm the actual Start Date/Time and End Date/Time and change the Service Type, Service Code, Cost Only, Override Price, Labor Loading, Time Sheet Number and Reference, if required.
If Time Entry Estimate, Actual and Billing Audits have been setup through the Audits program then selecting the View Audits button on the Time Entry tab will show any changes to these fields.
Recurrence Tab
The Recurrence feature allows multiple time entries to be created for a single Job based on a Schedule.
Creating Recurring Time Entries
Check the Enable Recurrence checkbox to activate the function.
Select the Schedule to apply to the Time Entry series.
Options to end the Time Entries on a selected date or after a set number of occurrences
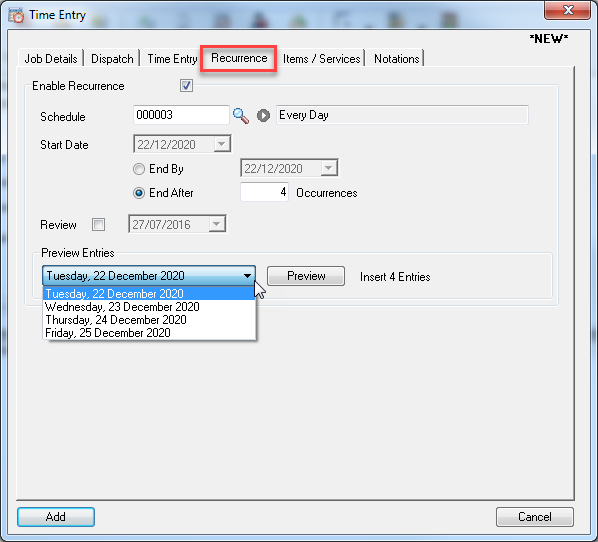
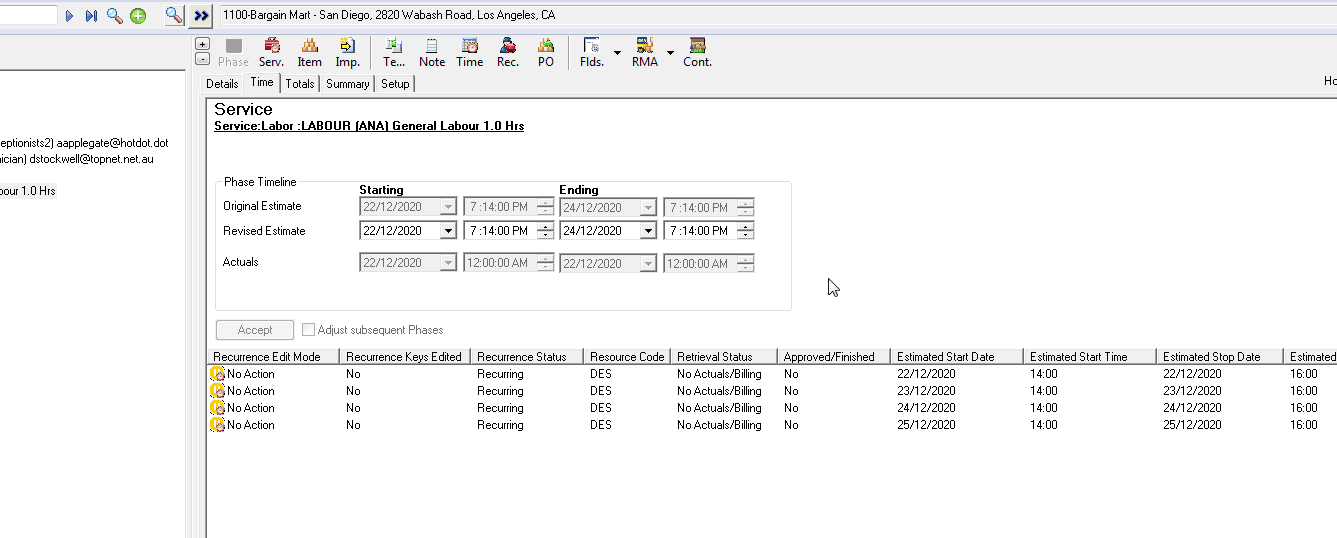
Once the appointments are created they gain the recurrence status of Recurring and all Time Entries are listed in the Document.
Modifying Recurring Time Entries
All Time Entries created as part of a recurrence are treated as a single series so modifications and deletions can either be applied to the series, part of the series or a single appointment only.
In the below example the second appointment for the 23rd of December is shifted to start at 3:00pm for 2 hours duration.
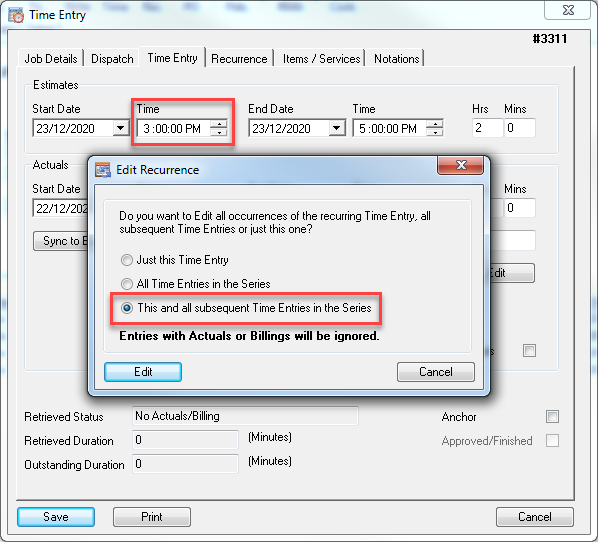
The Edit Recurrence window is raised to confirm whether to apply the change to:
•Just this Time Entry
•All Time Entries in the Series
•This and all subsequent Time Entries in the Series
The start time change is applied to This and Subsequent Time Entries in the Series and the affected appointments are all shifted.

When a Time Entry is modified and the option to apply to "Just this Time Entry" is selected then the Recurrence Status is updated and the appointment is then treated individually from then on.
Changing the third appointment from Resource DES to ANA and apply to the one time entry only
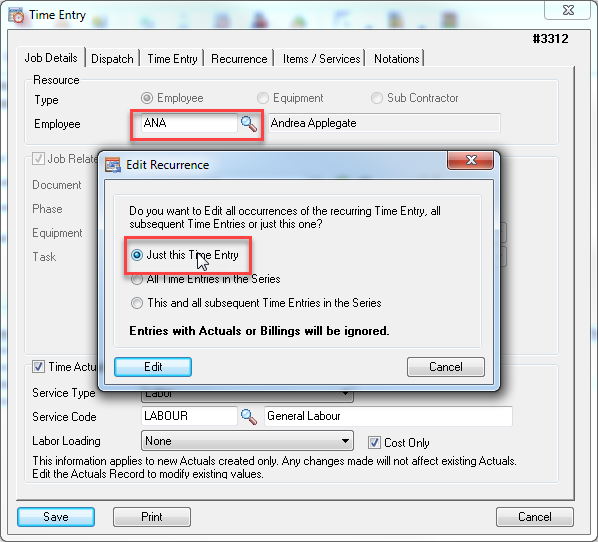
The individual Time Entry is updated and the recurrence status is changed from Recurring to Edited Record.

Edited Records will no longer be modified with the rest of the series and are treated as individual Time Entries from that point on.
In the below example, Resource DES is replaced with MJK and applied to "All Time Entries in the Series"
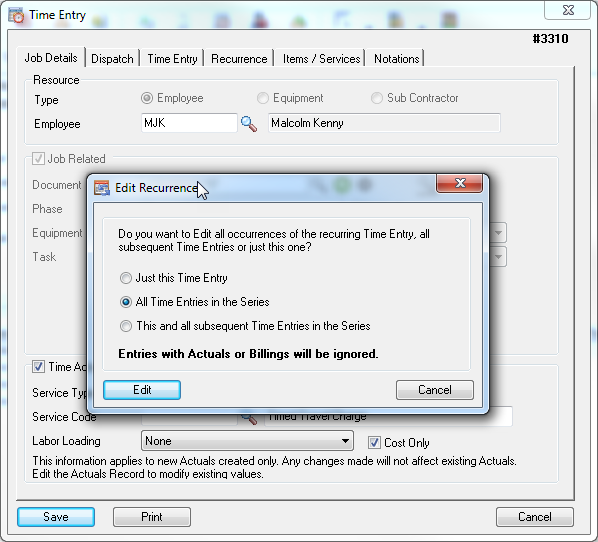
All Time Entries with the Recurring Status are updated with MJK as the Resource. The Edited Record of ANA has remained. Notice the start time modification applied in the first edit example has not been overwritten by the latest Edit to the Series.

When Recurring Time Entries have Actuals or Items and Services ready to retrieve they lose the Recurring Status and modifications to the series will not applied to Time Entries due for retrieval
Items/Services Tab
Items/Services gives the ability to add parts and services, as well as labor related charges, to a time entry.
The additional charges are retrieved when the time entry is retrieved to the job.
When a part is selected the inventory location can be chosen.
The inventory location can be defaulted to the employee’s truck location or can be changed to another warehouse or related Service Center at any time as required.
Time entry parts also support serialized inventory and inventory categories change.
The basic workflow is to enter labor, parts or services as required and then use Time Manager to retrieve the charges to their respective jobs.
(Note that the retrieval process can be automated using Field Portal so that an invoice can be produced in the field if required.)
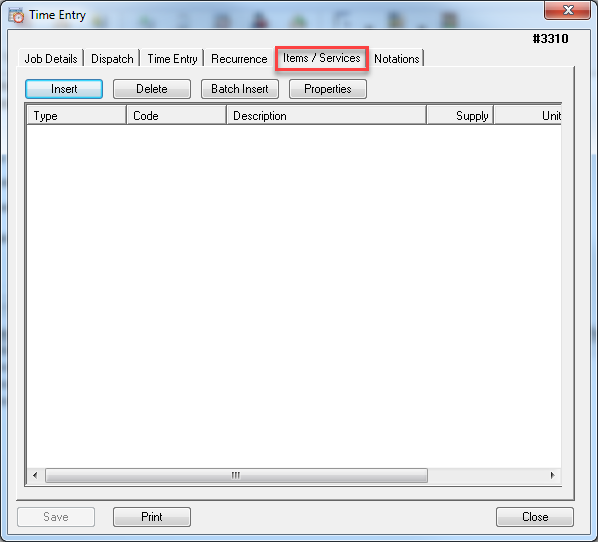
Select Insert to open the Edit Item/Services Window.
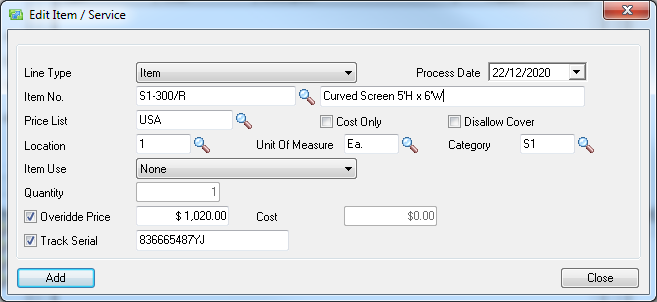
Select the Line type Item or Service
The description will load but can be modified as required.
The Price List will default from the customer settings or can be overridden.
Select “Cost Only” if the item is non-billable. E.g The item is for internal or warranty work, or for any other reason.
To bill an item/service uncheck Cost Only.
The Unit of Measure and Category should load by default from item details but can be modified if required.
The quantity will be set to 1 and cannot be modified if it is a stock item as only one serial number can be chosen at once with this method of entry. If inserting a Non stock item the quantity can be modified
Select Override Price to change the default if the item/Service is to be billed.
Select Add to add the item/service.
Enter additional items/services as required by selecting Insert again.
The Batch Insert option can be selected to Import many Items/Services. Valid codes must be known and each record to be inserted must appear on a separate line. Only the Item, Location and Quantity details can be entered through this Batch option by entering the Items/Services as follows:
Item Code_Location_Quantity
Eg: S1-300/R 1 2
Item: S1-300/R, Location 1, Quantity 2
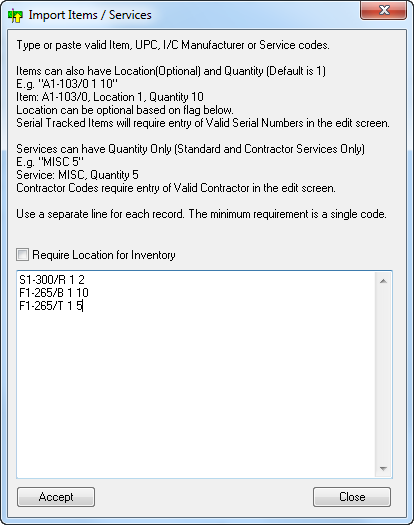
Click Accept to enter the Items/Services into the list.
Notations tab
Add Notations if required. Refer Notations for further information about creating and maintaining Notations.
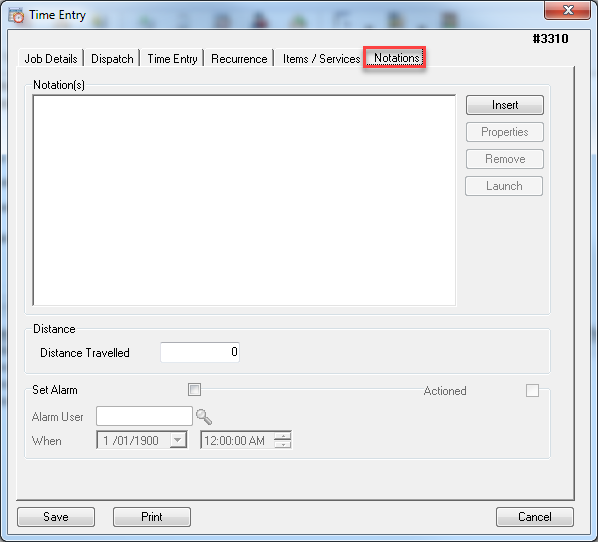
Enter Distance Traveled if relevant. This is an information only field.
Create an Alarm if required. Refer Monitoring Time Entry Alarms and Notation Follow-Ups for further information about managing Time Entry alarms.
Time Entry Billing Group / Task Association
Time entries can be associated to a job, phase in the job, a specific equipment record in the job, a billing group in the Job and to tasks.
This is especially helpful for field techs who need to assign time to specific tasks they perform.
Time entries can be edited from Document Entry, Time Entry, Time Manager, Advanced Scheduling or Field Portal.
This ensures a time entry can be retrieved directly to the correct point in the job.
That is especially important for field techs carrying out specific tasks that require items and services to be tracked to task level.
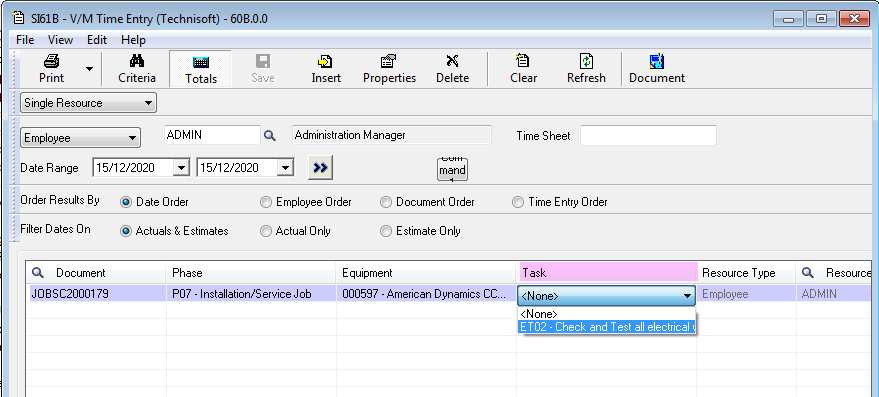
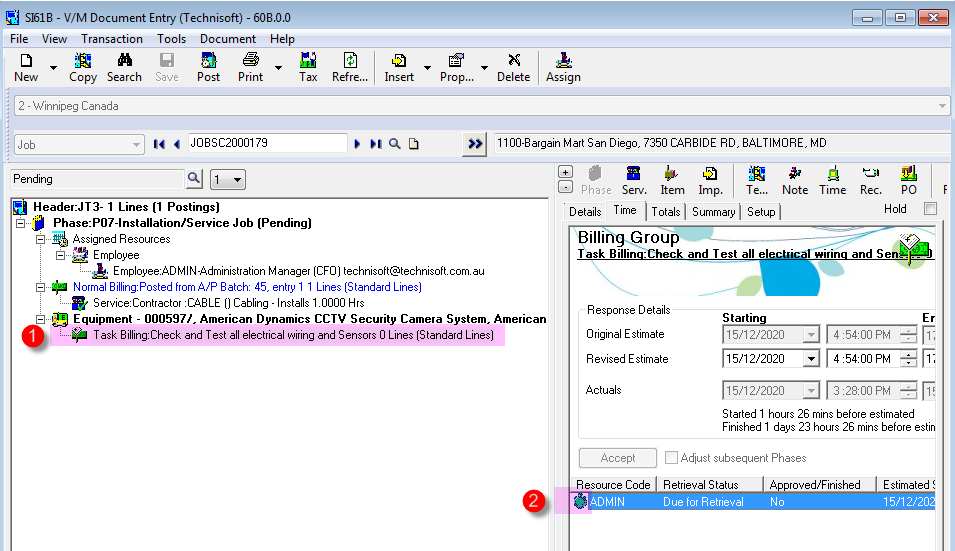
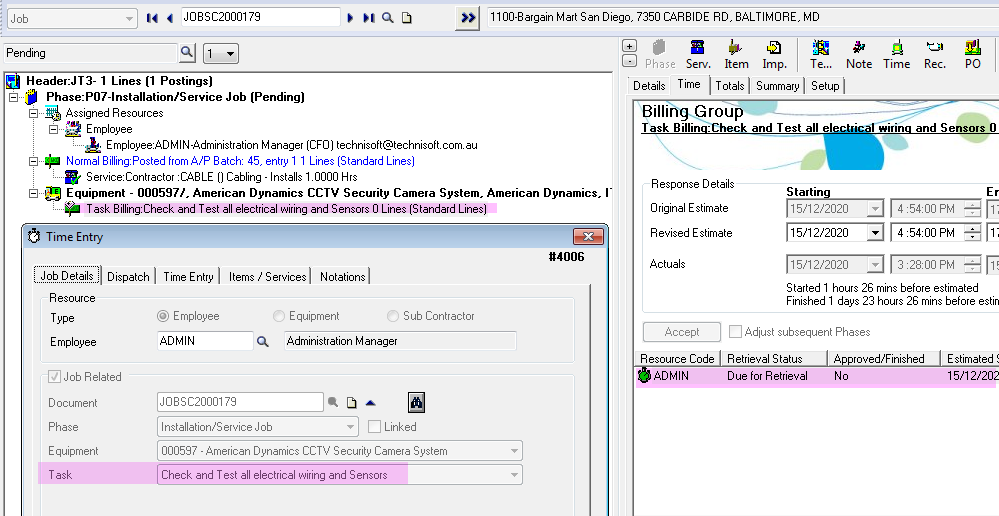
In the Document Entry screen below there is a task on the job to test electrical wiring.
Note the time entry marked on the right of screen with the number 2 relates directly to the task notated with the number 1 in the job tree.
When the time entry is retrieved the items service relating to that task will now be added to the job directly under the task.
Double click the time entry to view properties.
On the Job Details tab the time entry has been associated right down to task level.
After retrieving note that the items and services are now associated at task level.
When editing a time entry in Time Manager the form below appears.
Note note that on the Job Details tab it is now possible to associate the time entry directly to a task in the job.
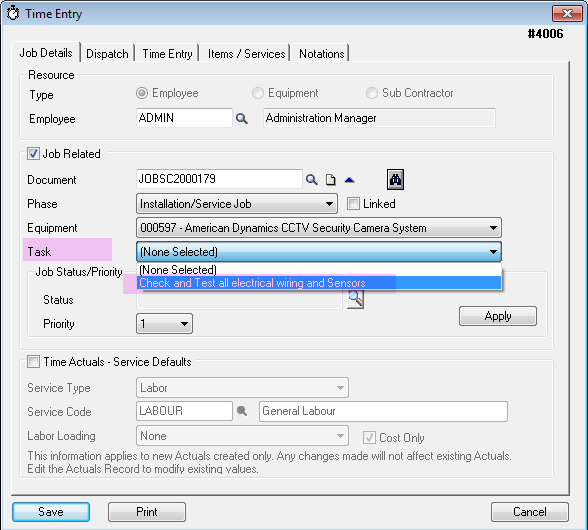
Open the Time Entry program and edit an existing time entry or create a new one.
Note it is now possible to associate the time entry directly to a task in the job.