Models

Contents
 »
»  »
» 
Overview
The Model setup function allows you to define all the Models that your company services, uses in-house, or rents.
Each Equipment record must be associated with a particular Model and will inherit that Model's characteristics. A Model may also relate to an item of Inventory that you sell.
Models must exist before Equipment can be created in Service Manager. Equipment inherits features from the associated Model record.
A maintenance program cannot currently be set at Model level. That means if creating Equipment for that Model, maintenance has to be set up each time at Equipment level. (The Service Manager Advanced Maintenance Add-On does allow you to specify a maintenance program at Model level.)
Information maintained includes: Manufacturer Details, Model Group Class, Release Date, Comments, Warranty Defaults, Maintenance and Meter Details, and Fault Codes that may apply to that Model.
Related Topics
Refer to the following sections in the Service Manager User Guide for additional information:
Using Manufacturer and Customer Item Numbers
Estimated Time
Typically allow between two and five minutes to set up a Model.
Import/Export functions available from the File menu can speed up this process dramatically.
Profile tab
When you start the Model Setup program, the next available Model ID will be shown.
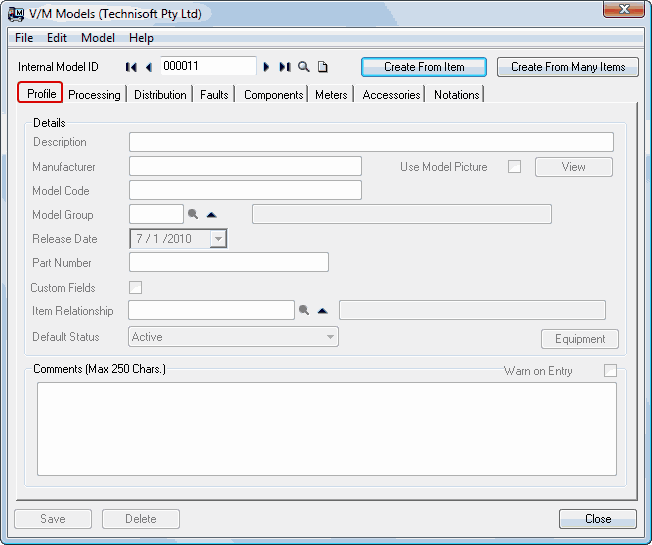
It is possible to quickly set up and create Models from Items that have been marked as serialized.
Creating Models from I/C Items
Creating a Model from a single Item
Click [Create From Item].
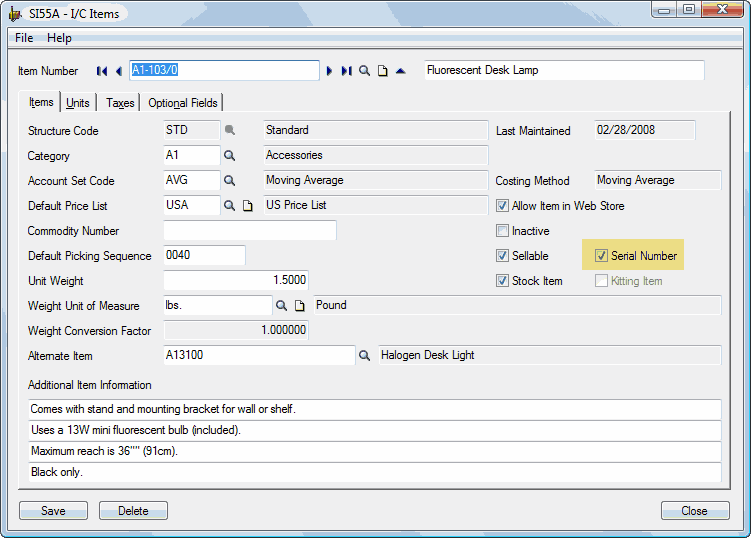
The Item Finder will be displayed. Only Items that have Serial Number tracking turned on in I/C Item Setup will be listed.
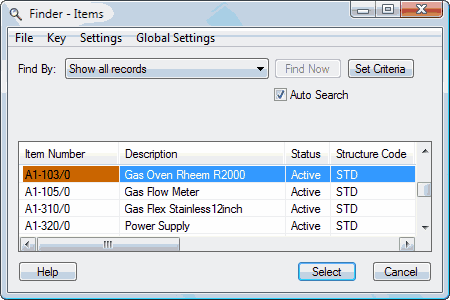
When you select an Item, the form will be populated with values from the Item record.
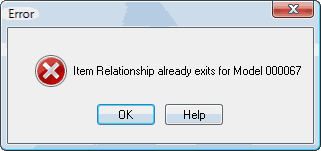
If there is already a relationship to the Item, an error will be displayed showing the Model Number with which the Item has a relationship, and nothing will be populated.
The fields populated are Description, Model Code and Item Number (in the Item Relationship field). You simply fill in the other fields required and click [Save]. If you do not wish to use the auto numbering, you simply populate the Internal Model ID with a value before clicking [Create From Item].
Create Models from multiple Items
Click [Create From Many Items].
The Create Models from I/C Items window will be displayed.
This form will ultimately create a Model for each Item marked as serialized that does not already have an Item Relationship.
You can let Service Manager auto number the Model Codes or use the I/C Item Code for the Model Number.
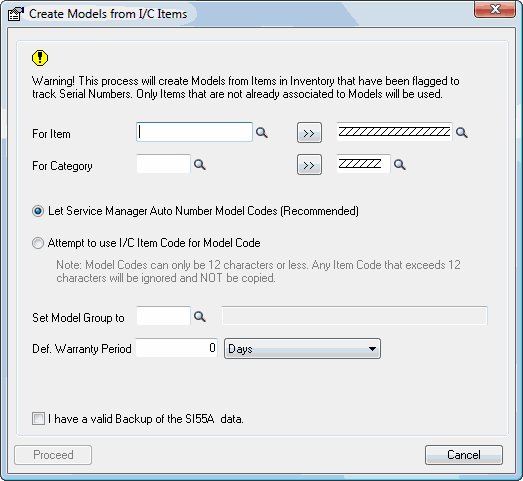
Select the required Item Number(s) and/or Item Category Code(s).
Set the required Model Group.
Set a default Warranty Period if applicable.
You must tick the I have a valid Backup of the <database ID> data check box before you can proceed.
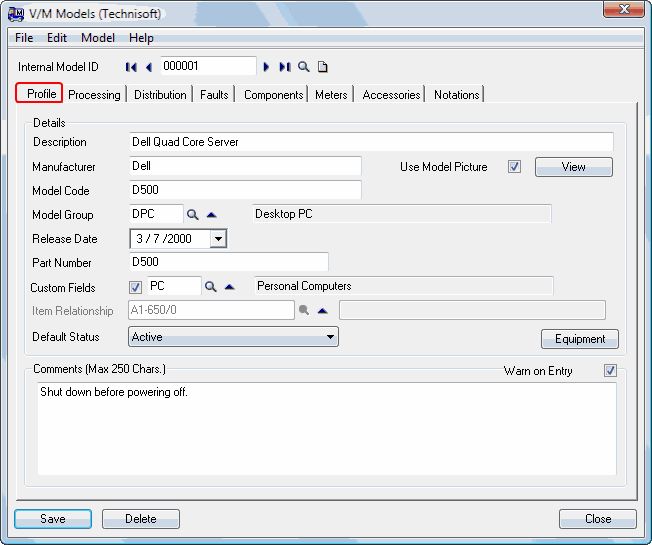
Click [Proceed]. A completed Model is shown below.
To create a new Model:
Enter the Model ID to allocate a specific Model Number or click New ![]() to allocate the next available Model Number.
to allocate the next available Model Number.
Press Tab twice.
Enter a Model Description.
Enter a Manufacturer and Model Code.
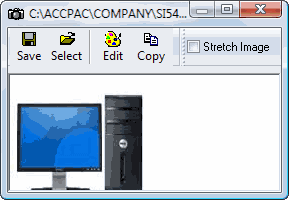
Tick the Use Model Picture check box and then click [View] to associate a graphic to the Model.
Enter a Model Group, set up in Class Types, if applicable.
The Release Date will default to the current date, but can be set manually if desired.
Enter the vendor Part Number.
Tick the Custom Fields check box and then choose a Custom Field template to use for this Model. Click the drill-to arrow ![]() to display details of the currently selected Custom Field. Remember that if you add, modify or delete a code, the changes made will be inherited by all Equipment that use this Model.
to display details of the currently selected Custom Field. Remember that if you add, modify or delete a code, the changes made will be inherited by all Equipment that use this Model.
Add an Item Relationship to an Inventory Item. When selling an Inventory Item on a Job or Sale Document, this association will match the Item with a Model to allow creation of an Equipment record automatically from that Model.
Select the Default Status.
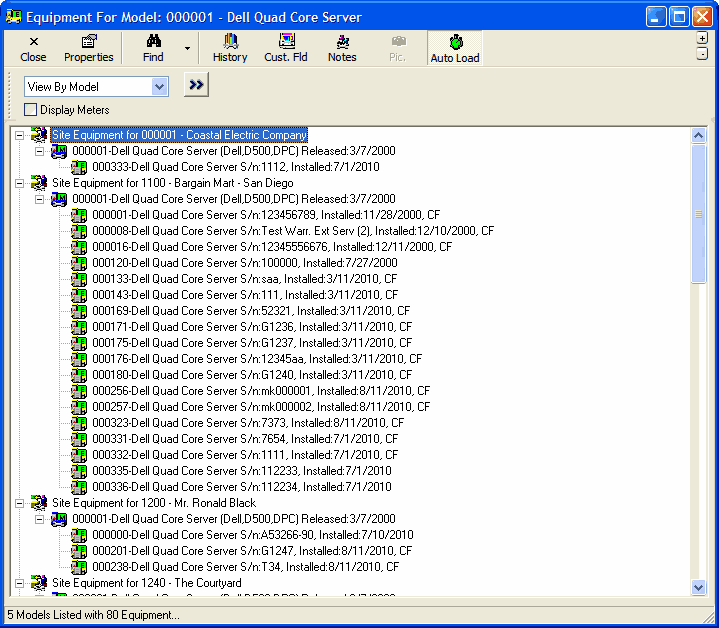
Click [Equipment] to show all Equipment of this Model. Auto loading of the records when the form is loaded, is optional. The Auto Load toolbar icon can be toggled off and on. If it is off, you must action the load manually. This gives you the ability to set criteria and grouping values before loading. These settings are retained when the form closes.
Add Comments and tick the Warn on Entry check box if you want the Comments to pop up whenever Equipment of this Model Type is added to a Job.
Click the Processing tab.
Processing tab
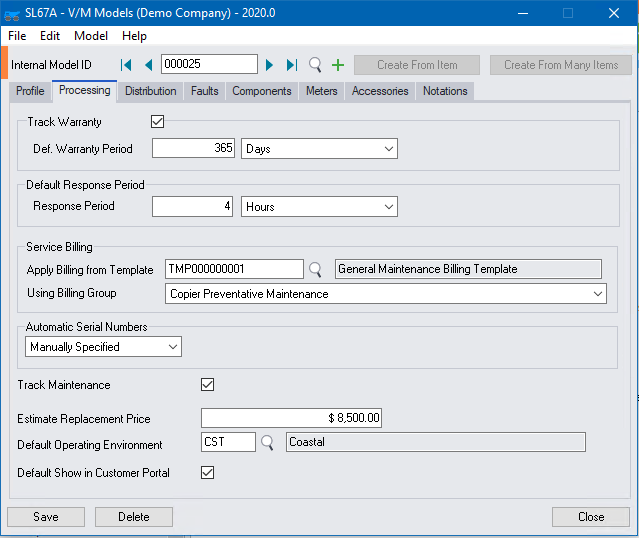
Tick the Track Warranty check box to implement manufacturer warranty tracking. Specify a default warranty period. When an item is sold that uses this Model, the warranty period will default to the Equipment record created.
Service Billing - In Document Entry, when you add Equipment of this Model, it is possible for Service Manager to prompt you to add billing groups from a template. To do this you must specify the Template and select a default Billing Group.
Example

In Document Entry, when you add Equipment for this Model, a Warning message is displayed.
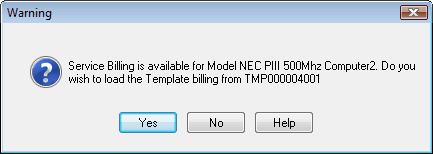
If you click [No], no Billing Group will be added to the Equipment line.
If you click [Yes], the Load Billing Template window will be displayed with the default Billing Group ticked.
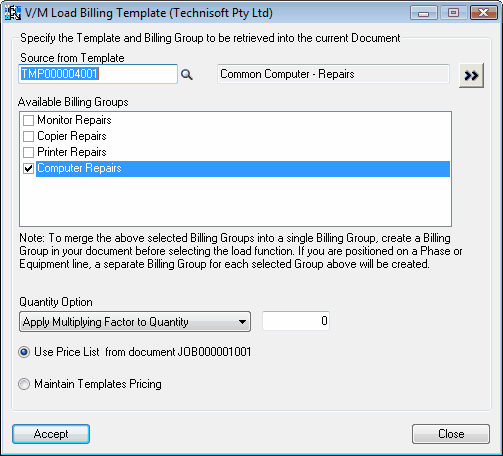
You then have the opportunity to select any of the Available Billing Groups and change quantity and pricing options during the load.
The Billing Group(s) selected will be added to the Equipment record.

Tick the Track Maintenance check box if you want to set up maintenance for Equipment created using this Model. If you clear this check box, maintenance fields will disappear. You can set it on at Equipment level at any time if required. Maintenance routines are set up at Equipment level.
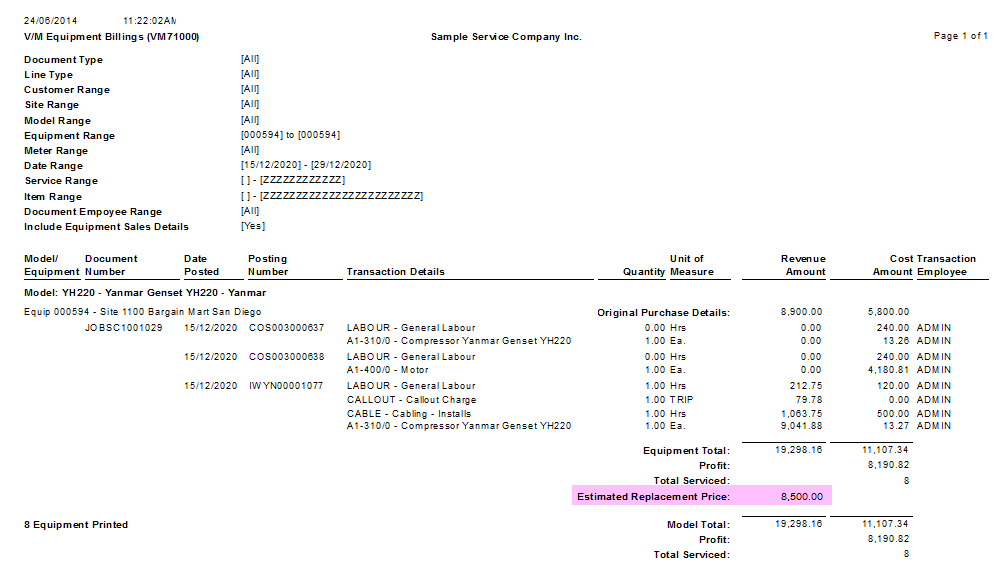
Add a value into the Estimate Replacement Price of the Equipment if required. This value is available for custom reports and is used in the Equipment Billings report which presents a life cycle history of the equipment and can be used to compare the cost of maintaining the equipment to the cost of replacing the equipment.
Set the Default Operating Environment Class Type to classify the normal operating environment the equipment will be located in. This can be particularly useful for identifying equipment deployed in a dangerous and hazardous environment as additional preventative maintenance or tools may be required when servicing such equipment. This field can be left blank or modified when creating individual equipment.
A “Useful Life Period” can also be specified when setting up the Operating Environment Class Type. Useful life can be compared to the install date to determine the remaining expected useful life of the equipment at the date of service.
Default Show in Customer Portal check box will set the default for when new Equipment of that model type are created to either show in Customer Portal or not.
Click the Distribution tab.
Distribution tab
The Distribution tab is used to set up Distribution Periods and display distribution percentages based on those Periods. You can then tell, for example, what percentage of Equipment of a particular Model or ALL Models is less than 1 year old, 1-3 years old, ..., 9 years or older, etc. Fault and Failure distribution by Period is also shown.

Select the Number of Periods to Track, e.g., 5.
Select the Period Age Type, e.g., Years.
Enter the Periods - Period 1 ... Period 5, etc.
Date Last Calculated shows the current date. Select a different date if you require calculations as at a different date.
Click [Calculate for Model] to refresh the distribution percentages for the currently selected Model.
Click [Calculate for ALL Models] to refresh the distribution percentages for all Models.
Click the Faults tab.
Faults tab
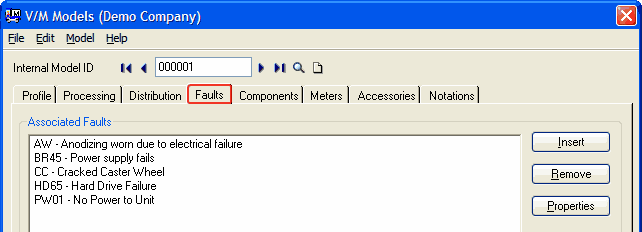
Click [Insert] to associate faults with this Model once faults have been created. It is not necessary to add faults when setting up the Model as they will automatically be associated with the Model when Service work is performed on Equipment that uses this Model and Fault Registrations are logged to the Equipment. It can be handy to visit Model Setup to quickly view all faults associated with that Model once Service Manager has been operational for some time.
Click the Components tab.
Components tab
A Model can consist of one or more Components. Each Component is a Model in itself. This is referred to as a Parent/Master to Child/Component relationship. This relationship is a one level deep Model to Model relationship. i.e., one Model is a Parent and many Models may be Components.
Whenever an Inventory Item is sold and an Item/Model relationship exists for that Item, Equipment is created based on the Model that has the relationship established with the Item. If that Model has Components, Equipment Components will also be created based on the Model Components.
Before you can create a Master/Component relationship you must first turn on company-wide Component Tracking. To do this, tick the Component Tracking check box in Company Options » Processing tab.
It is important to understand that each Equipment, be it a Master or Component, is treated as a separate individual Equipment record in Service Manager.
Related Topics
Equipment Setup » Components/Meters tab
Creating Model Components
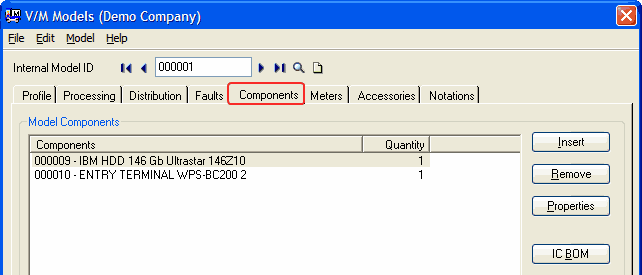
Click [Insert] to find another Model to insert as a Component to this Master Model. During the Insert function you can specify a quantity to insert for that Model.
Click [IC BOM] to insert Components quickly using a bill of material (BOM) item from Inventory Control. Make sure that Model relationships exist for each Item in the BOM, or the Model will not be inserted.
Click the Meters tab.
Meters tab
Similar in concept to the Distribution tab, the Meters tab is used to set up Usage Ranges and display distribution percentages based on Usage. You can then tell, for example, what percentage of Equipment of a particular Model or ALL Models has a Meter Reading of 0-1,000 hours, 1,001 to 2,000 hours, ..., 4,001+ hours. Fault and Failure distribution by Usage is also shown.
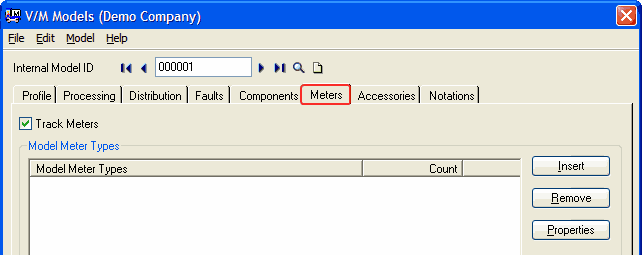
Tick the Track Meters check box to set up a Meter for this Model. Equipment can have unlimited Meters. These can be inherited from the Model or entered for the Equipment.
Click [Insert] to add a Meter. The Model Meter Type window will be displayed.
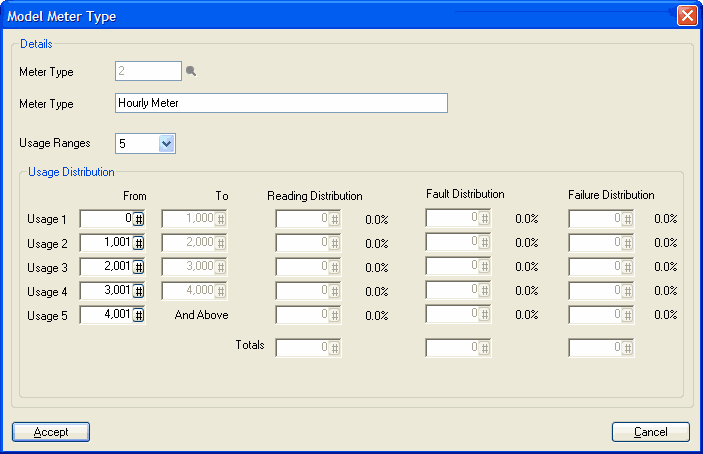
Enter or select a Meter Type.
Change the Meter Type Description if required.
Select the number of Usage Ranges, e.g., 5.
In the example above, Meter Type 2 is an Hourly Meter; Range 1 is 0 - 1,000 hours; Range 2 is 1,001 - 2,000 hours, and so on.
Click the Accessories tab.
Accessories tab
Use the Accessories tab to add Model Accessories (power cords, cables, disks, etc.) and/or Model Inventory Parts.
Model Accessories will enable all items associated with the Model / Customer Equipment to be accounted for. Accessories are set up in Class Type Setup.
Model Inventory Parts are used in Document Entry. When an Item is selected, click the Model ![]() icon to show only Inventory Parts for that Model.
icon to show only Inventory Parts for that Model.
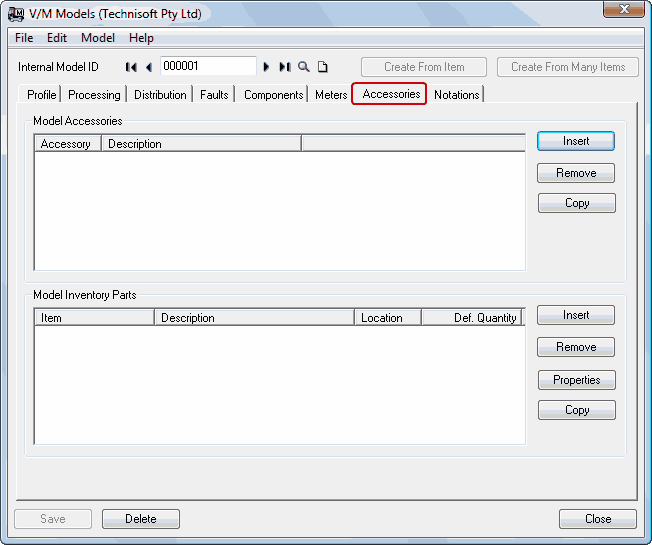
Inserting Model Accessories
Click [Insert] to the right of the Model Accessories section to insert a Model Accessory.
Select the Accessory to insert.
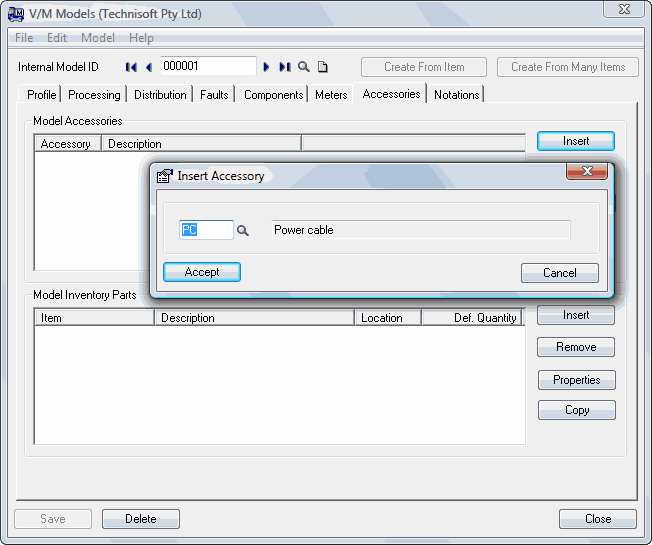
Click [Accept].
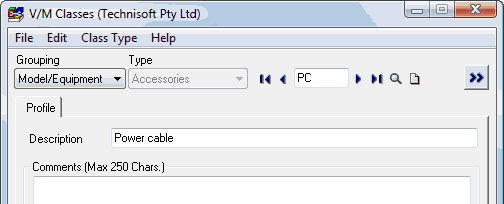
The following screenshot shows the Power cable accessory in Class Type Setup.
Inserting Model Parts
Click [Insert] to the right of the Model Inventory Parts section to insert a Model Part from Inventory.
Select the Item to insert. Select the Item Location and Default Quantity if required.
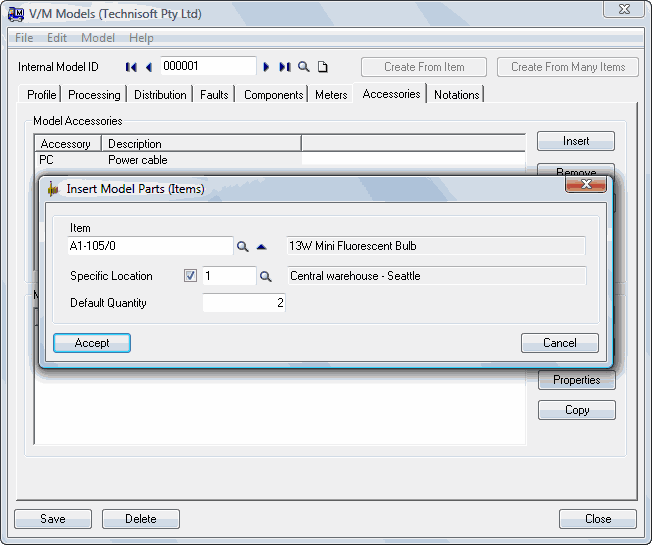
The following screenshot shows the Model Parts list in Document Entry.
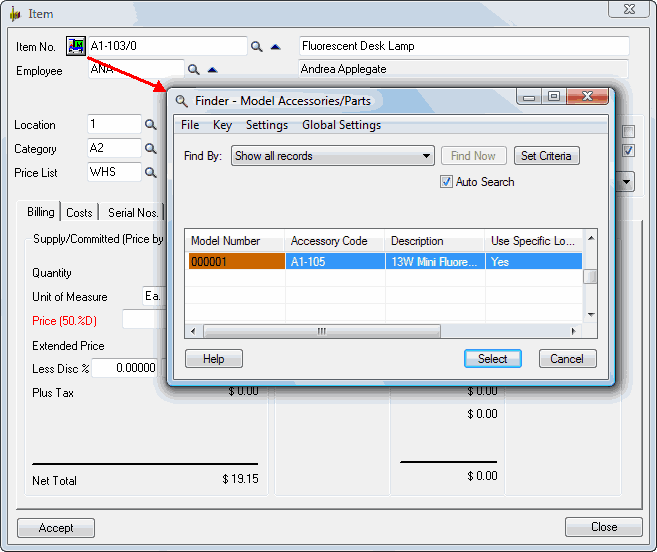
Click [Accept].
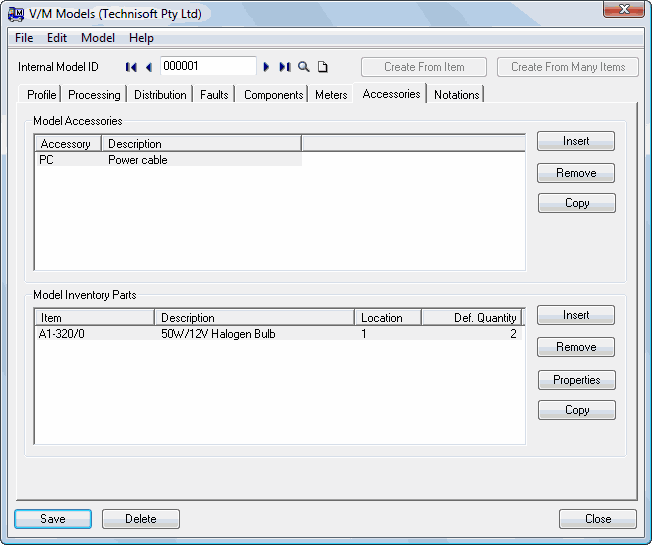
The following screenshot shows the Accessories and Inventory Parts that have been added for Model 000001.
Click the Notations tab.
Notations tab
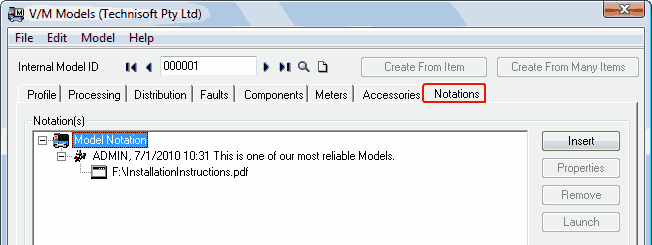
Click [Insert] to insert a Notation for this Model.
If the User Warning Level is set to Critical then the Warning will pop-up when the Model is loaded.