Searching the Database and Document Tree
Search Functions
Search functions are available if you click the Search icon when no Document is displayed in Document Entry, i.e., the Document Entry window is blank.
A global search will be performed.
•Find Site by Site Number, Primary Contact or Agreement Number
•Find Equipment by Equipment Number, Serial Number and/or Site
•Show all Equipment for the Site
•View Equipment History or Graphic
•Transfer Equipment to another Site
•Search Custom Fields
•Find Recent Documents by Zone
•Find Document by Equipment Serial Number
•Find Document by Invoice Number
•Find Document by Field Form Number
•Find Document by Equipment Lines, Service Lines or Item Lines
•Find Document by by searching the Time Entry records
•Find Document by Return Authorization (RA) Number
•Edit Documents found by search in Document Entry
•Create a Job, Sale, Quotation or Recurring Job directly from a search
There are numerous Finders![]() located on these tabs which allow comprehensive searches to be executed. Once the criteria have been matched, you can create a new Document from a Template or standard procedures.
located on these tabs which allow comprehensive searches to be executed. Once the criteria have been matched, you can create a new Document from a Template or standard procedures.
Find Transaction Functions
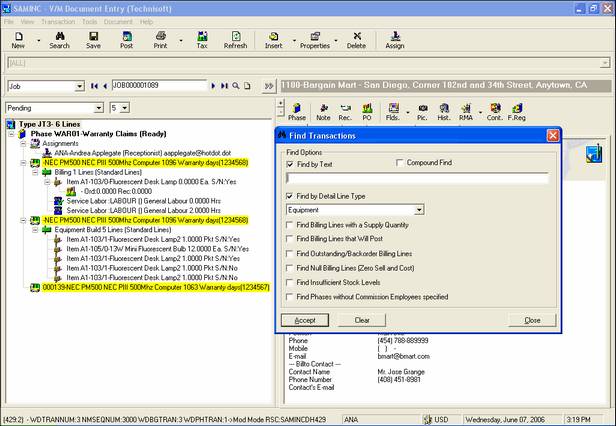
Find Transaction functions are available if you click the Search icon when a Document is displayed in Document Entry.
The search will be performed on the current Document.
•Find Billing Lines with a Supply Quantity
•Find Billing Lines that Will Post
•Find Outstanding/Backorder Billing Lines
•Find Null Billing Lines (Zero Sell and Cost)
•Find Insufficient Stock Levels
•Find Phases without Commission Employees specified
Using the Search icon in Document Entry
Open the Service Manager Document Entry Program
![]()
Click the Search icon
![]()
Note:
•If no Document is displayed in Document Entry, the Search window will be displayed.
•If a Document is displayed in Document Entry, the Find Transactions window will be displayed.
Search window
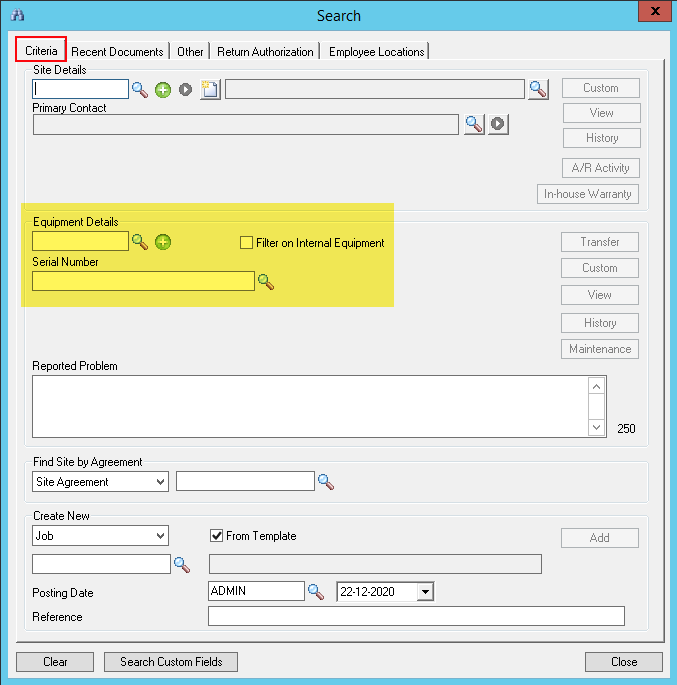
Criteria tab
You can search for Equipment by Equipment Number and/or Serial Number for all Sites or a particular Site. Type the Equipment Number in the Equipment Details field and/or the Equipment Serial Number in the Serial Number field. You can also use the Finders![]() to locate Equipment.
to locate Equipment.
Click [Search Custom Fields] to search Custom Fields.
Click [Clear] to blank out all fields on the Search window.
Press Tab to refresh the window details.
Example
Site Details section
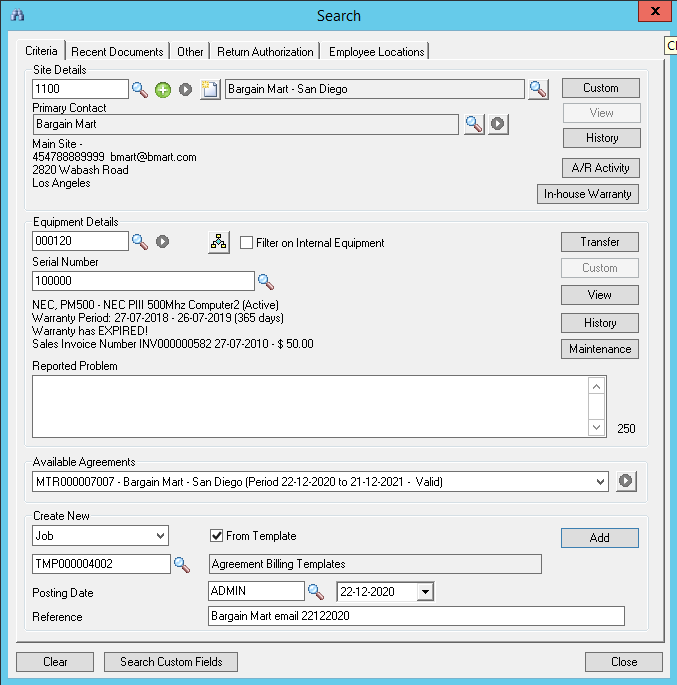
The Site Details section displays the Site description and Primary Contact details for the site.
Click [Custom] to view Custom Fields associated with the Site.
Click [View] to display a Graphic of the site Contact, if one exists.
Click [A/R Activity] to display A/R Customer Activity for the Customer.
Click [In-house Warranty] to display Jobs currently covered by In-house warranty.
Equipment Details section
The Equipment Details section provides Manufacturer, Model, Description, Warranty information, Purchase details and Equipment Record Number allocated in Service Manager.
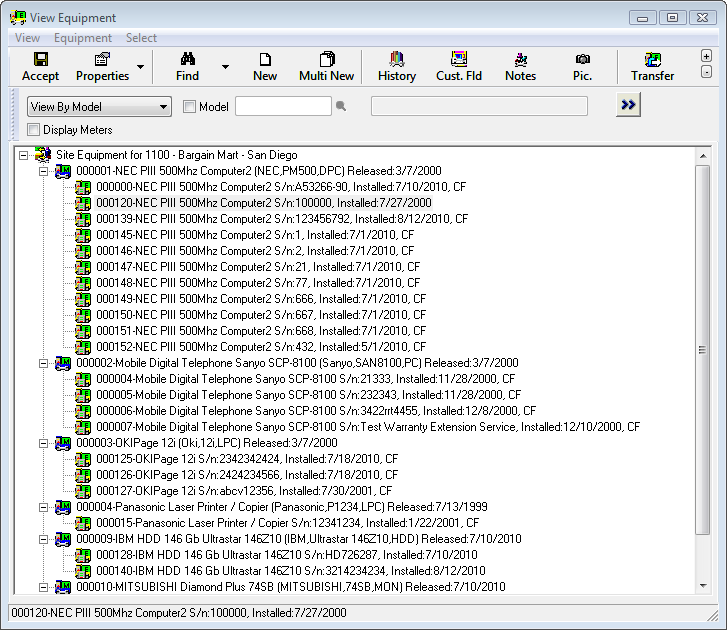
Click the View Site Equipment icon ![]() to display details of all Equipment at the Site.
to display details of all Equipment at the Site.
Click [Transfer] to transfer the Equipment to another Site. Refer Transferring Equipment.
Click [Custom] to view Custom Fields associated with the Equipment.
Click [View] to display a Graphic of the Equipment, if one exists.
Click [History] to display Equipment History.
Click [Maintenance] to display Advanced Maintenance details for the Equipment. The Advanced Maintenance Add-On Maintenance Setup window will be displayed with the Equipment highlighted and the Loading tab selected.
Note: Maintenance Details are only available for Equipment if the optional Service Manager Advanced Maintenance Add-On is installed.
Available Agreements section
The Available Agreements section displays any existing Agreement covering this Equipment and allows you to view any other Agreements that may be associated with the Equipment.
Create New section
The Create New section allows you to create a new Job, Sale, Quotation, or Recurring Job directly from this window. Tick the From Template check box if you want to create the Document from a Template, and specify the Template to use - type the Template Number or use the Finder![]() . Click [Add].
. Click [Add].
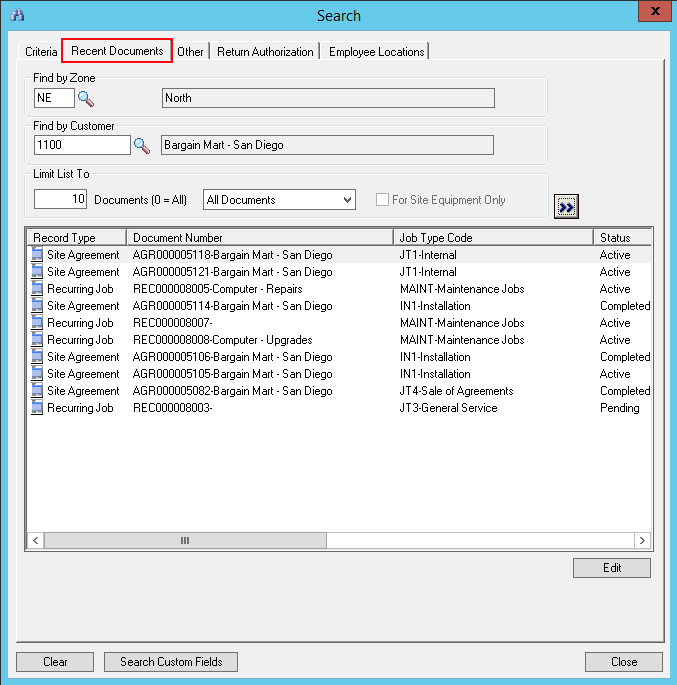
Recent Documents tab
Click the Recent Documents tab.
Type or select the Zone and enter the maximum number of Documents to list (0=All) in the Limit List To field.
Tick the Equipment Documents Only check box to find only those documents that contain Equipment.
Click Go ![]() .
.
All Documents that meet the specified criteria will be displayed in the Search Result pane.
Double-click a Document to display it in Document Entry.
Click [Search Custom Fields] to search Custom Fields.
Other tab
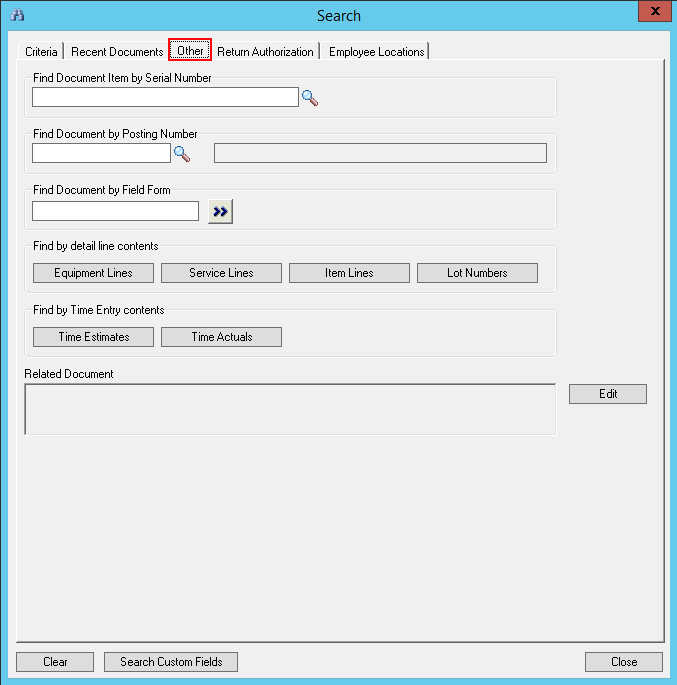
Click the Other tab.
Search will locate Documents by Equipment Serial Number, Invoice Number, Field Form Number, Equipment Line, Service Line or Item Line. Documents can also be located by searching the Time Entry records using a standard Sage 300 Finder.
The Document that matches the specified criteria will be displayed in the Related Document field.
Click [Edit] to display the Document in Document Entry.
Click [Search Custom Fields] to search Custom Fields.
Return Authorization tab
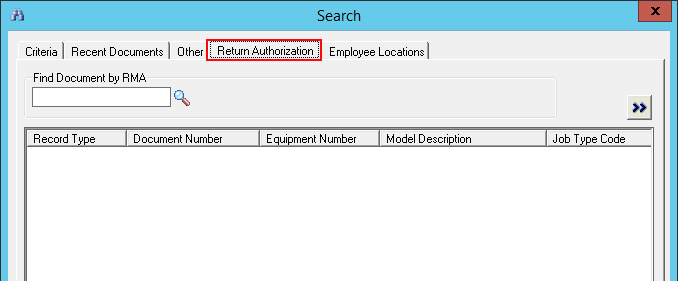
Click the Return Authorization tab.
Type or select the Return Authorization (RA) Number to search for.
All Documents that match the selected RA will be displayed in the Search Result pane.
Double-click a Document to display it in Document Entry.
Click [Search Custom Fields] to search Custom Fields.
Find Transactions window
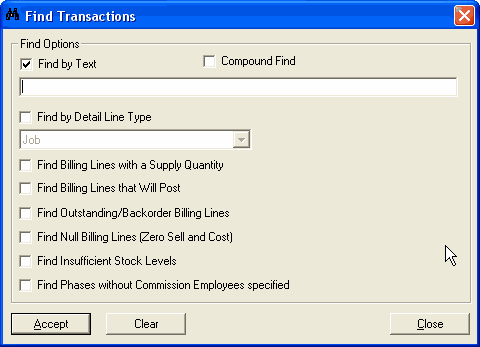
Select the required options and then click [Accept].
Lines in the Document tree that match the selected criteria will be highlighted in yellow.
It is possible to place all highlighted lines on Hold. To do this, right-click on any line in the Document tree that a Hold can apply to and then select Hold Lines » Hold Highlighted Lines.
Related Topics

