Document Billing View

Contents
The Document Billing view is used when it is a requirement to insert Service and Item lines directly to the Job or if the Job has Existing Service and Item lines that need to be updated.
The basic features of the Document Billing screen are:
•The Billing button caption changes to PH, EQ or TSK Bill according to the selected entry level to indicate to user which Node the Service and Item Billing lines are showing for.
•All Services and Items lines in all standard Billing Groups below the selected line are shown. The Billing Groups themselves are not shown in the Billing View.
The Document Billing view has the following sections:
•Recorder section showing ongoing Recordings which will Insert as a Service Line directly to the Job once stopped and saved
•Existing Billing (Item or Services) for the selected Node
•Notation list for the selected Node
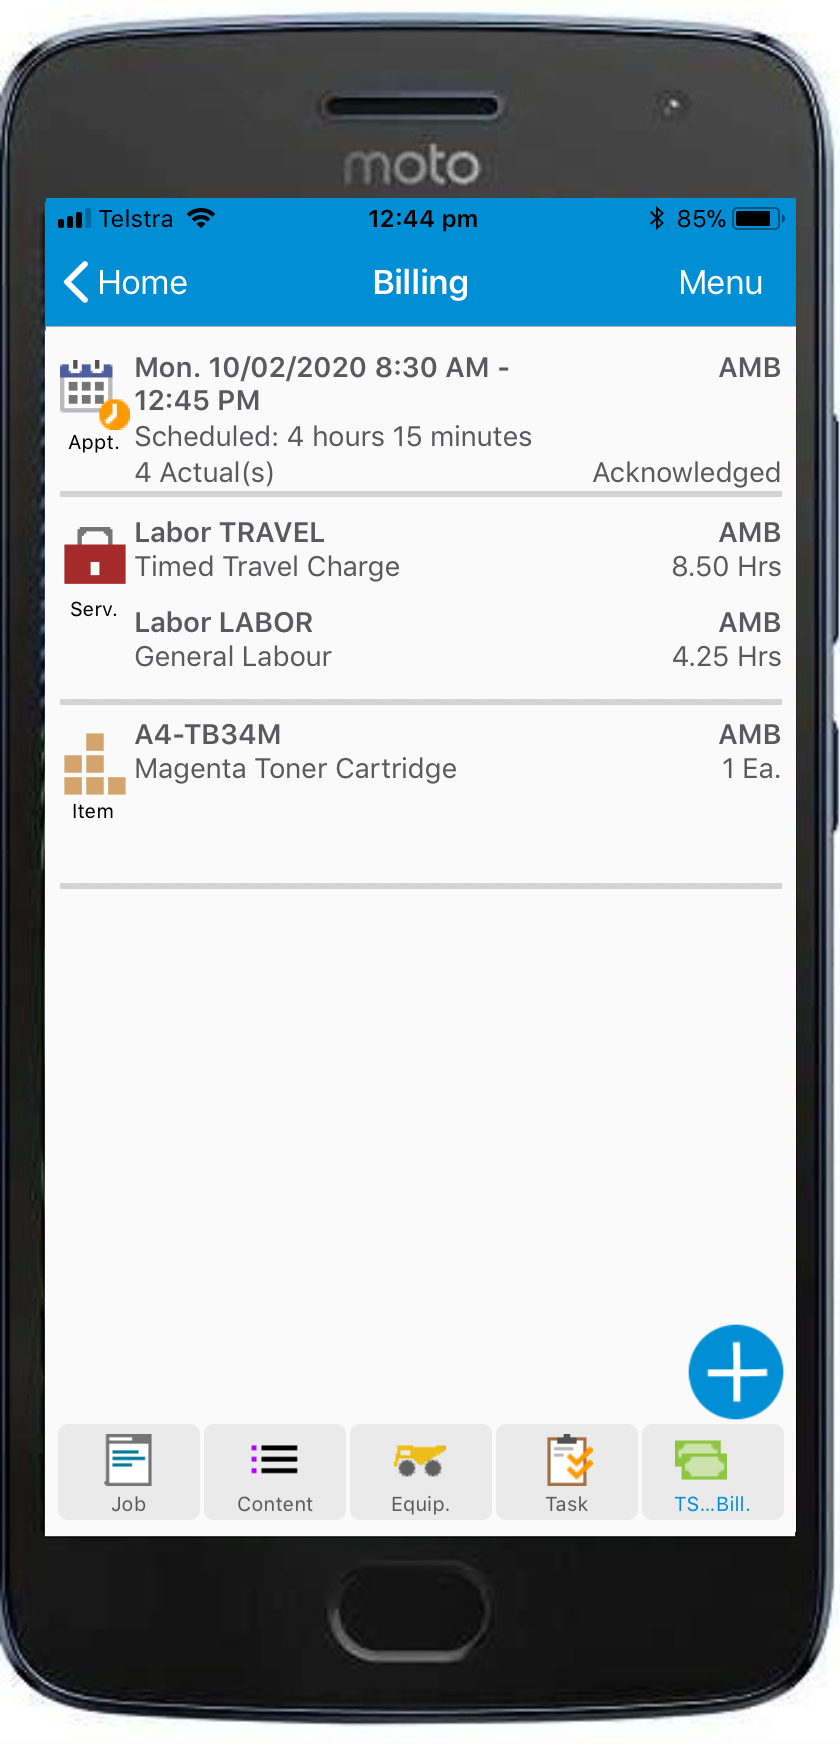
In the image below shows the Service and Item lines below the Equipment Task line as the Task Billing section was selected.
In this view the user can:
•Tap on the Recording section to Stop any current recordings
•Edit existing Items and Services Billing lines which have not yet been retrieved
•Edit existing Notations
The Billing Screen's Action menu allows the user to:
•Start a new Recording Now
•Start a new Recording for a specified time
•Add a new Notation
To simplify usage there are options available from the Configuration Utility such as Limit Billing. Limit Billing sets the lowest billing level. For example, Limit Billing can be set to Equipment so that the user can select a Task, but will see and enter Billing at the Equipment level. This configuration is typically used when there are multiple tasks below an Equipment line but Service lines are added at the Equipment level to cover work on all Tasks.
Please refer to the Configuration Utility section of the Installation and Systems Admin guide for more information on customizing the User's view.