Setting up a Service Center

Contents
 »
»  »
» 
Click the Service Centers desktop icon. The Service Centers window will be displayed.
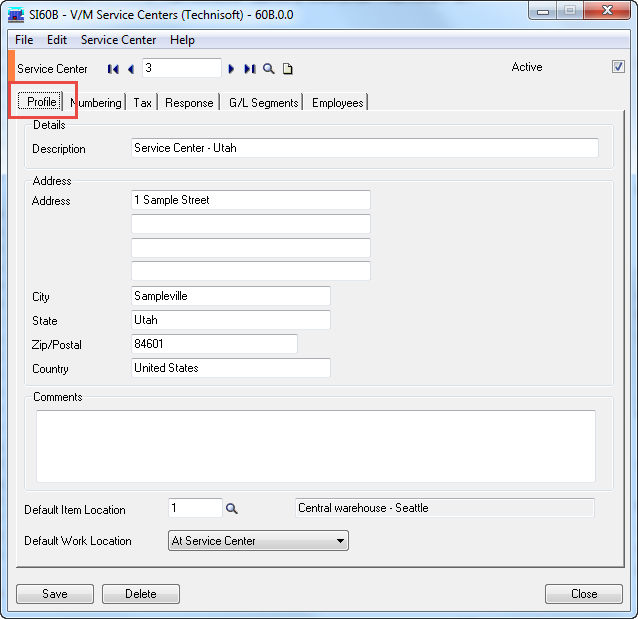
Profile tab
In the Service Center field, enter an existing Service Center Code or use the Finder![]() or navigational arrows to select the required Service Center.
or navigational arrows to select the required Service Center.
To create a new Service Center, click New ![]() and then enter the Service Center Code that you require.
and then enter the Service Center Code that you require.
Note: For the Service Center to be available in Service Manager, you must tick the Active flag.
Enter the Service Center Name, Address details and Comments.
Specify a Default Item Location for the Service Center, if applicable.
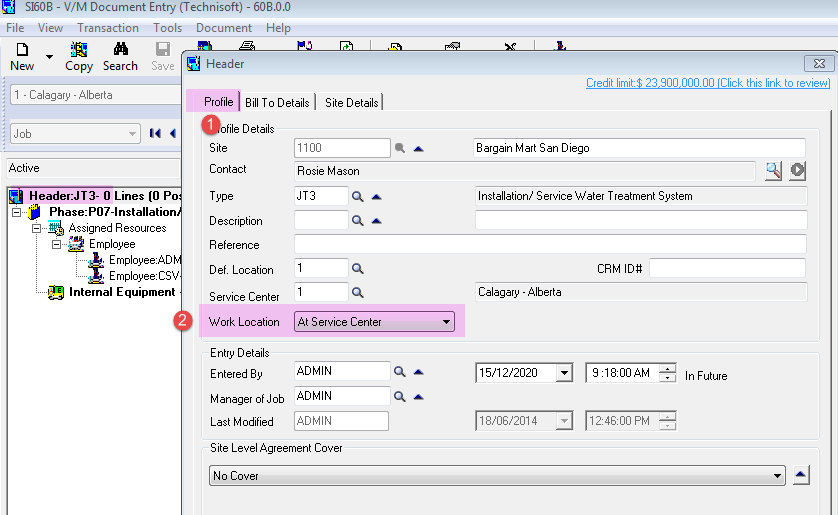
Specify a Default Work Location for the Service Center, if applicable.
•If “On Site” is selected when a job for a customer at this Service Center is created the Work Location is set to Site.
•If “At Service Center” is selected when a job for a customer at this Service Center is created the Work Location is set to the Service Center by default but can be changed in the job manually if required.
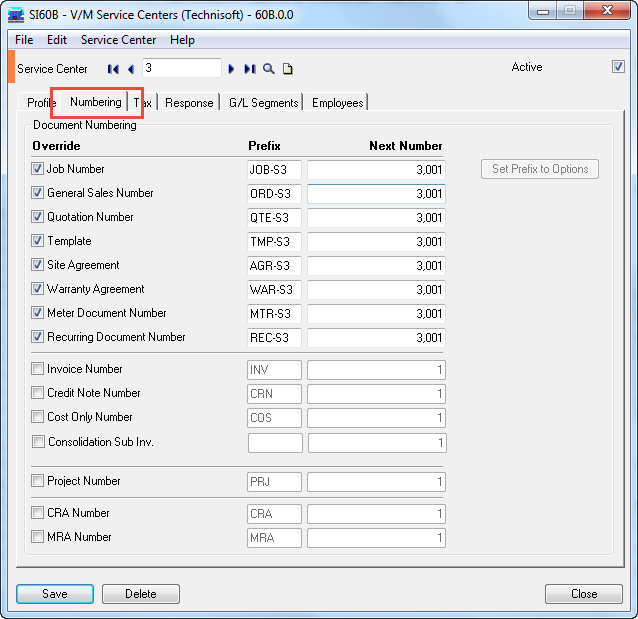
Numbering tab
Click the Numbering tab if you wish to use unique Document Numbering for this Service Center.
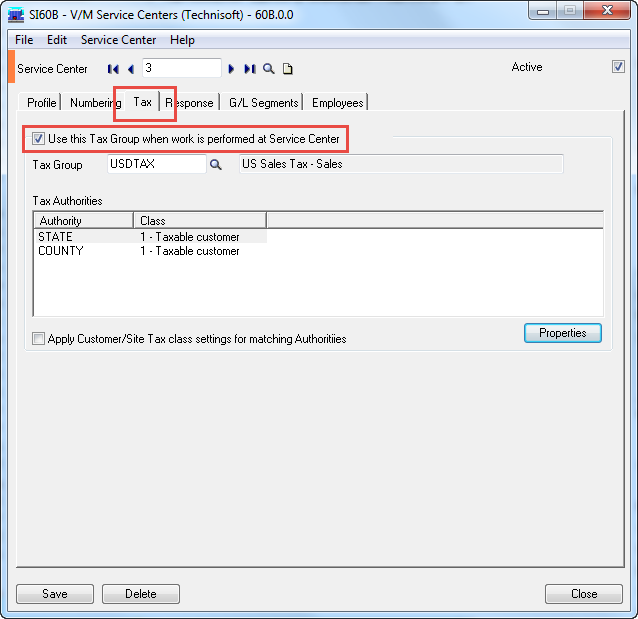
Tax Tab
Click the Tax tab to select the Tax Group to use when work is performed at the Service Center.
If this is checked on, then when the “Work Location” in the job header of a job is set to “At Service Center”, the customers Tax Group on the Bill to tab in the Header of the job, will be overridden with the Tax Group and Tax Authorities specified in the Service Center override.
This feature is particularly useful where equipment may be returned to a Service Center that is located in a different tax jurisdiction.
This may also be relevant in the case of a warranty repair where the work is performed in a totally different tax jurisdiction.
Select “Apply Customer/Site Tax Class settings for matching Authorities” where a Tax Group is selected that has the same authorities as the customer and those authorities need to be used instead.
Example:
Select a job.
Double click the Header to open Properties of the Header.
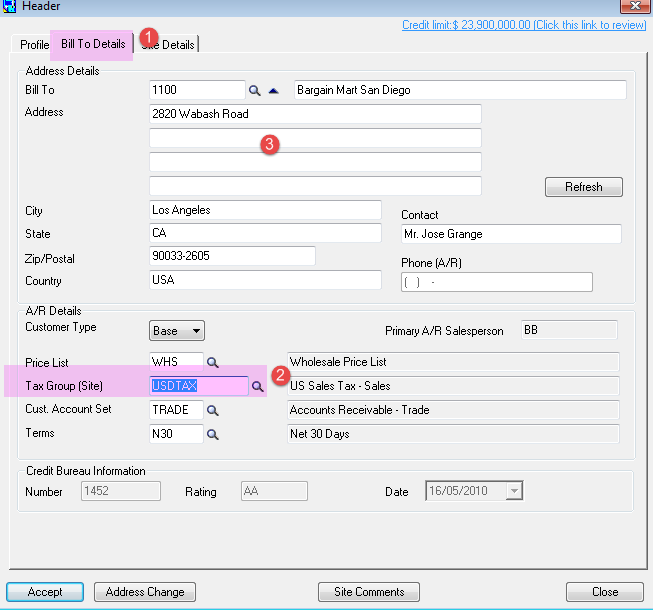
Select the “Bill To Details” tab.
Note in the job selected below the Tax Group is set “Calif” which is the Sites tax group because there is no Service Center override in this example.
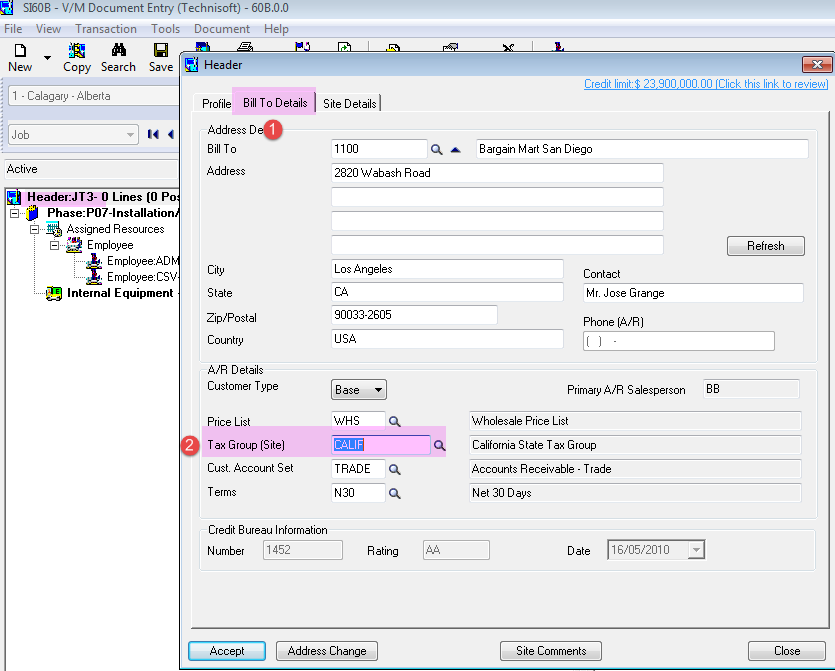
In the next example the Work Location is set to “At Service Center” and the Tax Group override has been selected in Service Center setup.
On the “Bill To Details” tab the Tax Group has now bee set to that of the Service Center instead of the customer.
(Note that tax group automatically changed only changed if there are no existing postings on the job.)
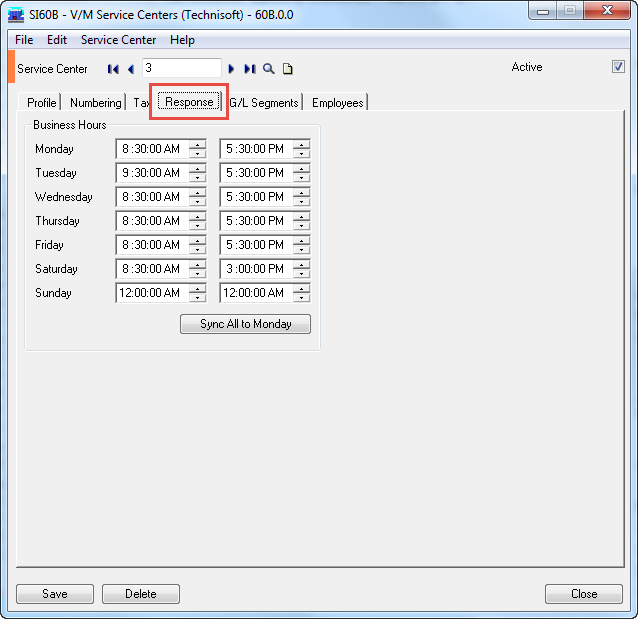
Response tab
Click the Response tab to view or change the Business Hours of the Service Center.
G/L Segments tab
Click the G/L Segments tab to override the default G/L Account Segments for this Service Center.
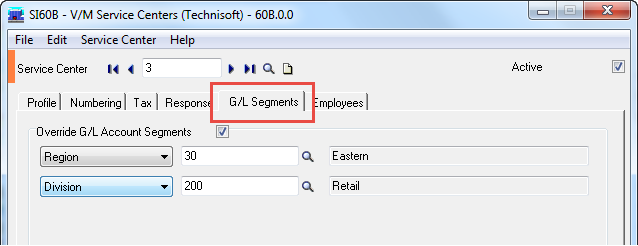
Tick the Override G/L Account Segments check box and then select Division or Region to override these G/L Segments.
Note:
•G/L Segment Overrides can be set for any of the following: Employee, Phase, Job Type, Service Center (if the Service Manager Service Center Add-On is installed). If you are using User Specified G/L Accounts in Service Setup, all G/L Segment Overrides will be ignored when Day End is processed.
•If you add a Service to a Job using a Service Center that has a G/L Segment Override and then turn off G/L Account Segment tracking for that Service Center before running the Day End process, the resultant G/L entries will not have G/L Segment Overrides, as Segment Overrides are processed during the Day End process.
•Refer to the Day End Processing of G/L Segment Overrides section in the Service Manager User Guide for information about how Day End processes G/L Segment Overrides and what happens if a G/L segment account does not exist.
Employees tab
Click the Employees tab to list all Employees assigned to this Service Center. As no Employees have been assigned to this Service Center yet, none are listed.

Click [Add] or [Save] to save the new Service Center details. This procedure will activate the Service Center and make it ready for use.
Click [Close] to exit the setup procedure.