Employees

Contents
 »
»  »
» 
Overview
The Employee setup program allows you to maintain the Employees you wish to utilize and assign to Jobs and Sales Orders in Service Manager.
These include Employees who enter documents and earn Sales Commission.
Personal and processing options relating to Employees, such as Defaults, Loadings, Commission details and Skills can also be defined in this program.
New in Service Manager 5.6A: Subcontractors, Internal Equipment and Employees are now all considered to be Resources which may be assigned to a Job and scheduled with time entries. (Prior to Service Manager 5.6A, only Employees were considered to be Resources.)
Estimated Time
Setup time depends on how many Employees need to be set up. Typically allow five to ten minutes per Employee assuming all information is available.
Import/Export functions available from the File menu can speed up this process dramatically.
Profile tab
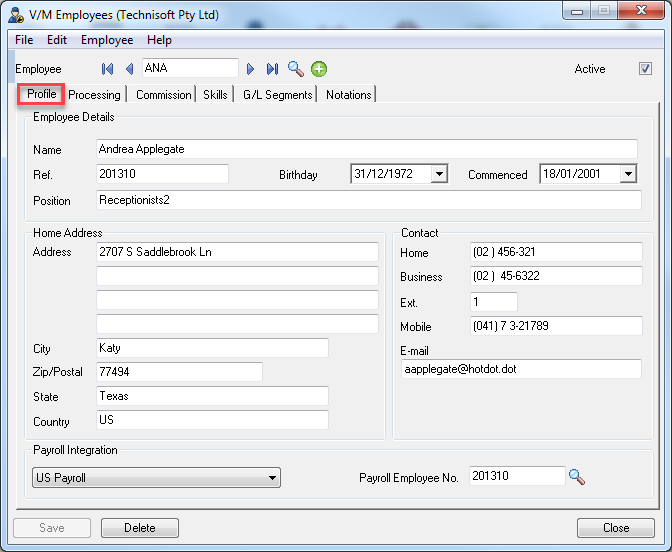
1.Enter an Employee Code.
2.Enter the Employee Name.
3.Click the Profile tab.
4.Tick Active if you wish to assign the Employee to Jobs.
5.Enter data in the fields.
6.Make sure you enter an email address if you wish to send email messages to the Employee.
7.Ensure Payroll Integration is selected if you wish for the Employee's Time Actuals from Service Manager to be transferred to US or Canadian Payroll
8.Click the Processing tab.
Processing tab
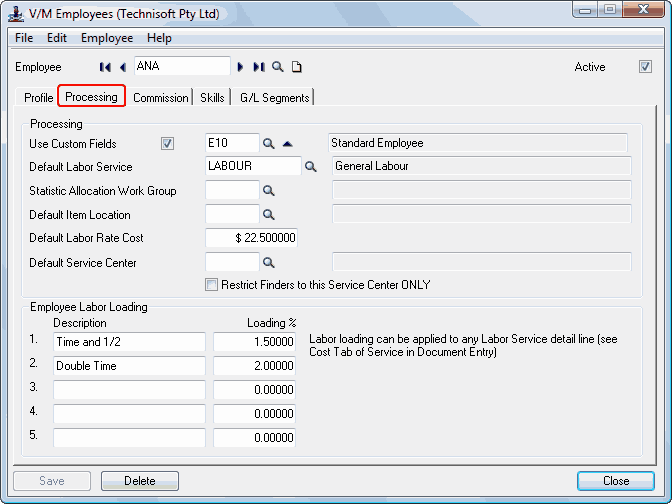
1.Tick Use Custom Fields.
2.Select a Custom Field Template.
3.Tick the Custom Fields check box and then choose a Custom Field template to use for this Employee. Click the drill-to arrow ![]() to display details of the currently selected Custom Field.
to display details of the currently selected Custom Field.
4.Leave the Default Labor Service for now and complete when Services have been set up.
5.Assign this Employee to a Work Group for statistical purposes.
6.Specify the default Item Location for this Employee. This Location is used when this Employee is selected when adding an Item.
7.Specify the default Labor Rate Cost for this Employee. This field is securitized and will not be visible if the user does not have Show Costs security level.
8.Specify the default Service Center for this Employee. You can optionally restrict Finders to this Service Center only. The Service Center fields will only be displayed if the Service Manager Service Center Add-On is installed.
9.Enter loadings, e.g., tool loadings, if applicable. Do not use these fields for Leave loadings.
10.Click the Commission tab.
Commission tab
Note:
The Commission tab will only be displayed if Company Options » Processing tab » Commissions section » Calculation Method is set to Always or On Min NPAC%.
Refer to the Employee Commissions section in the Service Manager User Guide for additional information about the commission tracking process in Service Manager.
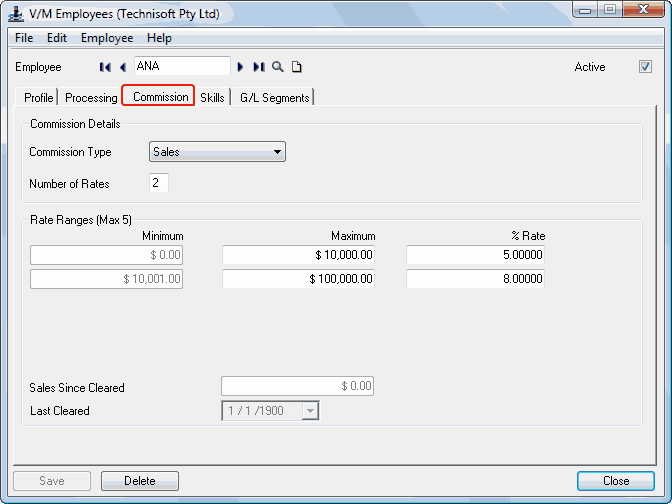
1.Choose the Commission Type
![]()
None - Do not track commission for this Employee.
Sales - Track commission for this Employee based on Sales.
Margins - Track commission for this Employee based on Margins, where Margin = Sales - Costs.
2.Enter the Number of Commission Rate Ranges required.
3.Enter the Commission Rate Ranges: Minimum, Maximum and % Rate that will apply for the range. The Rate Range used to calculate commission at employee level is based on the Sales/Margins Since Cleared value. In the example above, if Sales Since Cleared is in the range of $0 - $10,000, then commission will be calculated at 5%; if Sales Since Cleared is in the range of $10,001 - $100,000, then commission will be calculated at 8%.
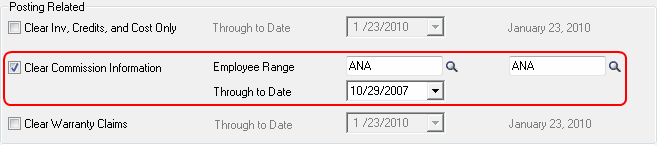
4.Sales/Margins are accumulated in the Sales/Margins Since Cleared field. Last Cleared shows the date that the Commission was last cleared for the employee. Commission information is cleared using the Clear History program. Refer to the Clear History section in the Service Manager User Guide for additional information.
5.Click the Skills tab.
Skills tab
Note:
If you do not use Skills, ignore this section.
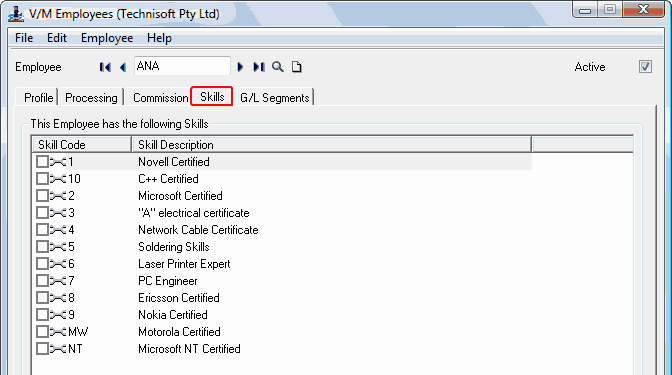
1.Tick the Skill Code of the skill that relates to the Employee.
The Skills Property window will open.
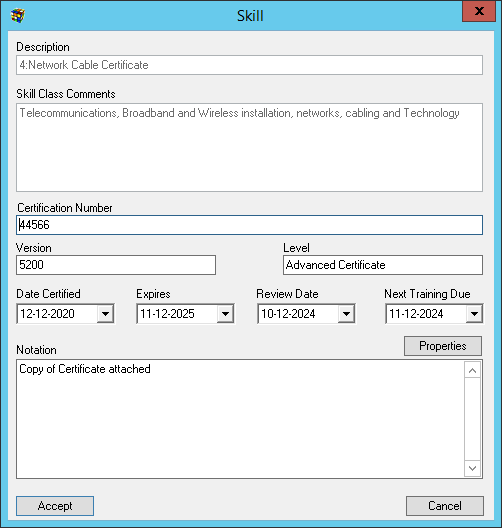
2.In the Skills properties window enter details of the skill including:
oCertification Number
oVersion
oLevel
oDate Certified
oExpires
oReview Date
oNext Training Due
oNotations
3.An Employee can have unlimited Skills. Skills are set up in Class Type Setup.
4.Click Accept
5.Click the G/L Segments tab.
G/L Segments tab
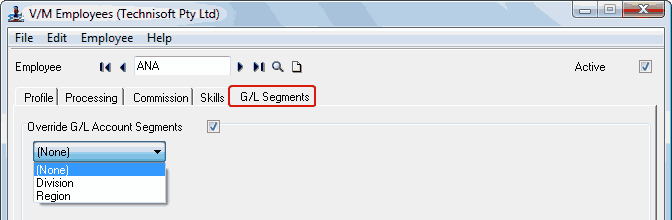
1.Tick the Override G/L Account Segments check box and then select Division or Region to override these G/L Segments.
Note:
•If you add a Service to a Job using an Employee that has a G/L Segment Override and then turn off G/L Account Segment tracking for that Employee before running the Day End process, the resultant G/L entries will not have G/L Segment Overrides, as Segment Overrides are processed during the Day End process.
•Refer to the Day End Processing of G/L Segment Overrides section in the Service Manager User Guide for information about how Day End processes G/L Segment Overrides and what happens if a G/L segment account does not exist.
2.Click [Save] to add the Employee record.
3.Continue to add records until all employees are created.
Key Points
Only Active Employees can be assigned to Jobs. The number of Active Employees permitted relates to the Service Manager Employee Packs purchased.
Employees can be deactivated at any time and another Employee can be reactivated. A common example might be where one Employee leaves a company and a new one commences. It is not necessary to purchase a new Employee License in this case.
We recommend that you create an Employee in Service Manager for each Sage 300 User that will be using the Service Manager program. Users do not have to be Active to simply enter details and/or post documents or to earn Commission as a Sales person.
Service Manager Day End process looks three days in advance and will wish a user "Happy Birthday" when they log on based on his or her birth date set in the Employee's record.