Creating a Meter Agreement

Contents
 »
»  »
» ![]() » Meter Agreement
» Meter Agreement
Steps
1.Select the Bill To Customer
2.Set up the Agreement Header
3.Set up the Agreement Details
4.Select Cover Levels - cover all or selected Equipment at the Site
5.Setup a Recurring Billing Schedule if required
6.The Agreement will be displayed in Document Entry
In Document Entry:
1.Insert the Equipment Meters
2.For each Meter, add a Billing Group and a Service Line
3.In each Service Line, set up the criteria for billing in relation to the meter readings
4.As meter readings are processed, Post / Invoice the Agreement Charges
Select Customer
![]()
Enter the Customer Number and then click Go ![]() .
.
If no Agreements exist for the selected customer, the Insert New Agreement window will be displayed.
If a customer has existing Agreements, click the New Agreement icon on the toolbar.
![]()
The Insert New Agreement window will be displayed.
Set up Agreement Header
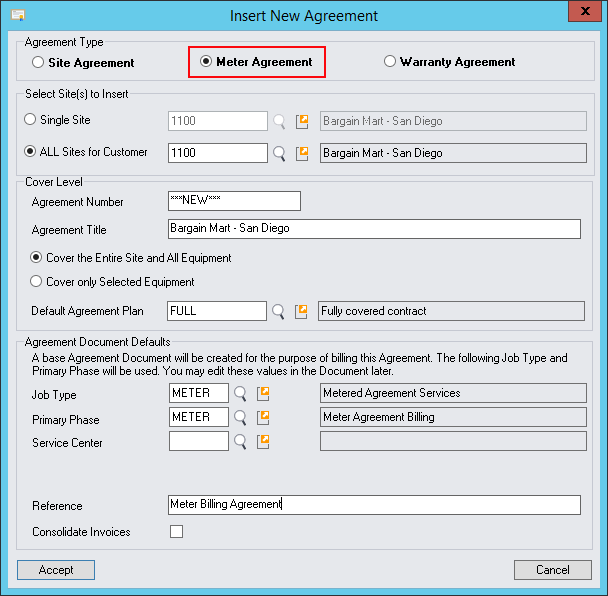
Select Agreement Type: Meter Agreement.
Select the Site(s) to be covered by the Agreement. You can specify a Single Site or ALL Sites for Customer. If you specify a Single Site, then additional sites can be added later.
The Agreement Number will default to the next available Meter Agreement Number when the Agreement is saved. If this is not what you require, enter an Agreement Number.
The Agreement Title defaults to the Customer Name. Change the Agreement Title if required.
All or specific Equipment can be covered at the Site. Select Cover the Entire Site and All Equipment to cover all Equipment at the Site. Select Cover only Selected Equipment to cover specific Equipment at the Site.
Enter or select the Default Agreement Plan for the Agreement. Agreement Plans are set up in V/M Setup » V/M General » Agreement Plans.
Enter or select the default Job Type and Phase to be used in the Agreement Document.
Click [Accept]. The Agreement Setup wizard will be displayed. Step 1 will be highlighted.
Step 1: Set up Agreement Details
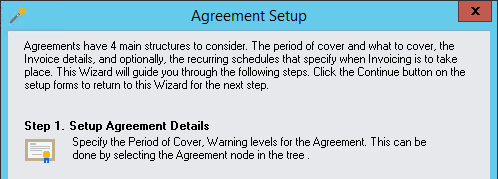
Click [Continue].
The Agreement Setup window will be displayed. The Agreement details are shown in the right-hand pane of the window.
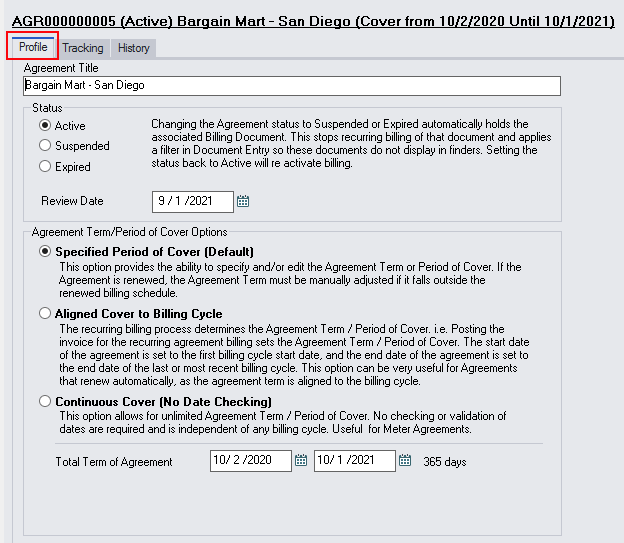
For information about the fields on the Profile, Tracking and History tabs, refer Creating a Site Agreement - Step 1.
Click [Continue] to return to the Agreement Setup wizard. Step 2 will be highlighted.
Step 2: Select Cover Levels

Click [Continue].
In this step you will specify the Equipment to cover by the Agreement.
Cover all Equipment at the Site
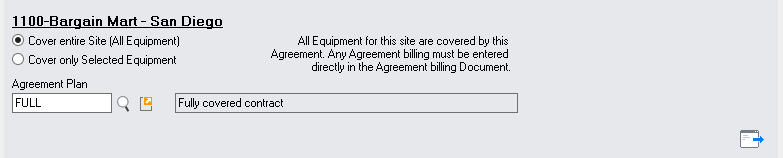
Select Cover entire Site (All Equipment) to cover all Equipment at the Site.
Change the default Agreement Plan if required.
Tick the Only Show Equipment with Meters check box to only show Equipment with Meters. Clear the Only Show Equipment with Meters check box to show all Equipment.
Click Go ![]() to list all the Equipment at the Site. All Active Equipment will be listed. To also list Inactive Equipment, i.e., show all Equipment, tick the Include Inactive Equipment check box. Inactive Equipment will be shown in red.
to list all the Equipment at the Site. All Active Equipment will be listed. To also list Inactive Equipment, i.e., show all Equipment, tick the Include Inactive Equipment check box. Inactive Equipment will be shown in red.
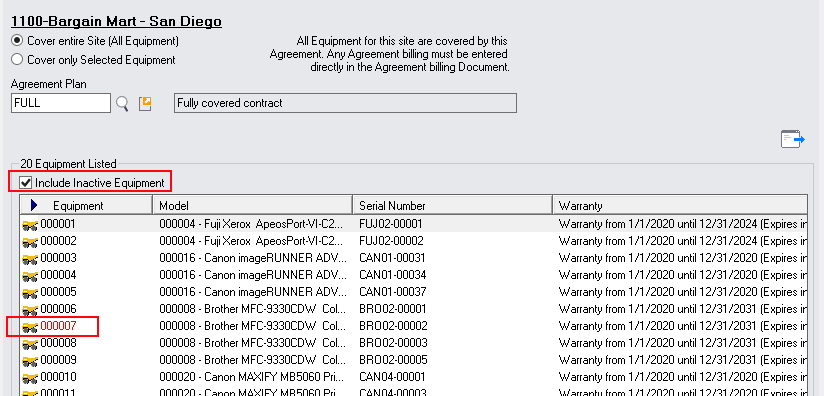
Double-click an Equipment line to view the Equipment properties.
You will need to create a Billing Group and Service line manually in Document Entry to bill this Agreement.
Click [Continue] to return to the Agreement Setup wizard. Step 4 will be highlighted.
Cover Selected Equipment

Select Cover only Selected Equipment to cover selected Equipment at the Site.
Change the default Agreement Plan if required.
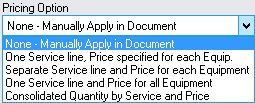
Select a Pricing Option from the dropdown if required
Click Go ![]() to list all the Equipment at the Site.
to list all the Equipment at the Site.
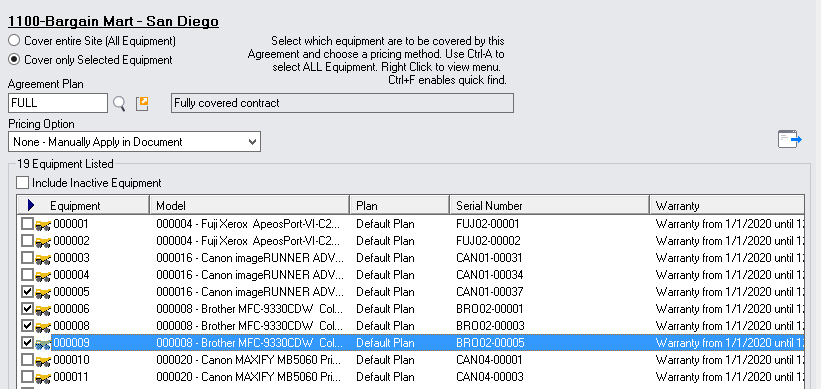
Tick each Equipment item to be covered by the Agreement. If the Equipment is to be covered by a plan different to the default plan for the Agreement, double-click the Equipment item, tick the Specific Agreement Plan check box and enter or select the Specific Plan.

Click [Accept].
Note:
•You can set the Specific Plan for multiple pieces of Equipment. To do this, tick and select the Equipment to modify, right-click on the selected Equipment and select Edit All Selected Equipment.
•You will need to create a Billing Group and Service line manually in Document Entry to bill this Agreement.
Click [Accept] to save changes to the Equipment covered.
Click [Continue] to return to the Agreement Setup wizard. Step 4 will be highlighted.
Covering Equipment at Multiple Sites
To cover Equipment at an additional site, click the Add Sites icon on the toolbar.
![]()
The Insert Customer/Site window will be displayed.
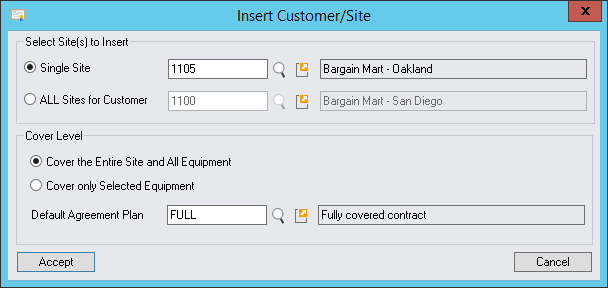
Select the Site (or ALL Sites for Customer), Cover Level and Default Agreement Plan. Click [Accept]. Select the Equipment to cover, if applicable.
An Agreement that covers Equipment at two Sites is shown below.

Step 3: Set up Recurring Invoice Schedules

Select Manually Post Invoices using Document Entry or Post Invoices using a Recurring billing Schedule.
Click [Continue].
Manually Post Invoices using Document Entry
Select Manually Post Invoices using Document Entry to post the Agreement invoices manually using Document Entry.
Click [Continue]. The Agreement Setup wizard will remain displayed. Step 4 will be highlighted.
Post Invoices using a Recurring billing Schedule
Refer Recurring Postings for information about setting up recurring billing schedules. Auto renewing billing is covered in the Auto Renewing Recurring Billing or Recurring Jobs section.
Close the Insert Schedule window and Posting Schedules window (if open) to return to the Agreement Setup wizard. Step 4 will be highlighted.
Step 4: Set up the Agreement Document for Invoicing
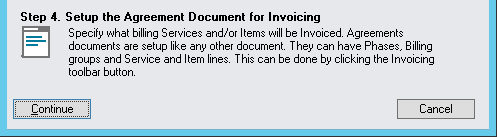
Click [Continue].
Publish Agreement Document
Publishing the Agreement will allow the Meters at the site to be selected and then automatically create the Billing Group and Service line(s) in Document Entry to bill the Agreement.
Select Accept and a warning message showing the number of successfully published meters for the Billing Document will be displayed
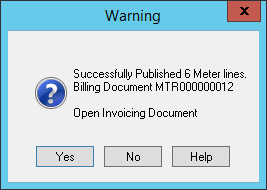
Select Yes to open the Invoicing Document in Document Entry.

Now the Meter Agreement has been set up with the selected Equipment Meters. Additional Meters can be inserted and associated Billing Group and one or more Service lines can be added to the Meter Billing Document.
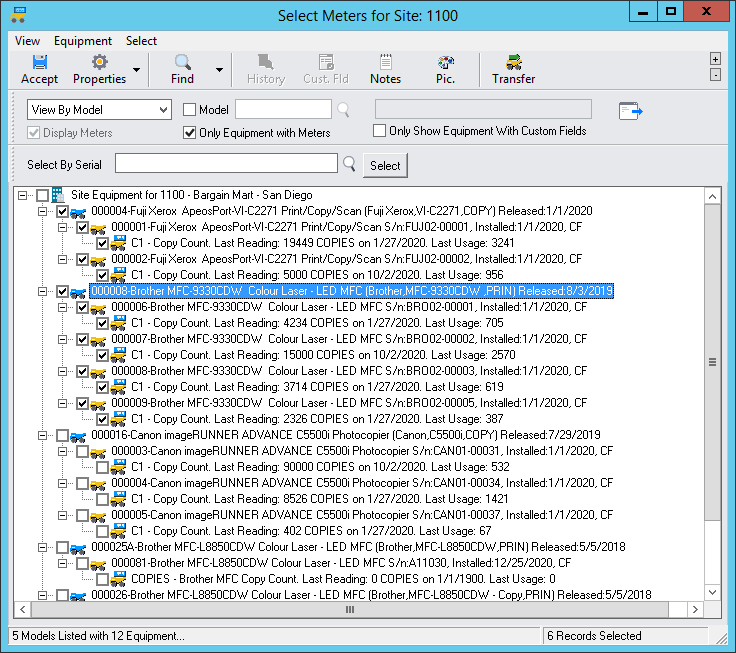
Inserting the Equipment Meter with Associated Billing Group and Service Line
Equipment Meter
Highlight the Phase and then click the Insert Meter ![]() fast icon.
fast icon.
The Meter window will be displayed.
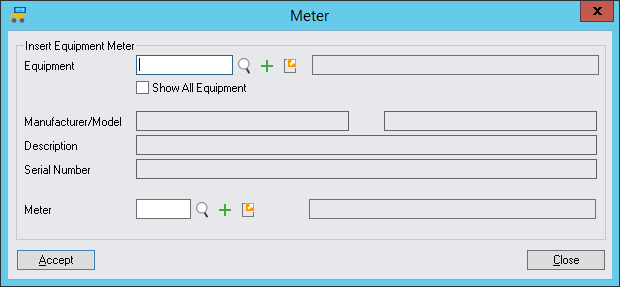
Type or select the Equipment to monitor. Use the Finder![]() to display all Equipment at the Site. The Manufacturer/Model, Description and Serial Number will be displayed as information only.
to display all Equipment at the Site. The Manufacturer/Model, Description and Serial Number will be displayed as information only.
Type or select the Meter Number, set up in V/M Setup » V/M Equipment » Meters. (A piece of Equipment can have multiple Meters.)
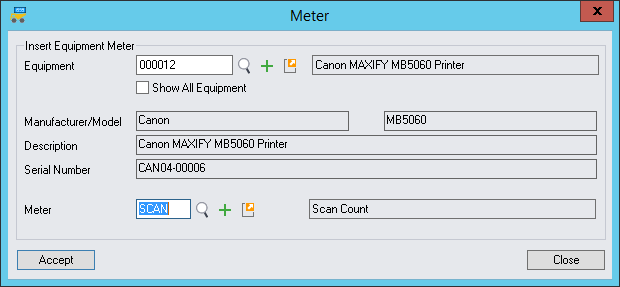
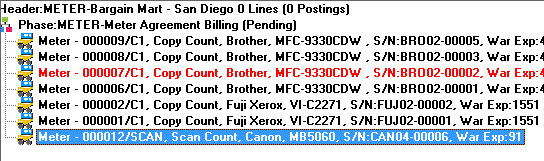
Click [Accept] to create the new Meter. The Meter will be displayed in the Document tree.
Billing Group
We now need to insert a Billing Group into our Agreement for this piece of Equipment.
![]()
This will now create a Standard Billing Group branching from the metered Equipment.
Service Line
You can now insert any Services and Items that will be required to bill the customer.
![]()
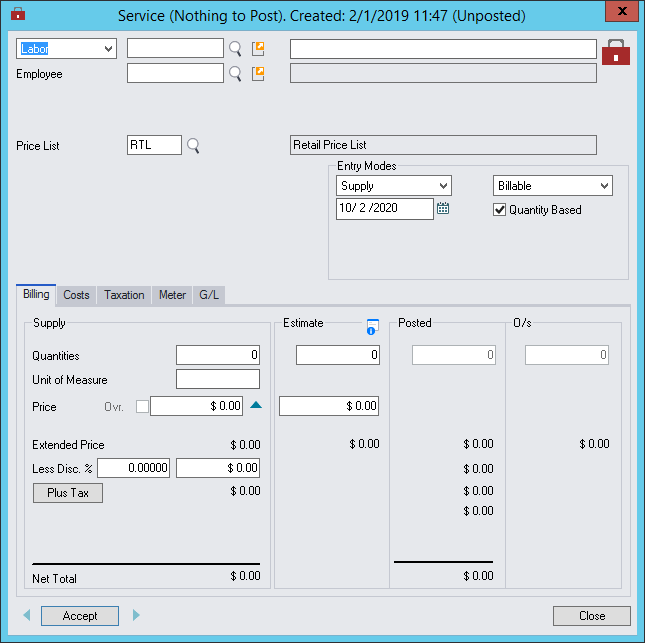
The Service window will be displayed.
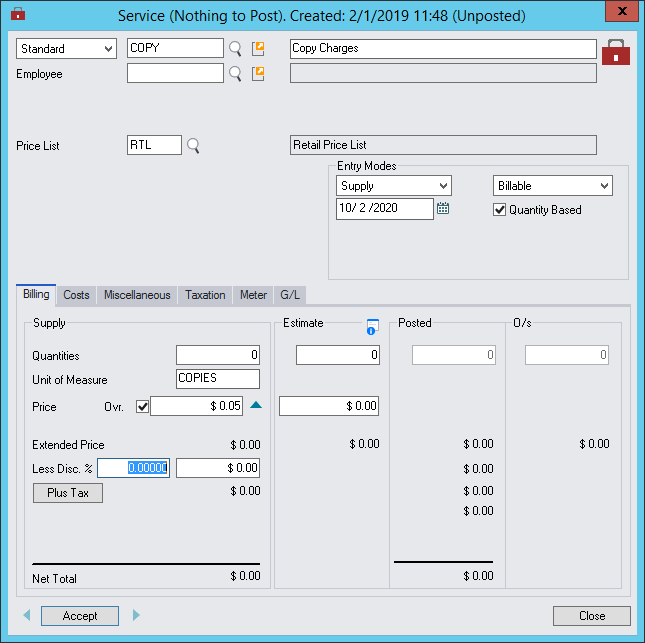
Select Service Type: Standard.
Type or select Service Code: COPY.
In this example, we have selected Copy Charges and have set our Cost Price of this Service at $0.02 and our Selling Price at $0.05.
Note: To adjust or override the Cost Price, you must tick the User Specified Cost check box for the respective Service Type. This is an option in Service Setup » Processing tab.
Click the Meter tab to view the criteria for billing in relation to the meter readings.
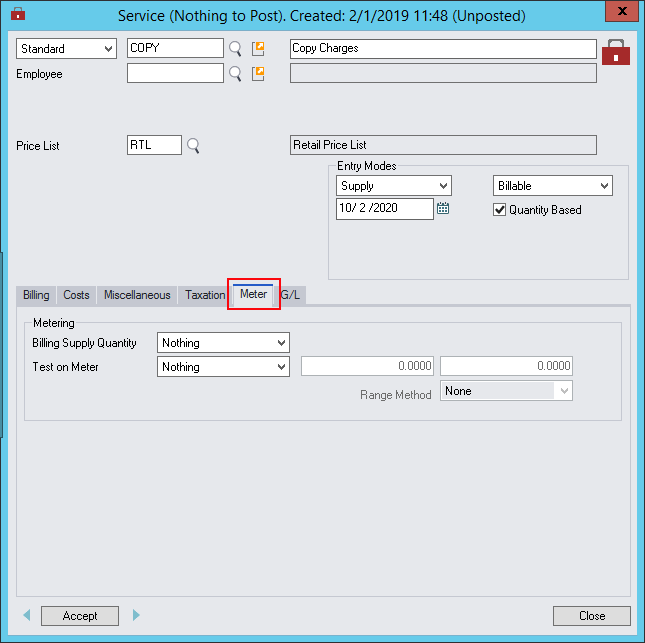
When a meter reading is entered for this Equipment, the system will calculate, distribute and incorporate the resulting data throughout the agreement and through to the final invoice stages.
Note: There are two very important data entry sections within this tab, (Metering and Range Setup) and we recommend you develop a good understanding between the relationships of these items and how they will affect the invoicing.
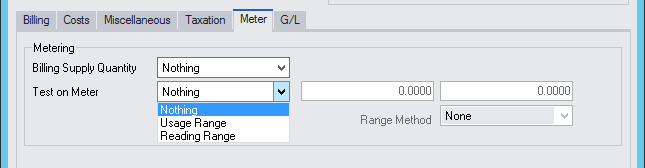
Metering
Billing Supply Quantity |
The Billing Supply Quantity selection will determine the value transferred to the Supply Quantity in the Billing tab.
Nothing – The system defaults to this setting. No value will be transferred to the Supply Quantity. Usage – The meter reading needs to be entered into the system. This number can be entered manually into the meter reading field of the Equipment or via the Meter Processing program. Units could be in hr, km, gal, watts, etc. The system will take the meter reading and check its history to see if there has been any previous entry. If there is no history or previous entry, the meter reading will be the Usage figure. If there has been a previous meter reading entry, it will subtract the last reading from this reading, resulting in a net Usage figure. Reading – The actual meter reading. Supply 1 – A simple flag that will enter a quantity of one (1) into the Billing Supply Quantity providing the criteria has been satisfied. Minimum Value – Each metered equipment record contains a "Minimum Value" field. This is used to satisfy certain criteria and whether action should be taken or not dependent on the value specified. For instance – If the meter reading is below the minimum level, ignore the reading – no action will be taken. Value Under Minimum – A criterion can be set to evaluate whether action should be taken or not depending on the value specified. Transfer this value into the Billing Quantity only if it is below the specified minimum value otherwise ignore the reading value. Value Over Minimum – another true or false criterion. Example – If the value is over (and only over) the minimum, transfer this value into the "Billing Quantity" otherwise ignore the reading value. |
|||||||||||||||||
Test on Meter |
The Test on Meter menu options will determine if billing will be based on usage or the current reading.
Nothing – No Range test. Usage Range – The term Usage is used to describe the differential between the current reading and last reading. This is the usage figure. This usage figure will be a proportion of the total reading. Usage can vary from day to day or month to month. Reading Range – This is the current reading. This figure or value is the total. This is used for instance in a life cycle situation. Verification against this value for instance will only occur once as each reading is an increment on the last. |
|||||||||||||||||
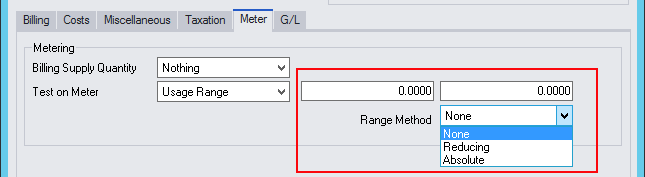
Range Fields |
The Range Setup fields activate if you select Usage Range or Reading Range. Enter minimum and maximum values for the range. |
|||||||||||||||||
Range Method |
Absolute
The Absolute Range Method ignores any meter reading value outside its absolute limits. In the example above, any meter reading less than 1,001 or greater than 20,000 will be ignored. Other values are accepted and passed through for further processing in the system.
Reducing
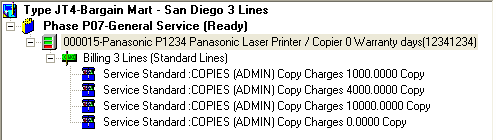
Complex, yet more powerful, is the Reducing Range Method. With this method you can charge different rates depending on the Usage. To implement the following example, you would need to insert four Service lines in the Meter Billing Group.
On the first Service line, on the Billing tab, enter a Supply Unit Price of $0.02 and on the Meter tab, a Usage Range of 1 To 1,000. On the second Service line, on the Billing tab, enter a Supply Unit Price of $0.015 and on the Meter tab, a Usage Range of 1,001 To 5,000. On the third Service line, on the Billing tab, enter a Supply Unit Price of $0.005 and on the Meter tab, a Usage Range of 5,001 To 20,000. On the fourth Service line, on the Billing tab, enter a Supply Unit Price of $0.003 and on the Meter tab, a Usage Range of 20,001 To 9,999,999.
If the Usage was 15,000 copies: •The first 1,000 copies would be charged at $0.02 per copy; •The second 4,000 copies would be charged at $0.015 per copy •The remaining 10,000 copies would be charged at $0.005 per copy.
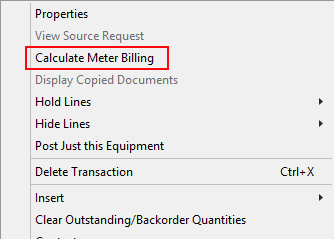
The number of copies in each case, will be transferred to the Billing tab, Supply Quantity field. Right-click on the Meter and select Calculate Meter Billing.
The Supply Quantities will be apportioned against each Service line as detailed above.
|
|||||||||||||||||


Posting and Invoicing the Agreement Charges
Select the Billing lines to post and then click the Post icon on the toolbar.
![]()
Refer Posting Invoices for information about posting and invoicing.
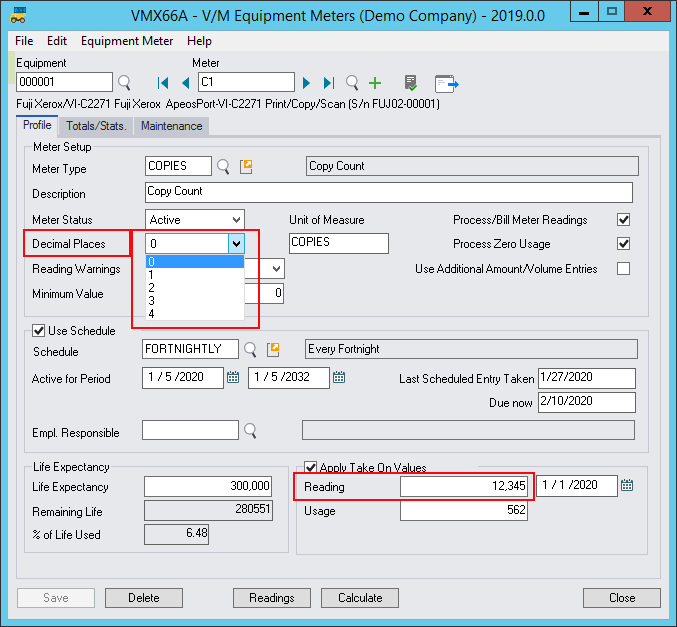
Meter Decimals
Up to four decimal places can be set for a Meter Reading. This enables meters that use time or quantities to include fractional readings.
To set up a Meter with a fractional reading quantity, open V/M Setup » V/M Equipment » Meters. Select an Equipment record that has a Meter. On the Profile tab, specify the number of decimal places to use in the Meter Reading Decimal Places field. All the Meter Reading fields will be set to the number of decimal places specified.