Job Header Functions

Contents
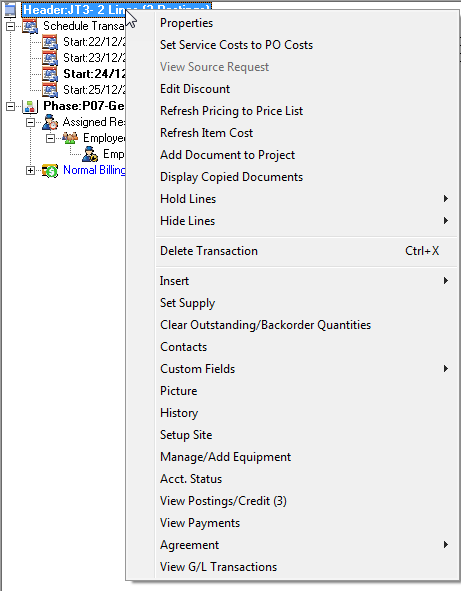
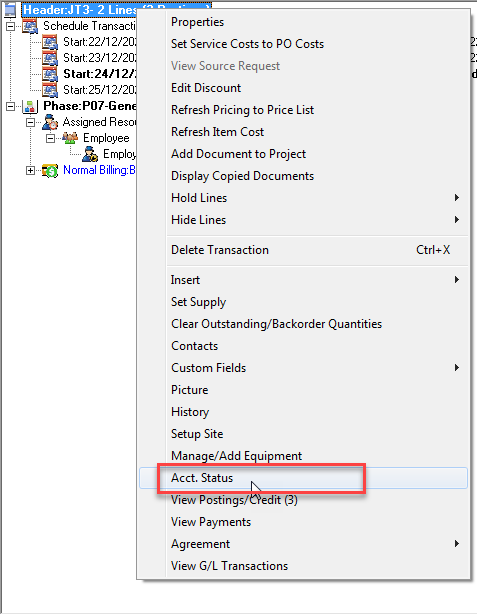
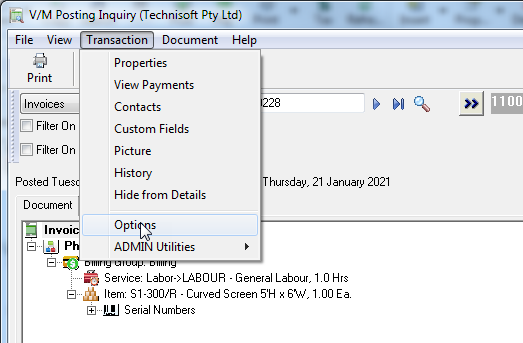
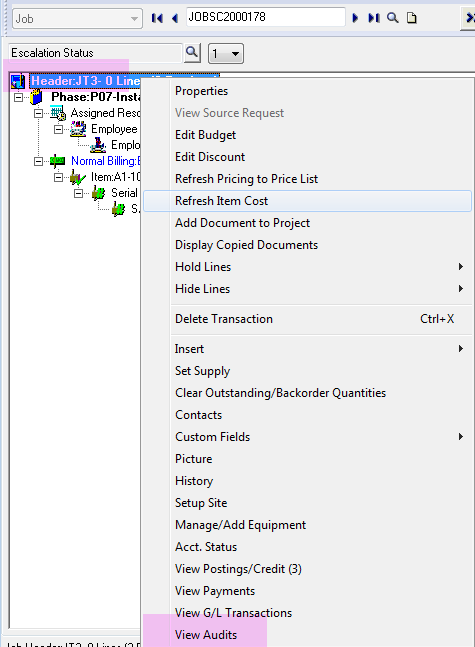
Right-click the Job Header.
![]()
A drop-down list of actions that you can perform while the Job Header node is selected will be displayed.
You can also use the toolbar icons and fast icons to perform an action when on a Job Header. It is a matter of personal preference as to which method you use.
The following Job Header functions are explained below:
Related Topics
Assigning Resources to a Job or Phase
Projects » Insert New or Existing Documents
Job Phase Functions » Edit Budget
Job Phase Functions » Hold Lines
Job Phase Functions » Hide Lines
Properties
Select Properties to display the Job Header details. You can also double-click the Job Header to display the Job Header details.
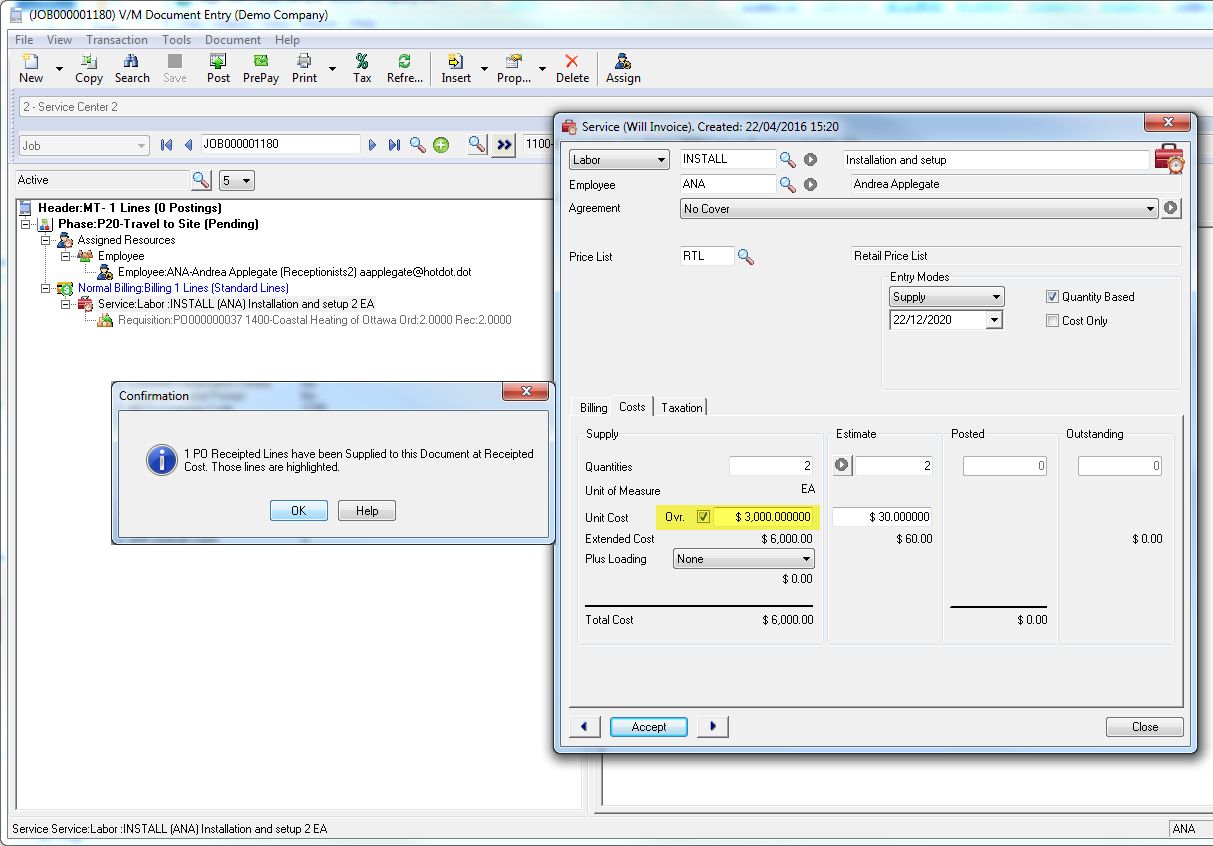
Set Service Costs to PO Costs
The Service Line Unit Cost on a Document can be set to the PO Unit Cost when the Service Line has not yet been receipted or supplied to the Document.
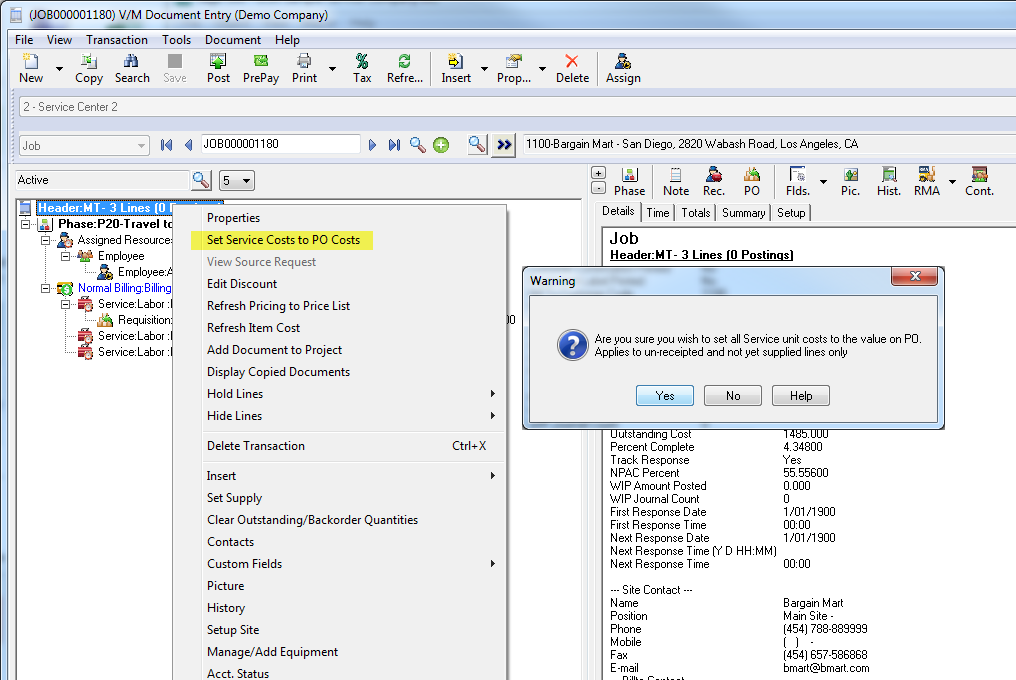
A PO Receipted Cost indicator is located on the Document and Posting Service and Item lines to specify whether the line was updated with a PO Receipted cost.
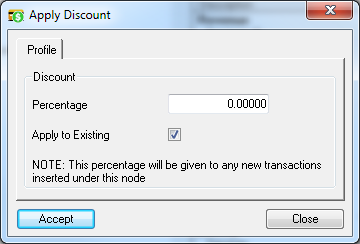
Edit Discount
Selecting Edit Discount will allow you to enter a percentage discount to be applied to the entire Job. Applying discount at the header level will apply discount for all phases within the job. Applying discount at phase level will only modify totals for that specific phase.
The Apply Discount window will be displayed.
Edit Budget
This will run the Budget Editor allowing you to manage the budget for the Job.
Hold Lines
Hold Lines will stop a Document, Phase, Billing Group, Service or Item from being posted and invoiced.
Refer Job Phase Functions » Hold Lines.
Hide Lines
Note:
Do not confuse this with Hold Lines.
Hide Lines will hide an Item or Service from the Invoice to be generated. The totals will be accumulated correctly, but the individual line will not be displayed on the invoice.
Refer Job Phase Functions » Hide Lines.
Account Status
Account Status displays accounting information from A/R.
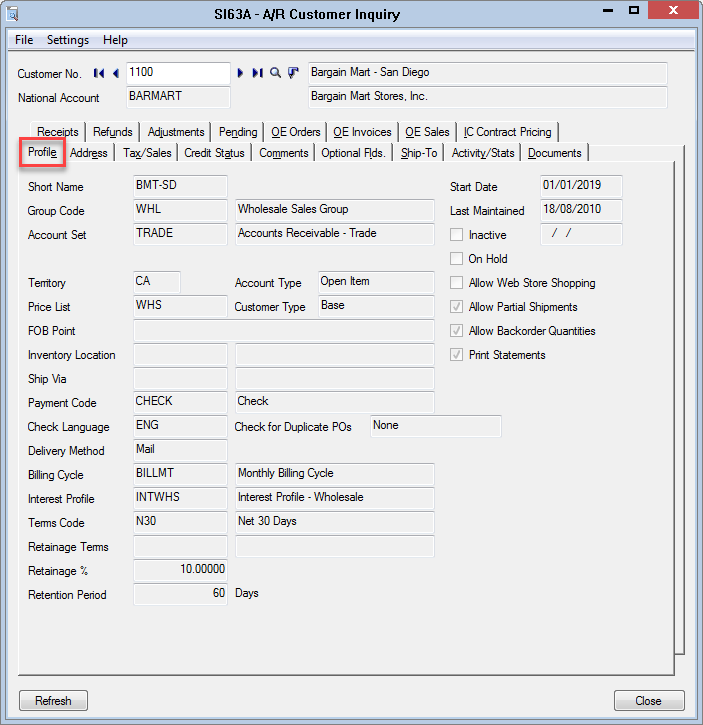
The A/R Customer Activity window will be displayed.
Profile tab
On the Profile tab you will notice important Customer information such as Group Code, Account Set, Price List.
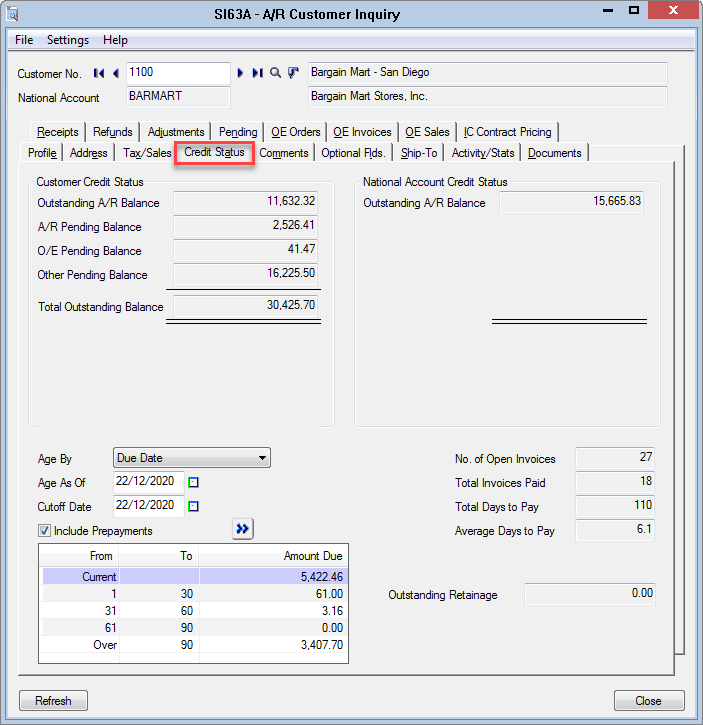
Credit Status tab
The Credit Status tab shows aging details from A/R as well as Pending balances.
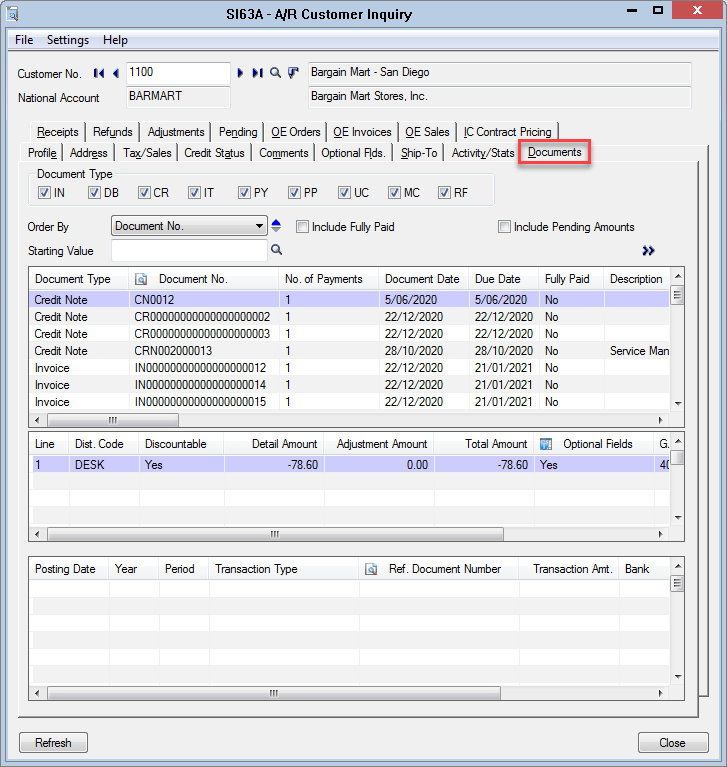
Documents tab
The Documents tab shows transaction details from A/R.
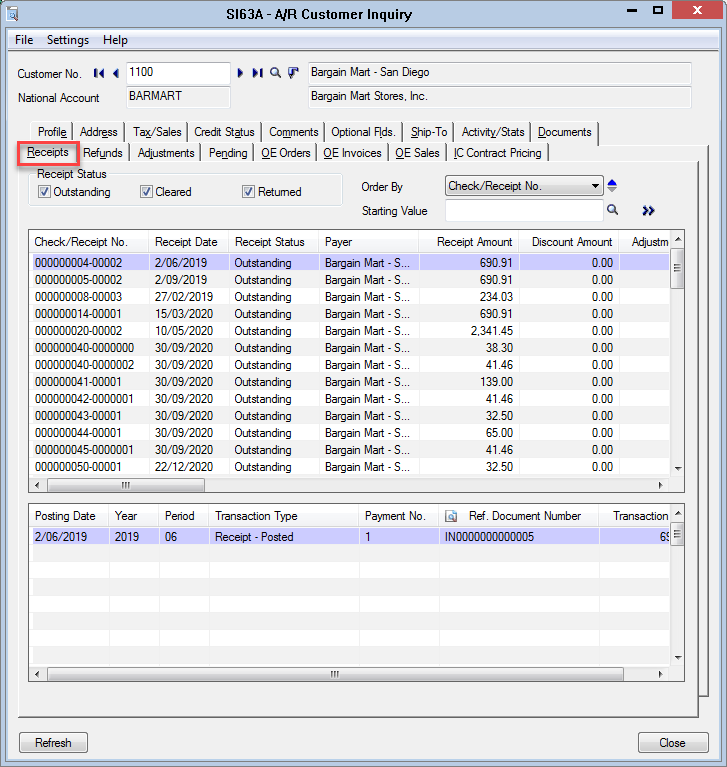
Receipts tab
The Receipts tab shows receipt details from A/R.
View Postings/Credit
The View Postings/Credit option will show the number of posted items in brackets to the right of the option.

The Posting Inquiry window will be displayed showing posted item information.
Select Invoices, Credit Notes or Cost Only from the drop-down list.
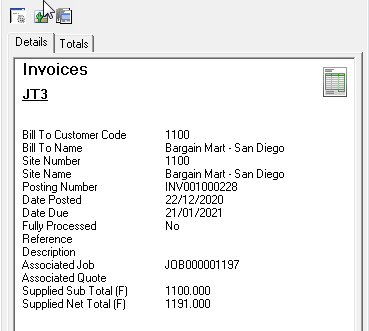
Type or select the posted document number, e.g., INV001000228
Click Go ![]() . The posted document will be displayed in a tree structure similar to the Document tree in Document Entry.
. The posted document will be displayed in a tree structure similar to the Document tree in Document Entry.

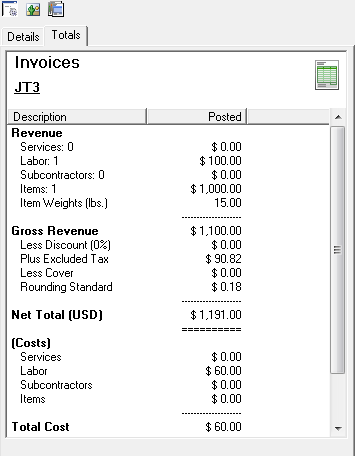
Select Details or Totals in the right hand pane.
Details
Totals
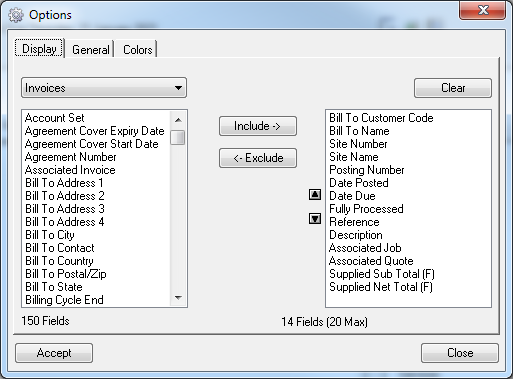
Posting Inquiry Options
You can Include, Exclude or change the order of fields displayed in the Details pane.
Select Transaction » Options.
The Options window will be displayed.
View G/L Transactions
View GL Transactions is available generally in Document Entry for WIP and non WIP jobs and displays all posted GL entries to date on the job.
This option is available from the Header and Detail tree nodes only.
Right click the Header or Detail line and select View G/L Transactions.
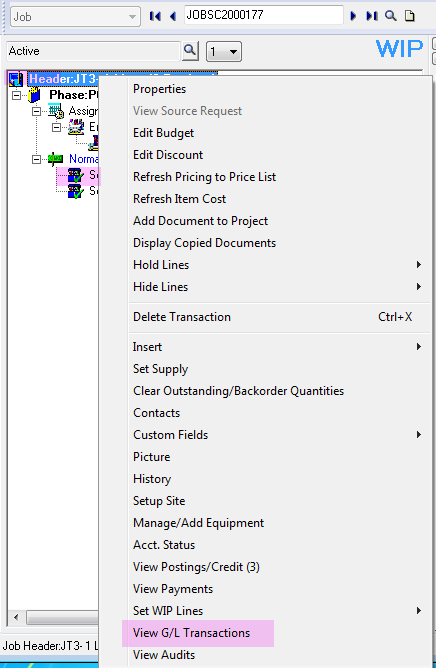
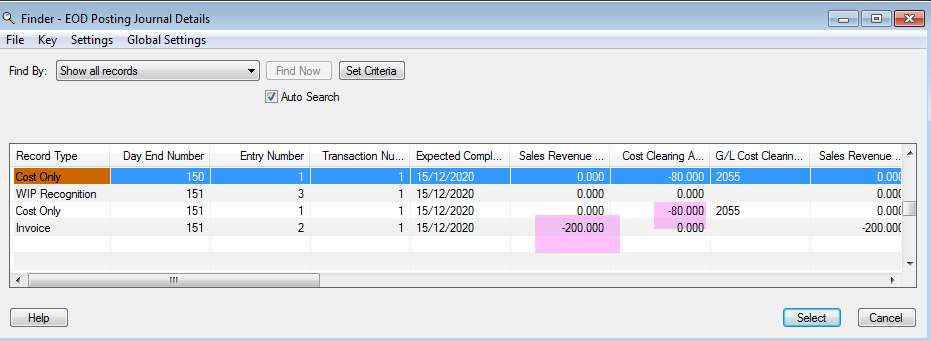
Transaction detail for all posted lines will display in a pop up form.
This information is derived from the Day End posting journals.
It is not recommended the Day End posting journals be purged or this information will be lost.
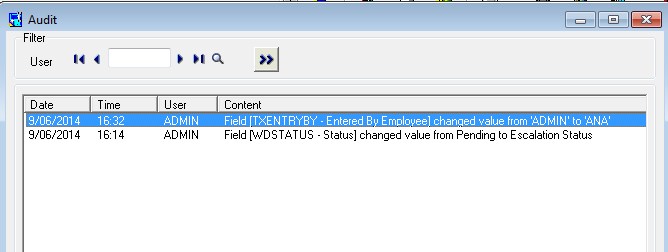
View Audits
View Audits in Document Entry
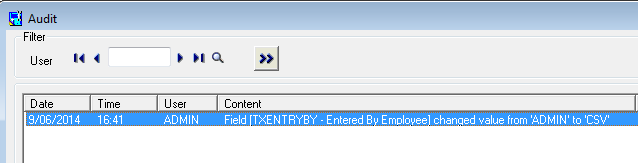
To view changes audited open Document Entry and right click on any tree node and select “View Audits”.
Note a change was made to Entered By Employee and the job Status.
View Audits in Return Authorizations
A field can be selected from the Returns table to be tracked for audit purposes.
To view an audit for a Return Authorization (RA), select the RA and choose Tools, View Audits from the top menu.
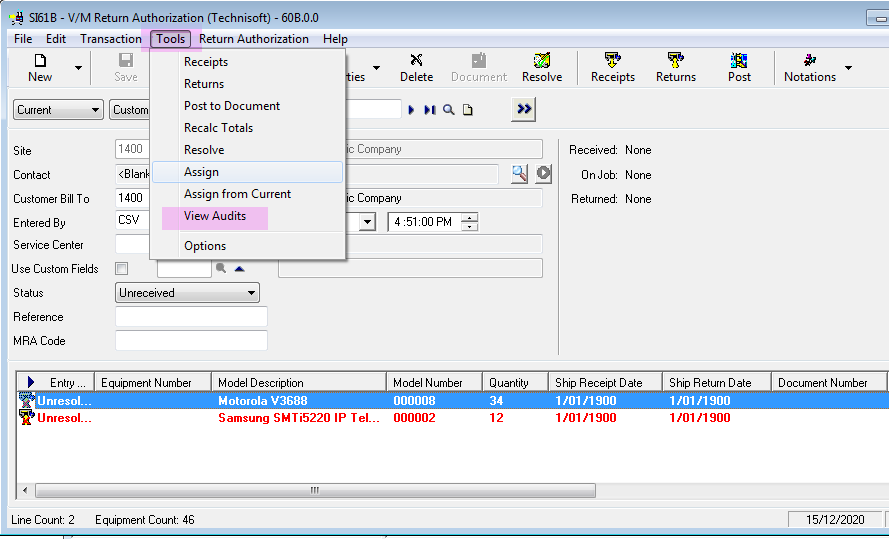
In the example below Entered By Employee is being audited for changes.