Document Entry Window

Contents

The Document Entry window consists of a number of distinct functional areas. The main areas of the Document Entry window are outlined below:
Menu bar
![]()
Toolbar
![]()
Refer Toolbar Icons.
Fast Icons
![]()
Refer Fast Icons.
Service Center

If you are using the Service Manager Service Center Add-On, then this drop-down list can be used to specify the Service Center for which the Document is to be created. For existing Documents, the Service Center of the active document will be displayed.
Refer to the Creating a Job including Service Center information section in the Service Manager Service Center Add-On User Guide for additional information.
Document Identification and Navigation
![]()
The Document Type and Document Number of the current Document is shown.
Navigate through Document records of the current Document Type using the navigational arrows or keyboard arrow keys.
Create a new Document of the current Document Type using New ![]() and Go
and Go ![]() .
.
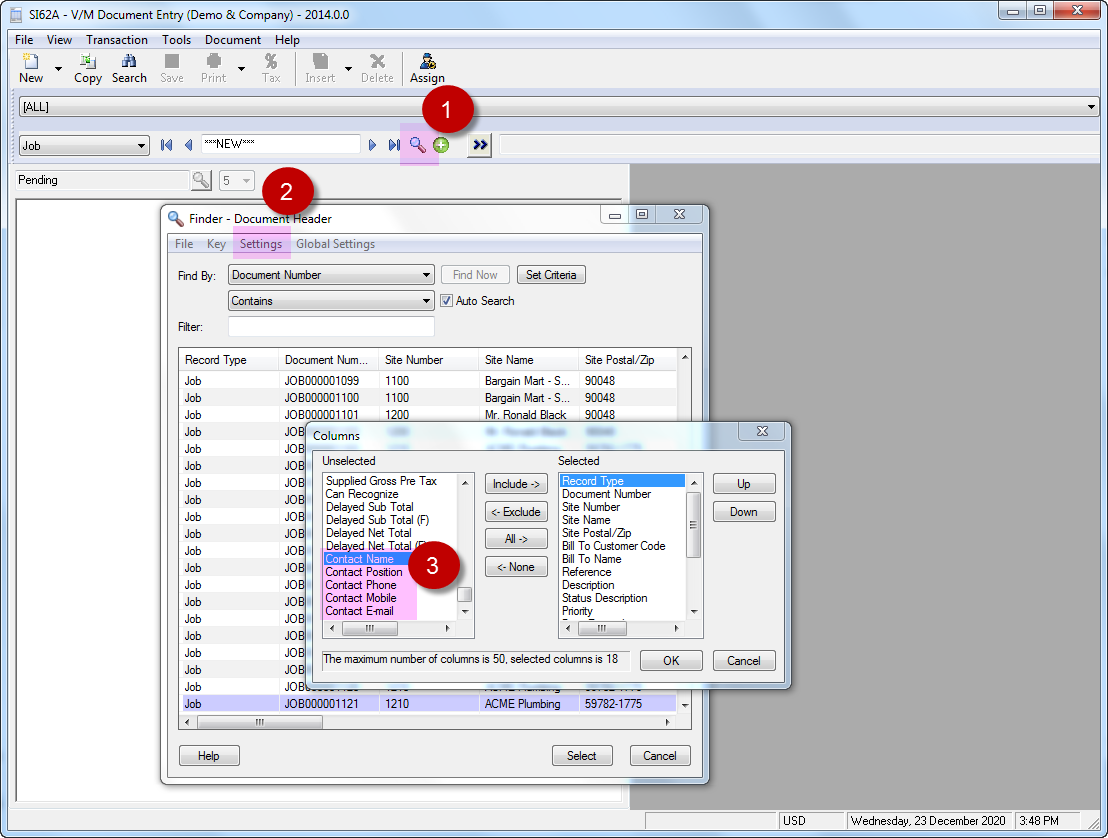
Search for a Document using the Finder![]() .
.
Note:
The "Find By" Fields and Columns displaying can be adjusted by selecting Settings > Columns from the Finder Menu.
To select a field click on it and press the "Include" button to add it. Use the Up/Down buttons to set the column order.
Site Identification
![]()
Document Status and Priority
![]()
Refer Document Status and Priority.
Document Tree
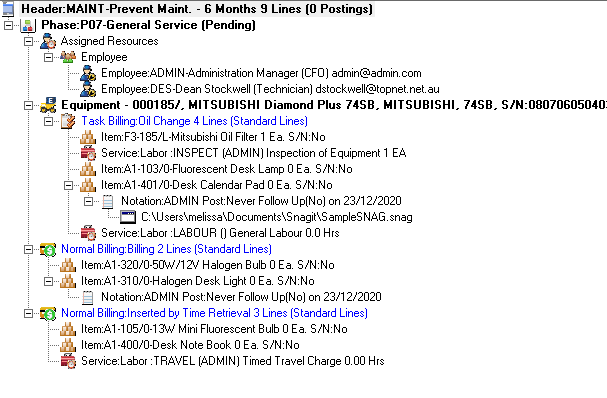
The Document Tree is a hierarchical structure of nodes, the highest level of which is the Document Header.
Refer
Details Pane
The Details pane provides information in a number of tabs.
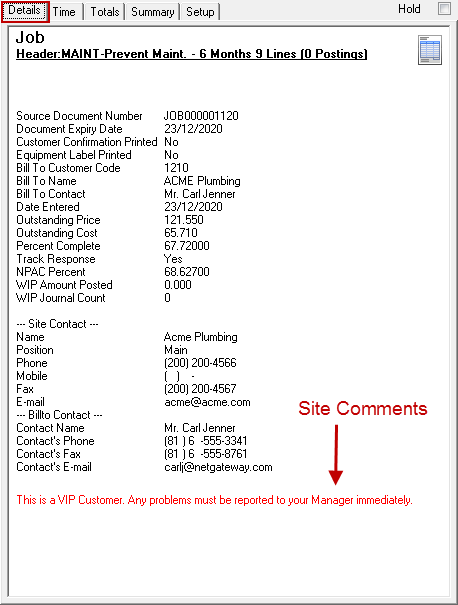
Details tab
The Details tab shows information for the currently selected node.
Time tab
The Time tab shows Response Details and Time Entries. This tab will only show if Response is enabled for the Job, i.e., the Track Response check box is ticked in the Setup tab.
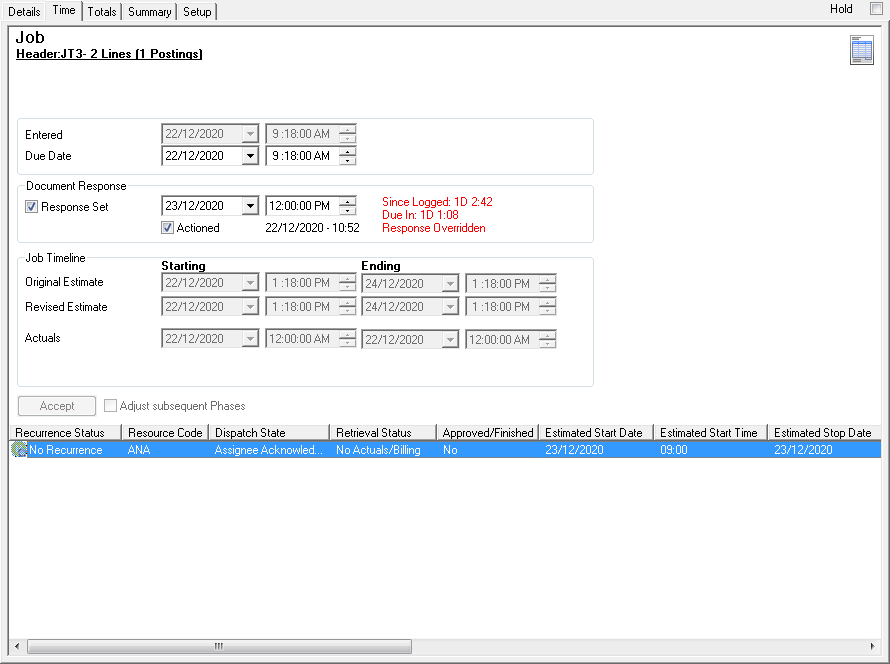
Document Response can track values based on the Response Times set at either the Document, Site, Equipment, Symptoms or Agreement Plan Level.
Upon opening the Job a pop up can be displayed if a Response is due in less than 2 days. This setting can be found in the Document's Tools > Options menu.
Document Responses are marked as Actioned once a Time Entry is inserted into the Document or can be manually marked as Actioned.
Totals tab
The Totals tab shows Revenue, Payments, Costs and Profitability. Revenue and Costs are broken down by Services, Labor, Subcontractors and Items. Totals will show for the currently selected node, if applicable.
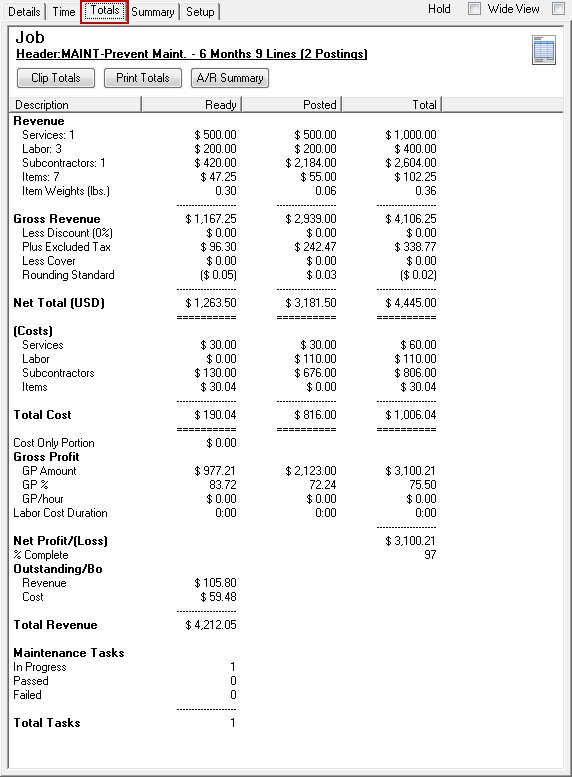
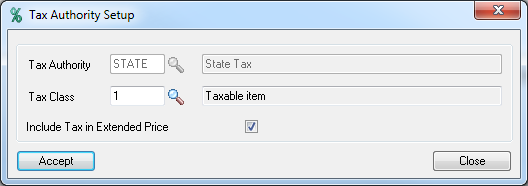
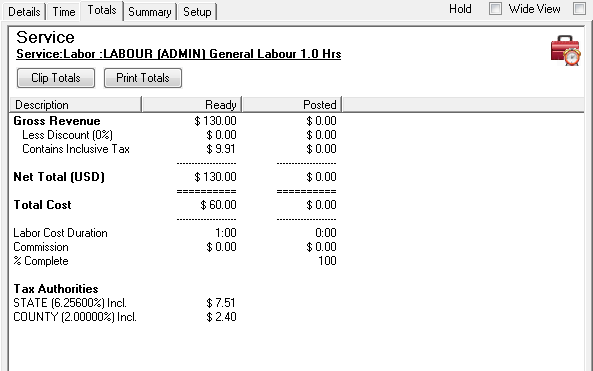
If the Tax Authority Setup has the Include Tax in Extended Price checkbox ticked then the Totals tab will support Inclusive tax totals for Service and Item Lines, billing groups, phases and document totals including Gross Profit. This includes both functional and source currency values.
Summary tab
The Summary tab provides a Document-level executive summary. You can view either Current or Original Estimates.

Note:
If you double-click a line in the Summary tab, all matching lines in the Document tree will be highlighted. An example is shown below.

It is possible to place all highlighted lines on Hold. To do this, right-click on any line in the Document tree that a Hold can apply to and then select Hold Lines » Hold Highlighted Lines.
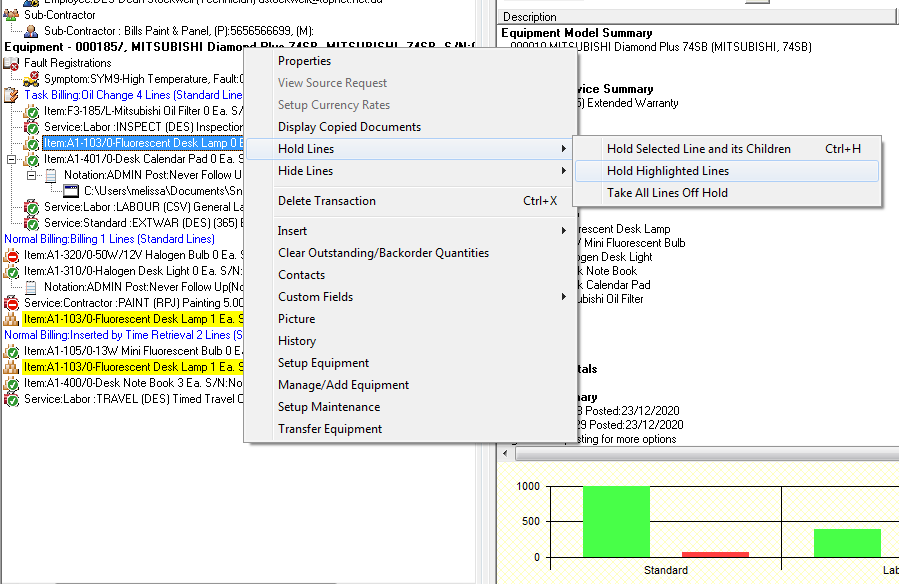
Related Topics
Job Phase Functions » Hold Lines
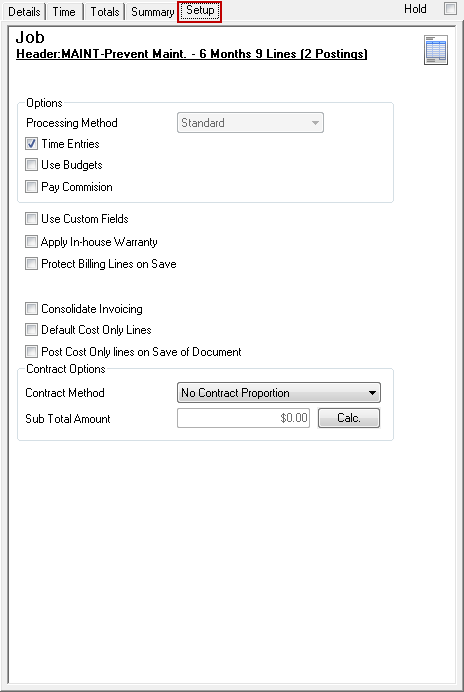
Setup tab
The Setup tab is where you set up Document-wide Options, Processing Method, etc.
Recurring Job tab
The Recurring Job tab is where Posting Schedules and Schedule Activation settings for Recurring Jobs is maintained. For more information refer to Recurring Jobs.
Price Escalation tab
The Price Escalation tab is where escalation settings are maintained for Recurring Jobs, Site Agreements and Meter Agreements. For more information refer to Price Escalation